
此页面会告诉你如何成为验证者,或运行Basechain节点。 目前, 这仅适用于我们的测试网。 请填写这份 表单来成为验证者。
Purpose
This page walks you through the steps necessary to become a validator.
Setting Things Up
First things first. To become a validator, you need a pair of private and public keys. Basically, there are two scenarios:
1. You already set up your node and have a key pair
Get your key pair from the chaindata/config/priv_validator.json file. You can open the file in your favorite editor or run cat chaindata/config/priv_validator.json:
{
  "address": "2B13CEF5253D12045F05D99AAE1C6D2A809B95F3",
  "pub_key": {
    "type": "tendermint/PubKeyEd25519",
    "value": "GmsHqkOb3S1L4K6ADCJFr7ROJ6clfqnly55vuPCDuWw="
  },
  "last_height": "50",
  "last_round": "0",
  "last_step": 3,
  "last_signature": "CEPtnowjQFiCErQxqBJVWquEW3ODJL48YfY1d9KjEXiCiu8bmLmf5VECmOOQD3p7fumS7APxkMqUfCT+YqqhDg==",
  "last_signbytes": "6B0802113200000000000000220B08A6E8A7EC0510A8C1D42A2A480A2026ECBA6AB3721E5479D29237D4BBE2851EB4B5F580453048549E146E5BC9F5A212240A202D0F81B4495A49578C0E34205A9C51AECDC4A4562677044A415189DA30BB7F5C1001320764656661756C74",
  "priv_key": {
    "type": "tendermint/PrivKeyEd25519",
    "value": "B1H76JYdX5kZxmpuHVKrSmcI59NNLuNpZimQgkCB9pIaaweqQ5vdLUvgroAMIkWvtE4npyV+qeXLnm+48IO5bA=="
  }
}
Note that your public key is stored under pub_key -> value and your private key under priv_key -> value.
2. You didn't set up a node and you don't have a key pair
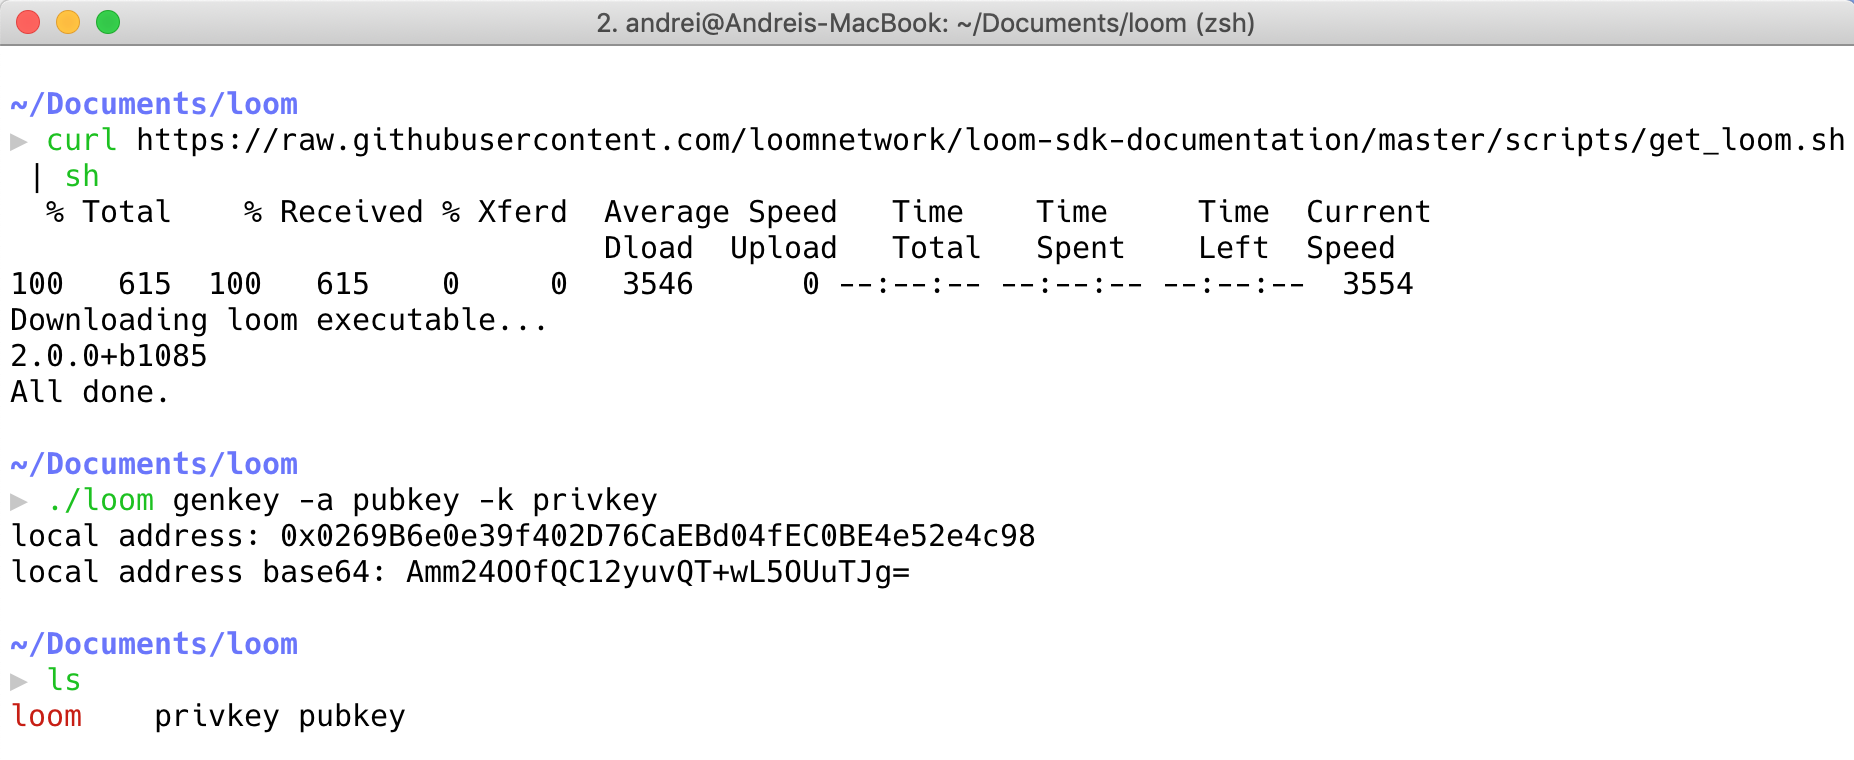
- Download the latest stable version of Loom. Fire up a terminal and run the following command:
curl https://raw.githubusercontent.com/loomnetwork/loom-sdk-documentation/master/scripts/get_loom.sh | sh
- Then, you can create a public-private key pair like this:
./loom genkey -a pubkey -k privkey
This will save your private key into a file called privkey and your public key into a file called pubkey:
- Next, let's compute your address by deriving it from the public key:
./loom resolve pubkey <YOUR_PUBLIC_KEY>
- Update the
chaindata/config/priv_validator.jsonwith the new key pair and the address. Remove the0xthat prepends the address.
Note: To whitelist your address, you need 1.25M Loom.
Connecting to Dashboard
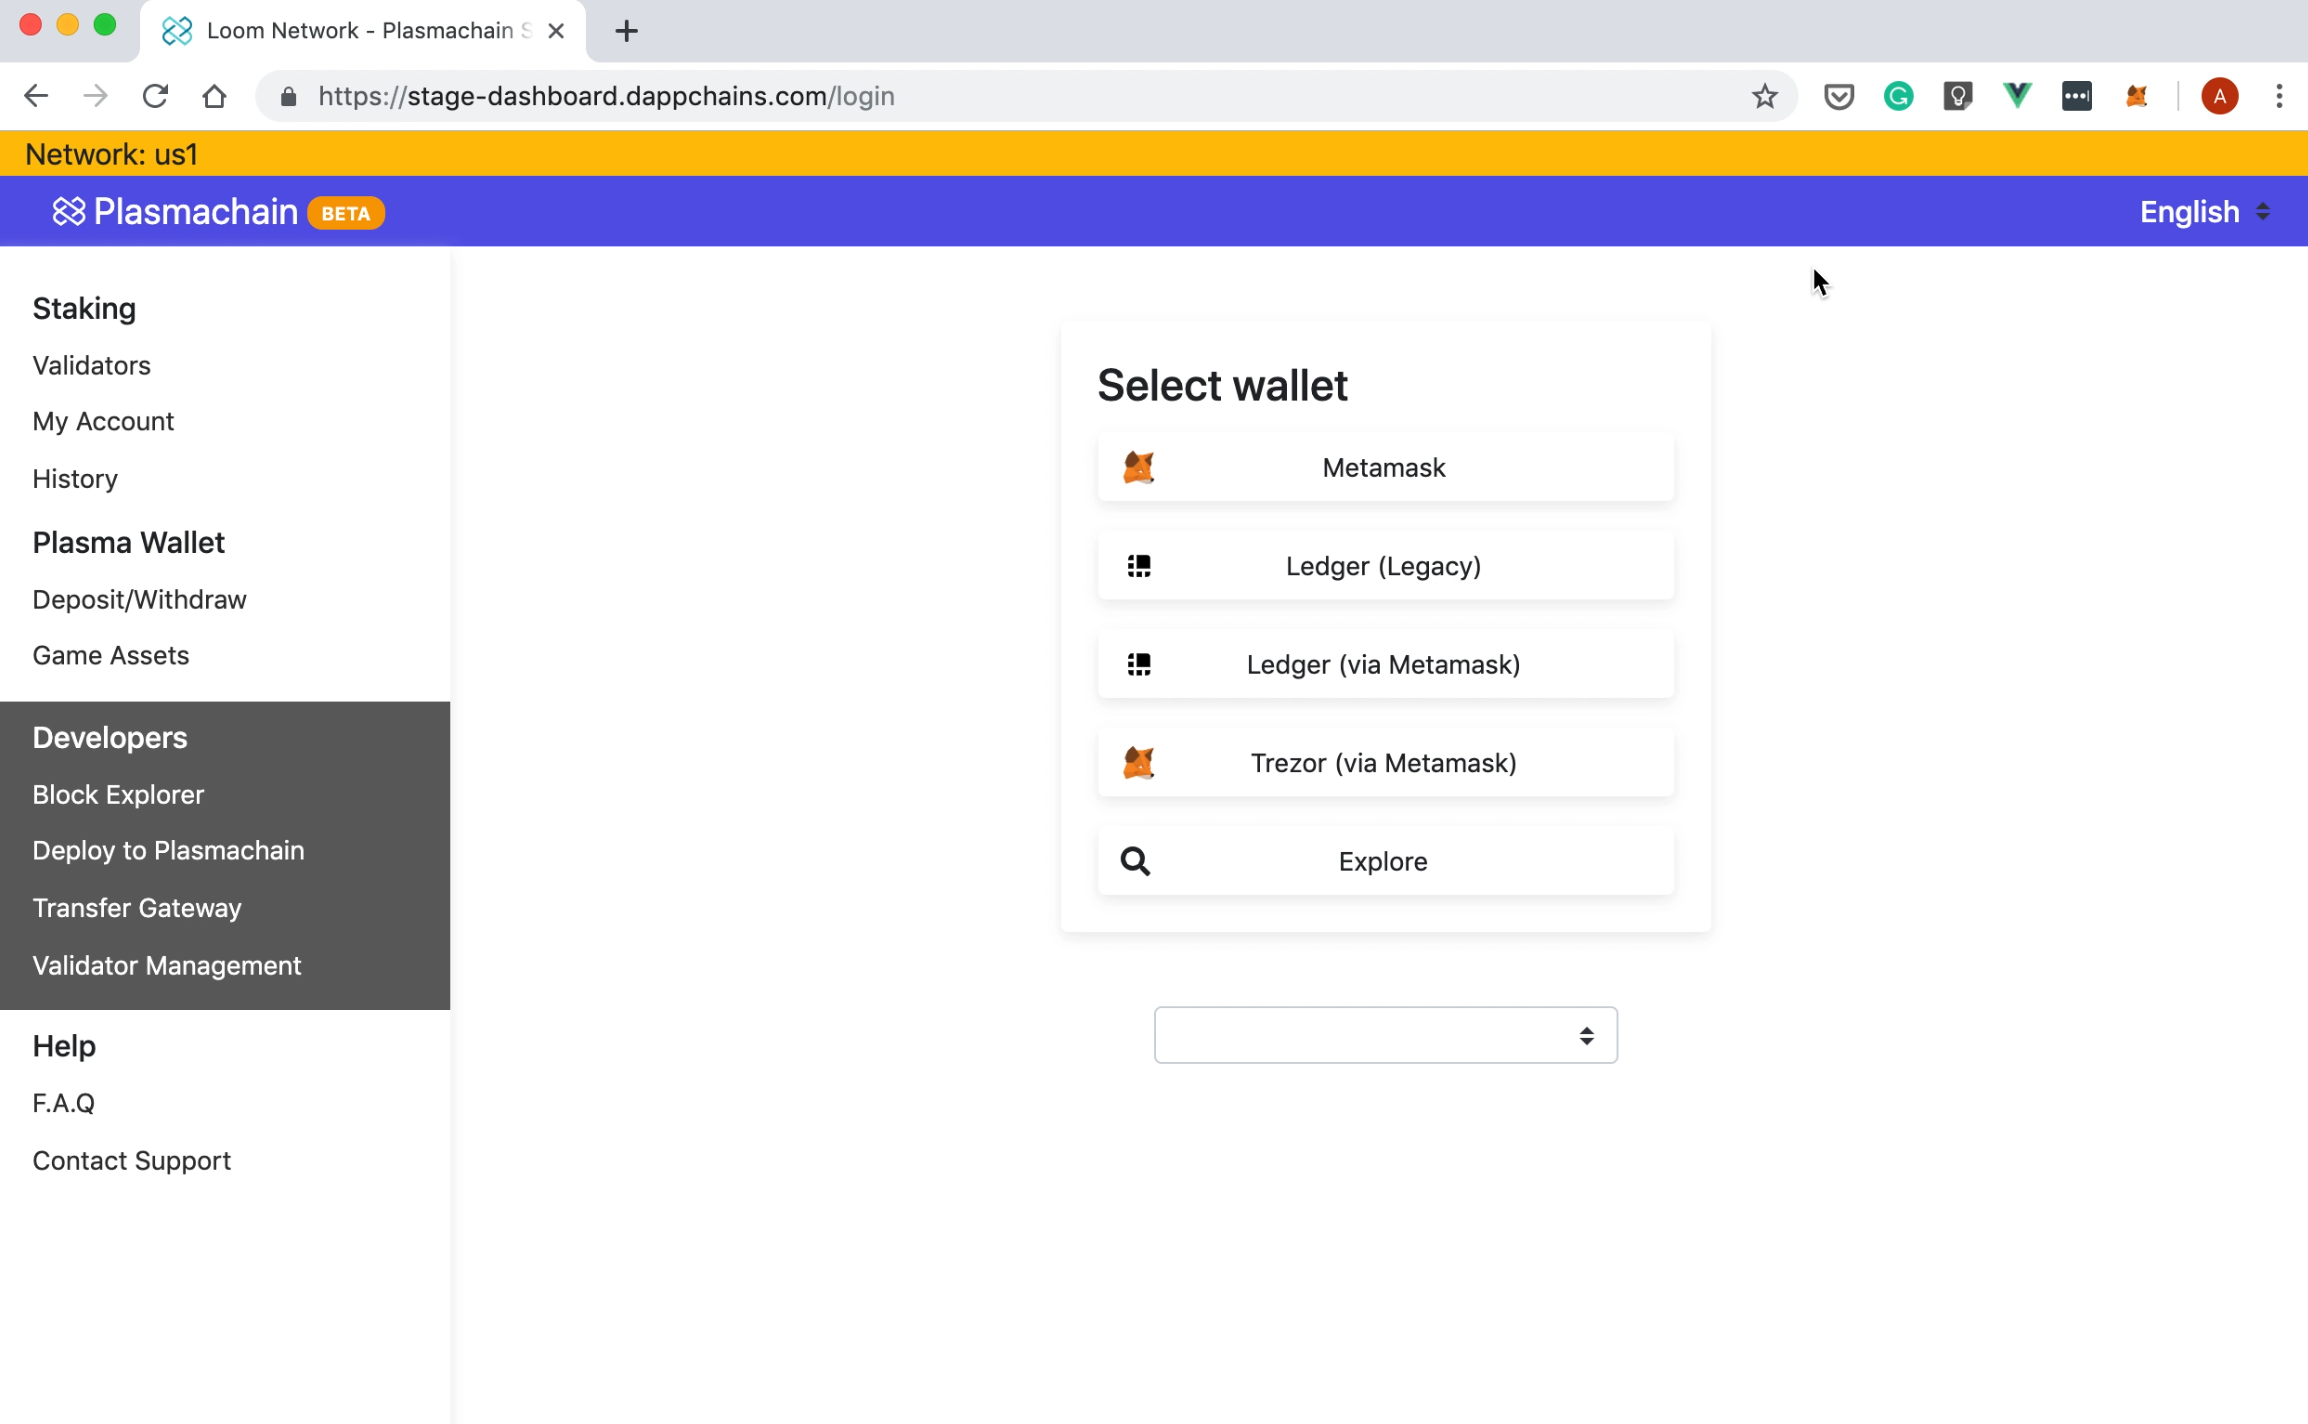
Let's head over to our validator management page. You will be asked to choose a wallet. Currently, we provide support for the following wallets:
Please note that, for the scope of this tutorial, we're using our Testnet. However, the process is similar on Loom Mainnet.
Depending on your preference, click "Metamask", "Ledger (Legacy)", "Ledger (via Metamask)"or "Trezor via Metamask".
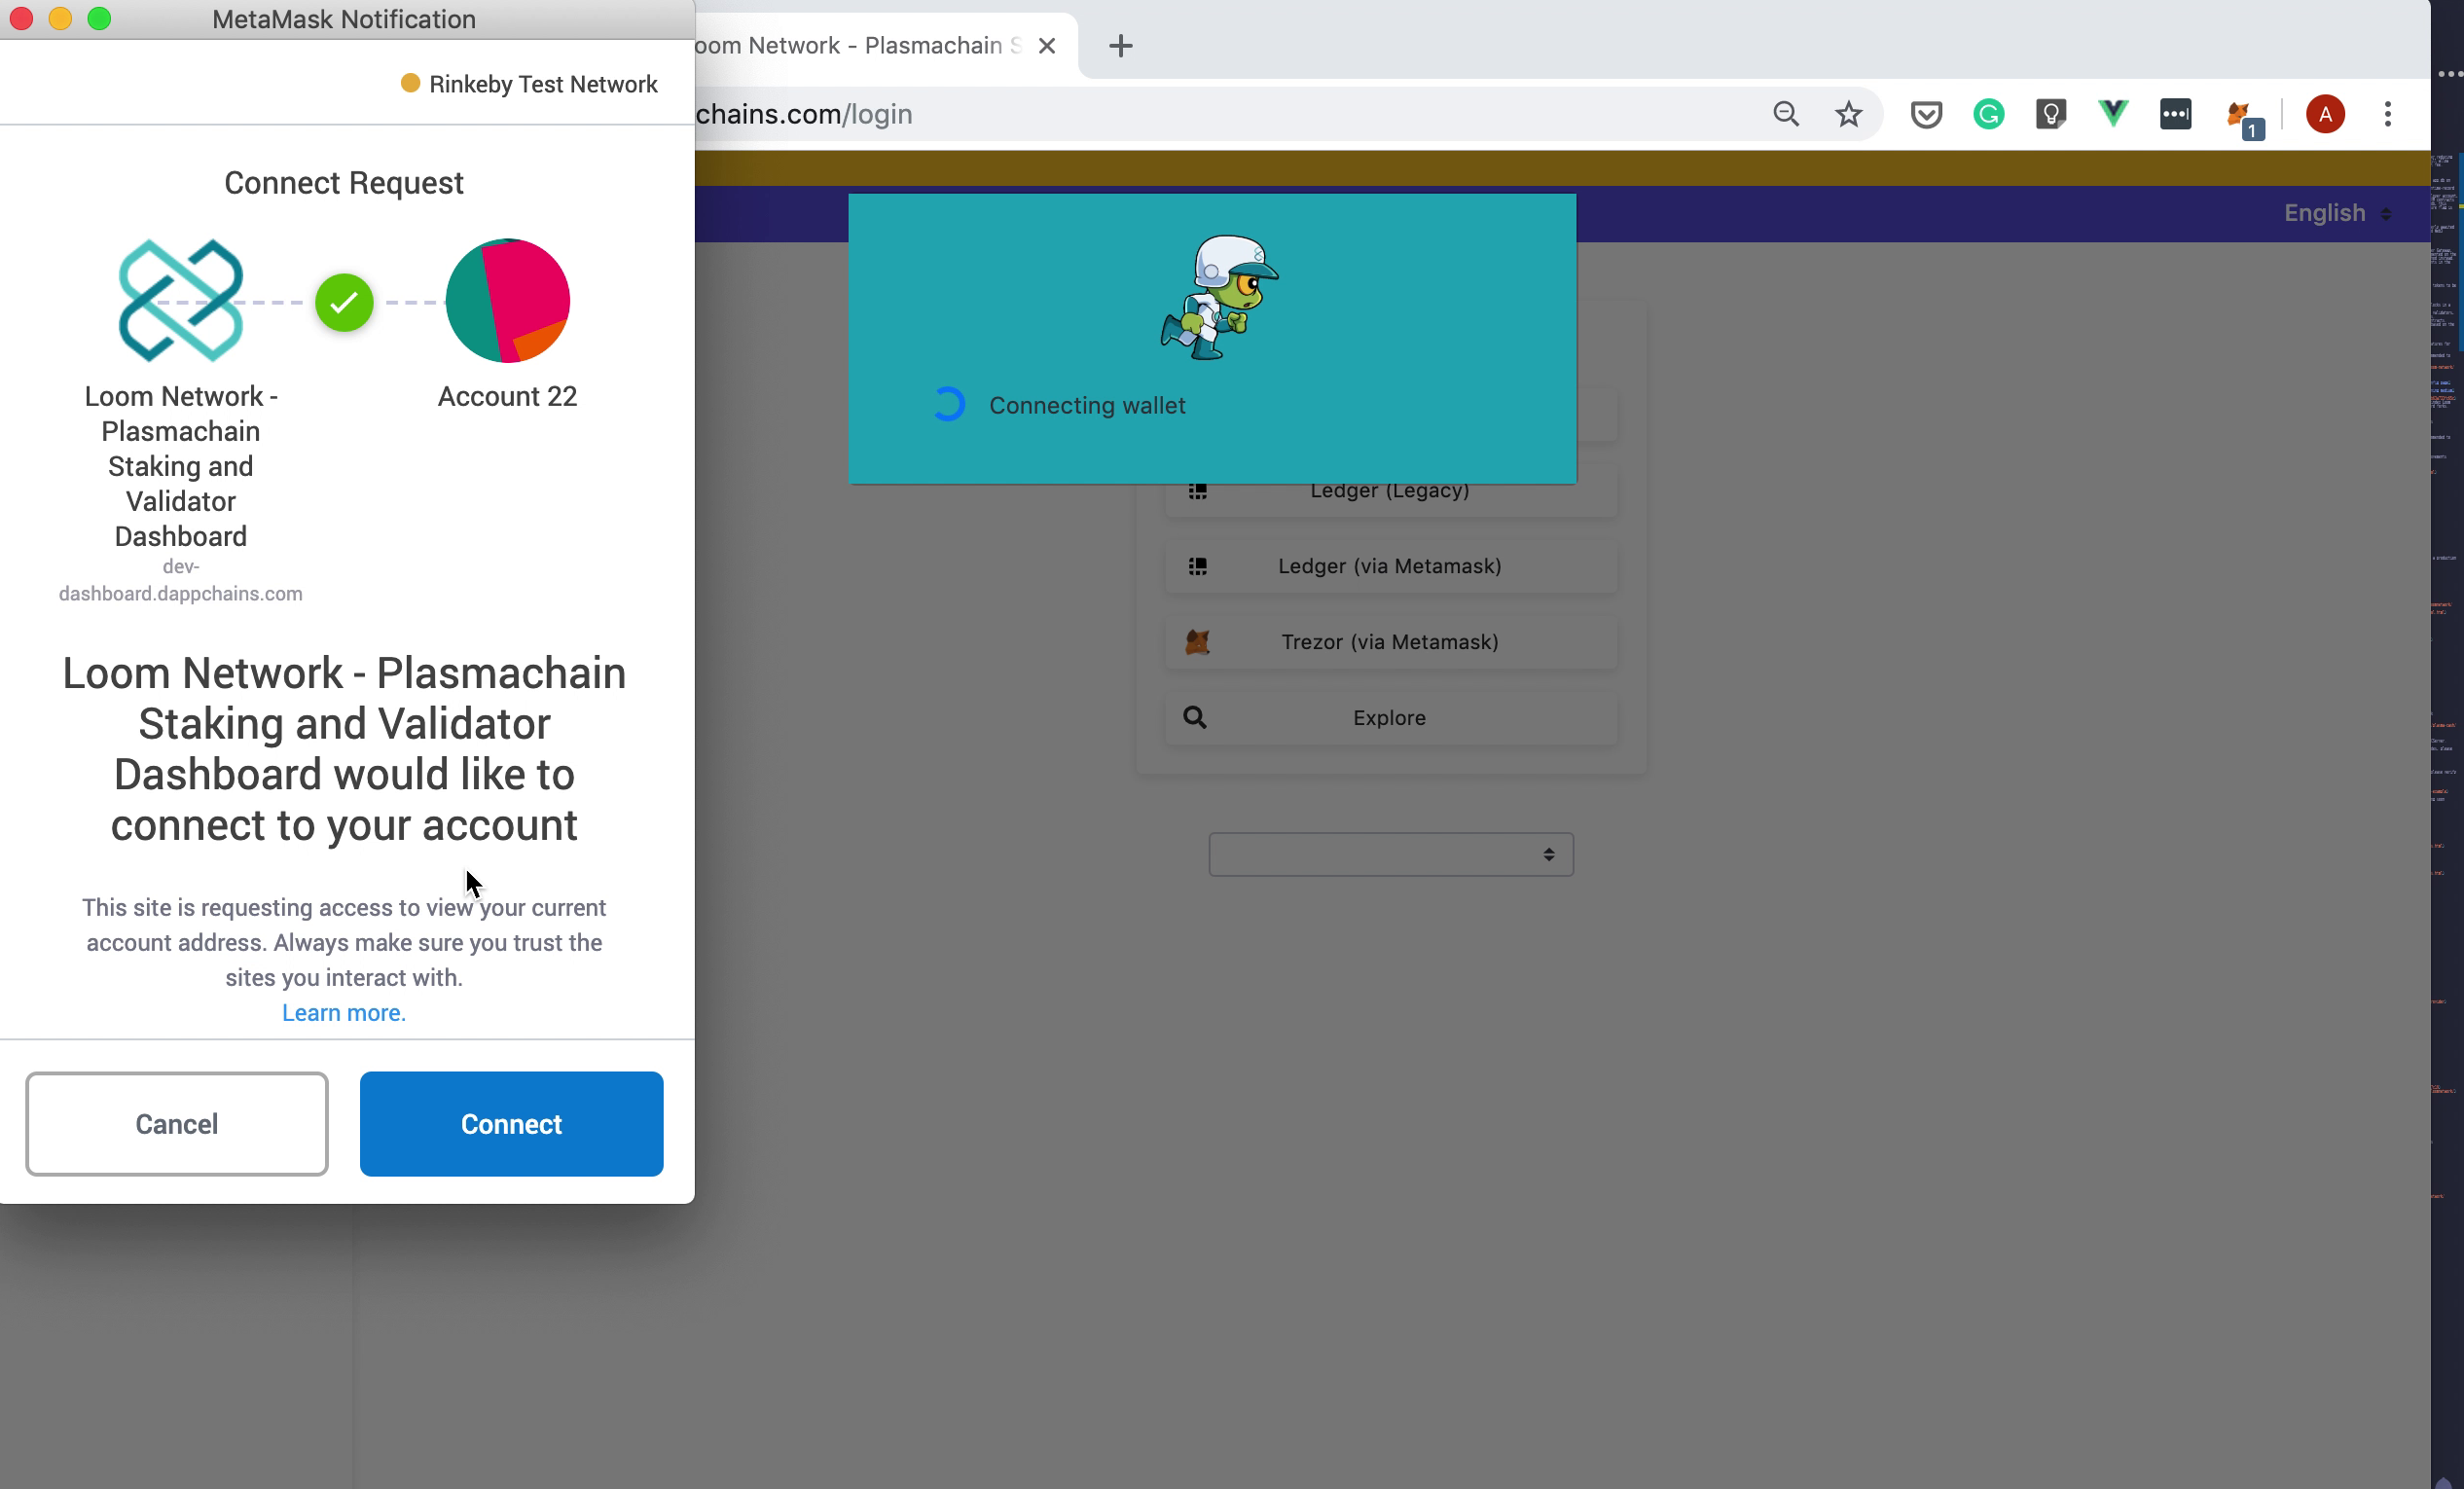
We selected MetaMask, but the process is similar if you choose a different wallet. Next, you'll see a Metamask popup like this:
Adding a Mapping to an Existing Loom Mainnet Account
Next, you'll have two options to choose from:
- Map to an existing loom account (for validators)
- Create a new account
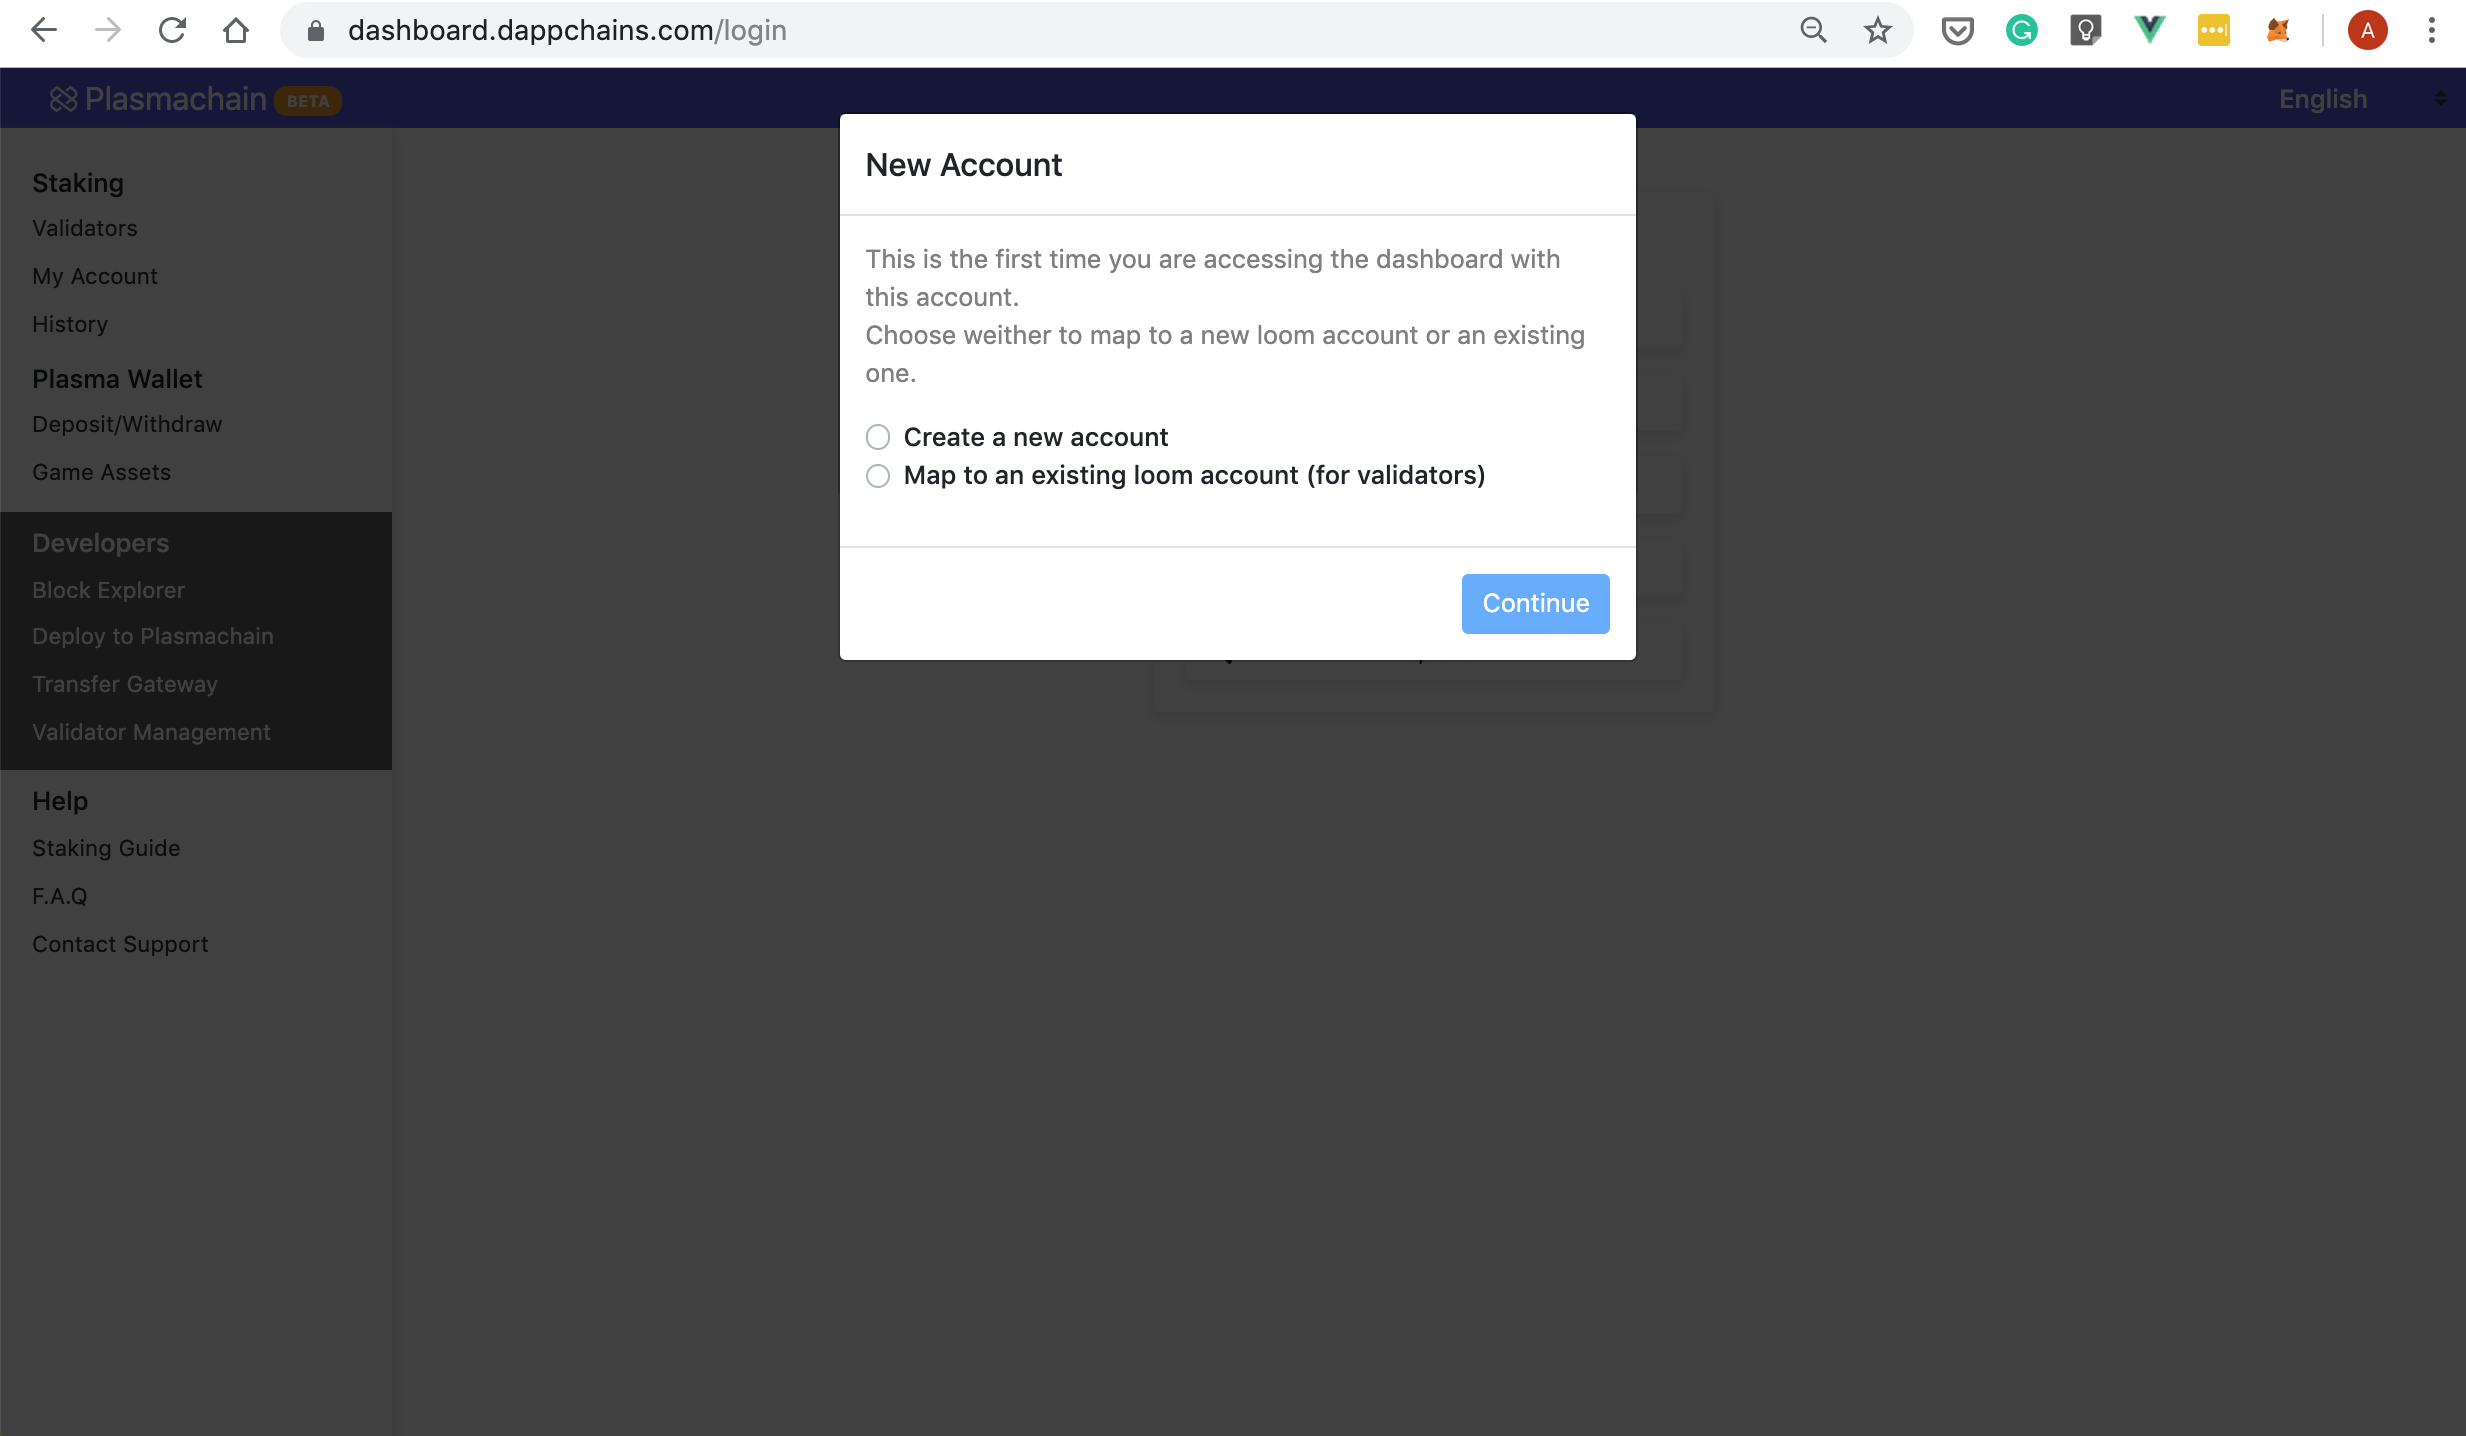
Go ahead and select "Map to an existing loom account (for validators)". At this point, the dashboard will ask you to input your Loom Mainnet private key:
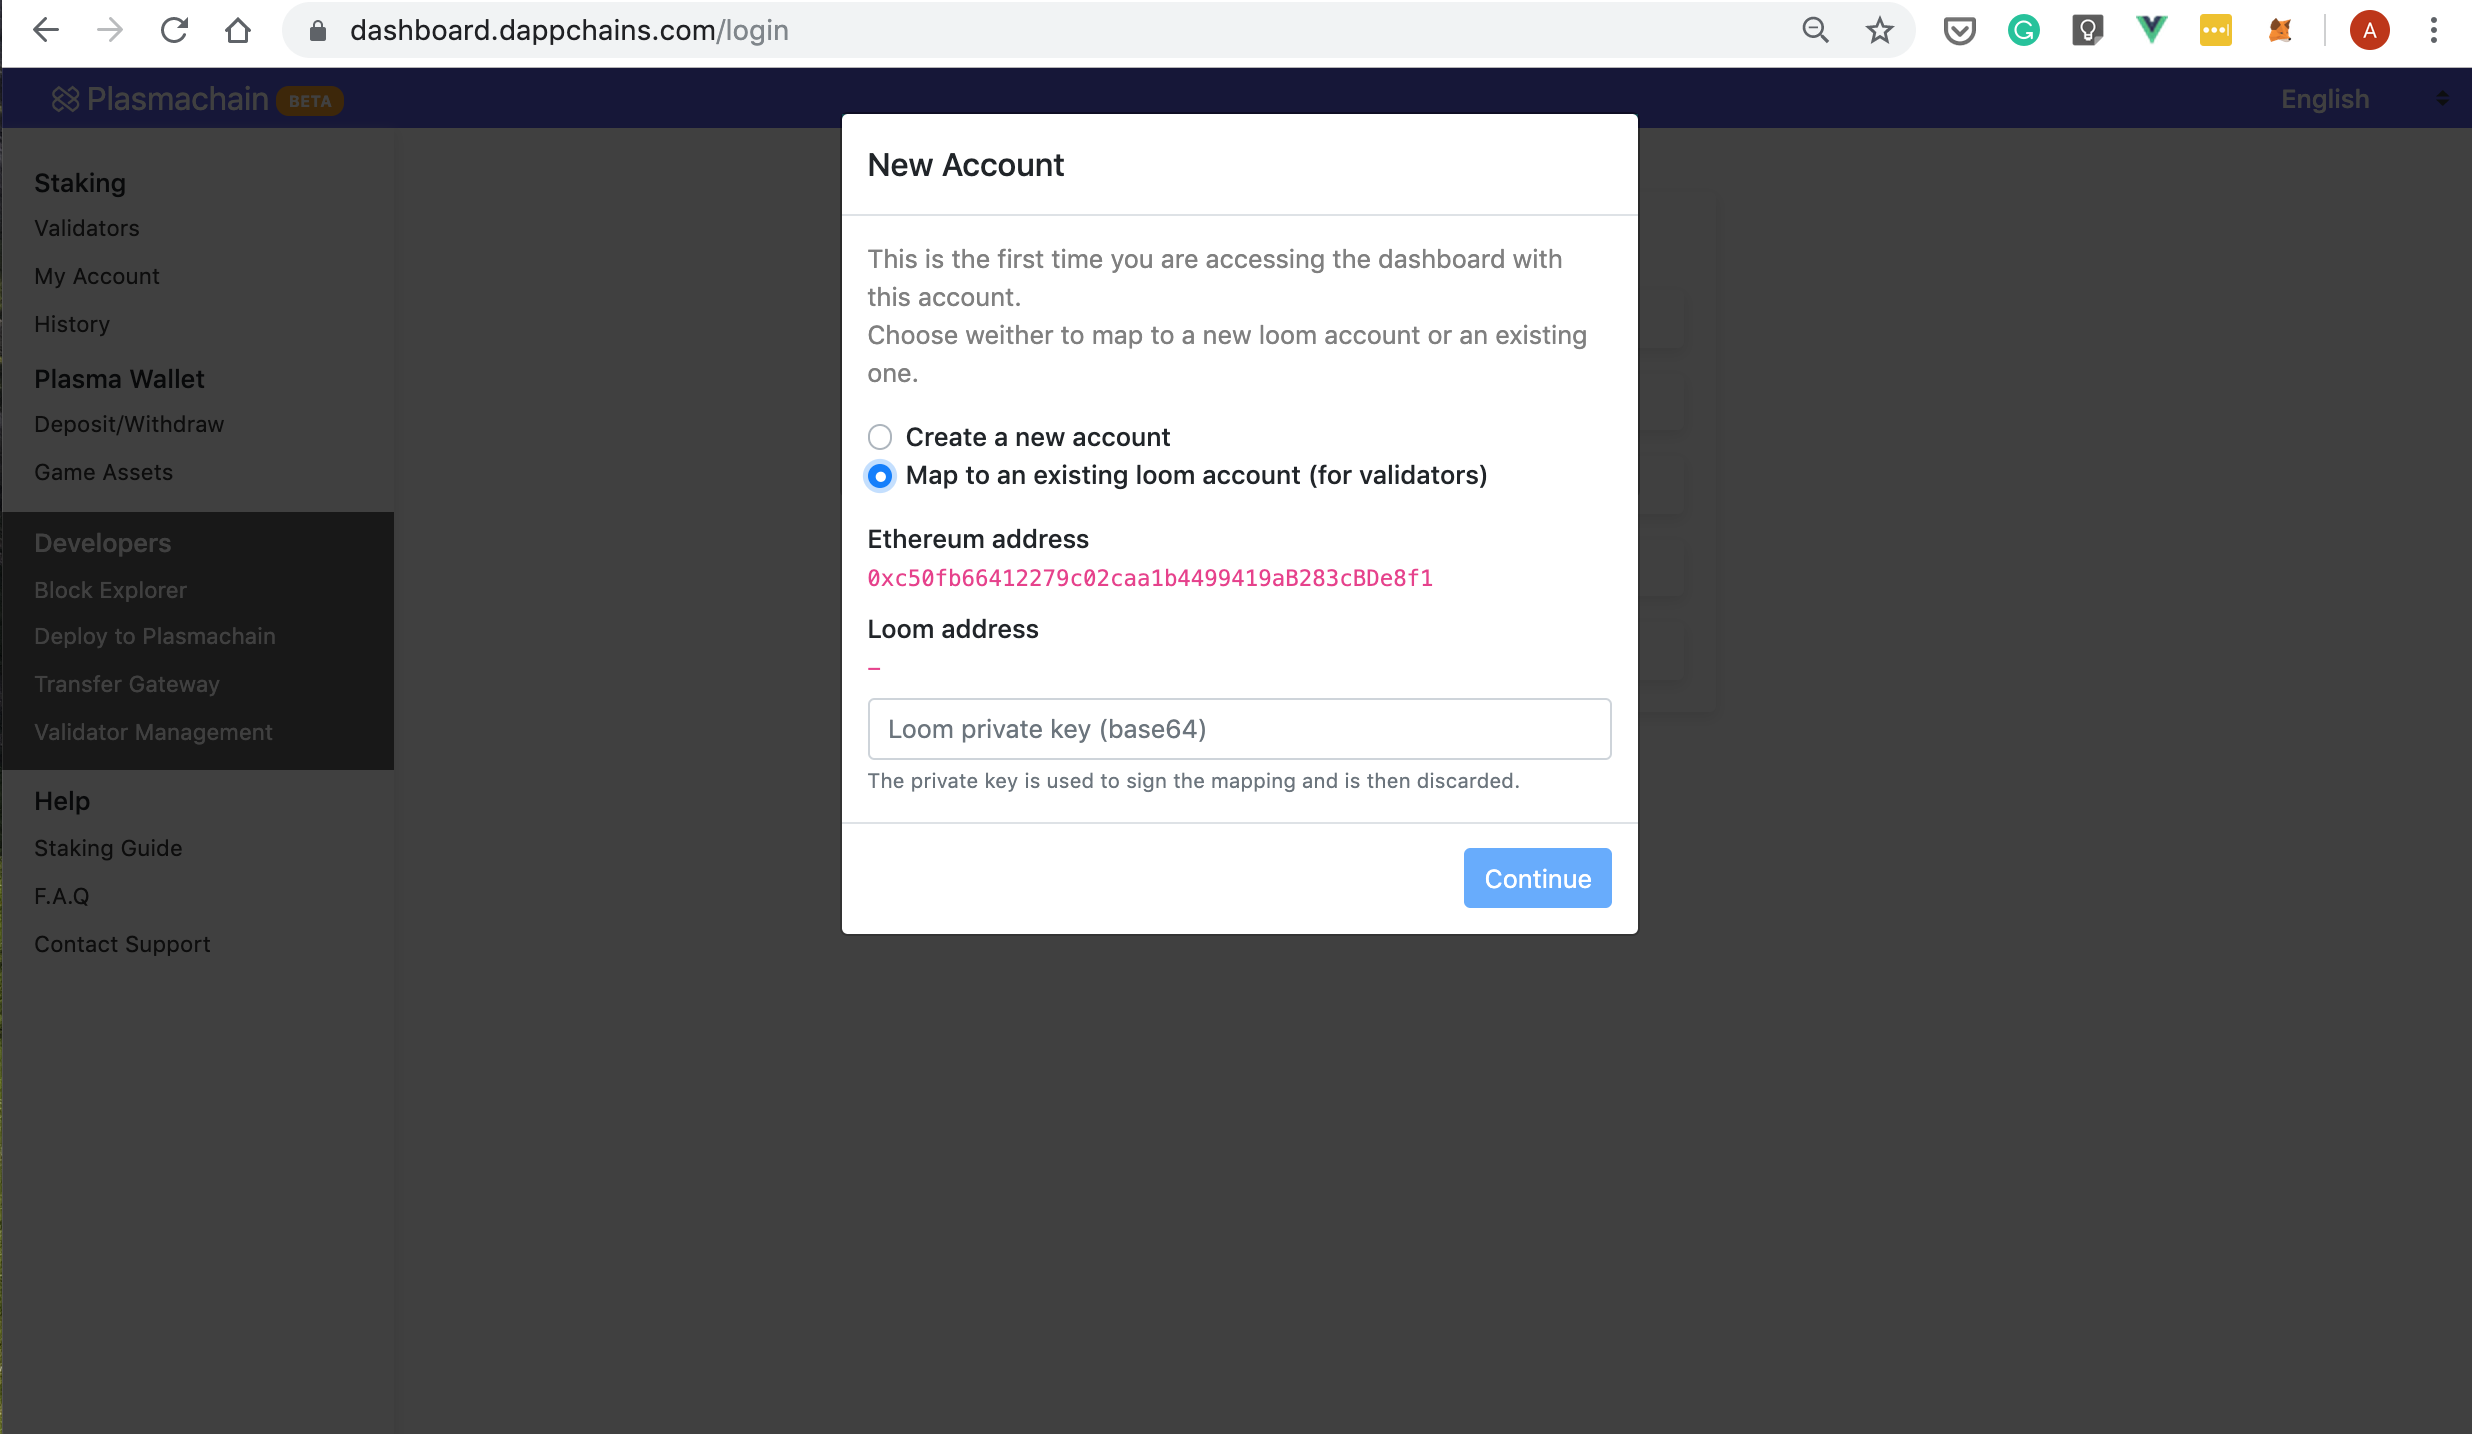
Paste your private key and then click "Continue" to move to the next step.
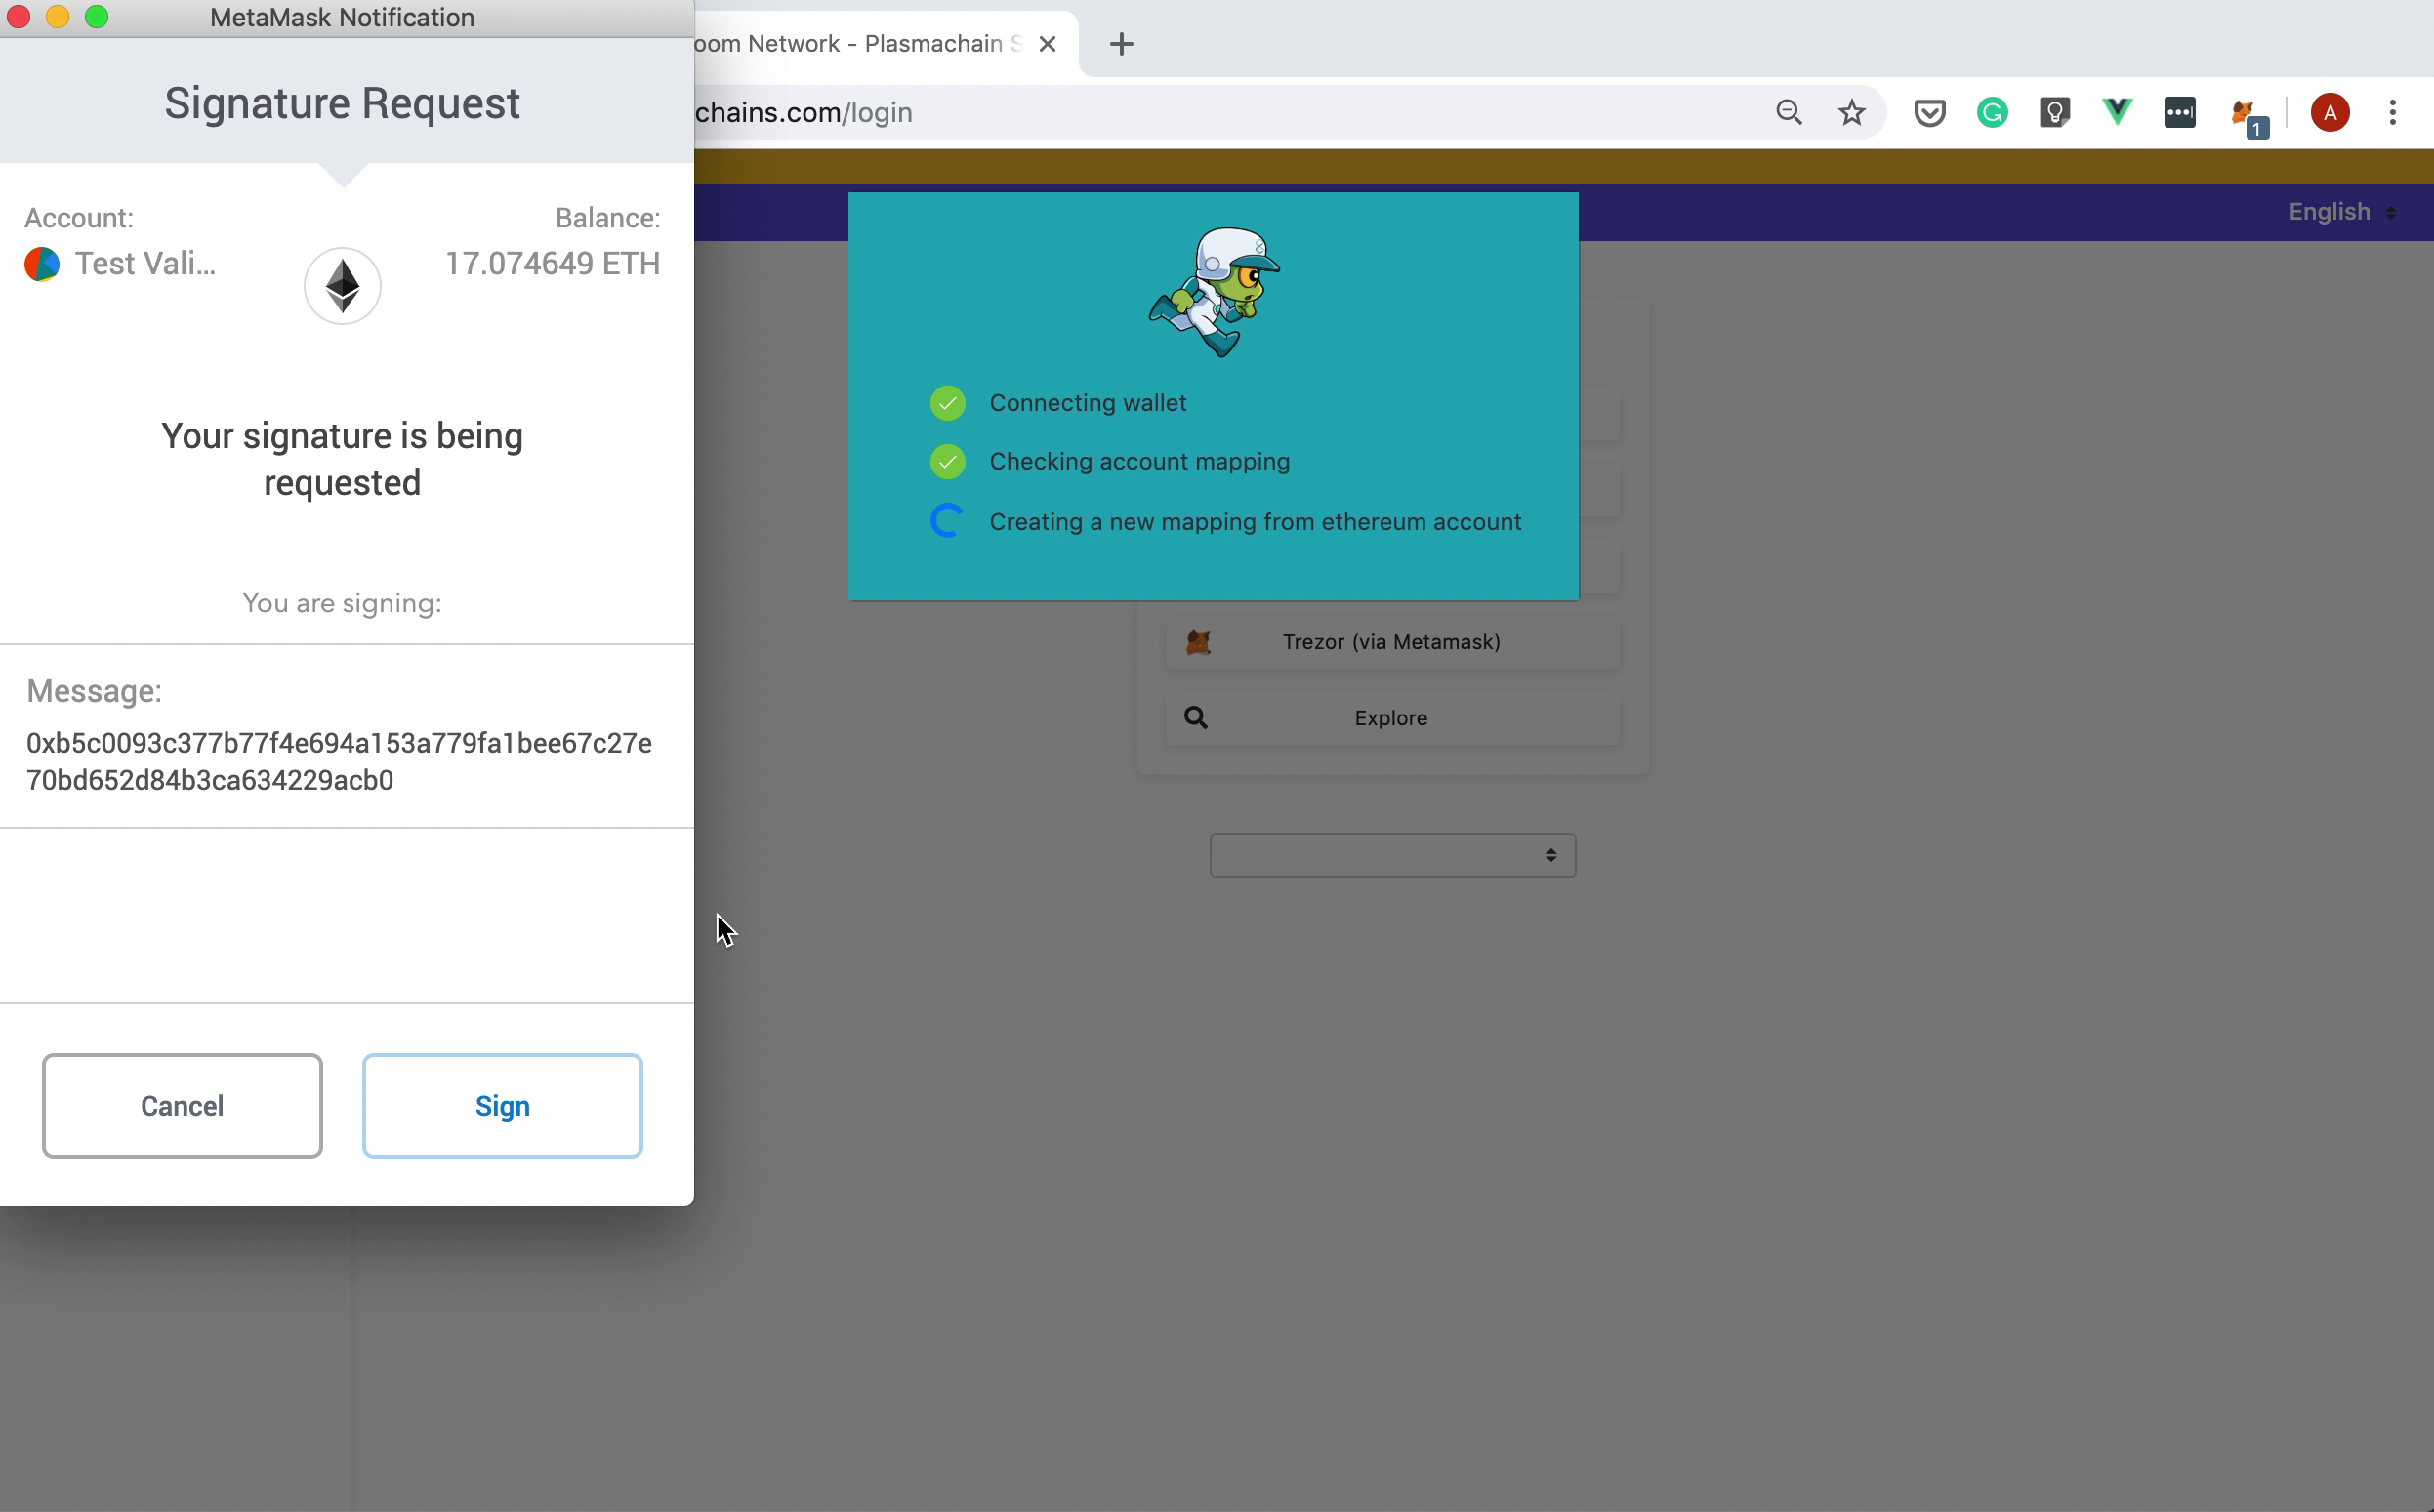
Now, the dashboard will derive the address from the private key you provided and will check if a mapping already exists for the said address. If not, it will create a new mapping. This will take a few seconds to process and you will be asked to sign a message:
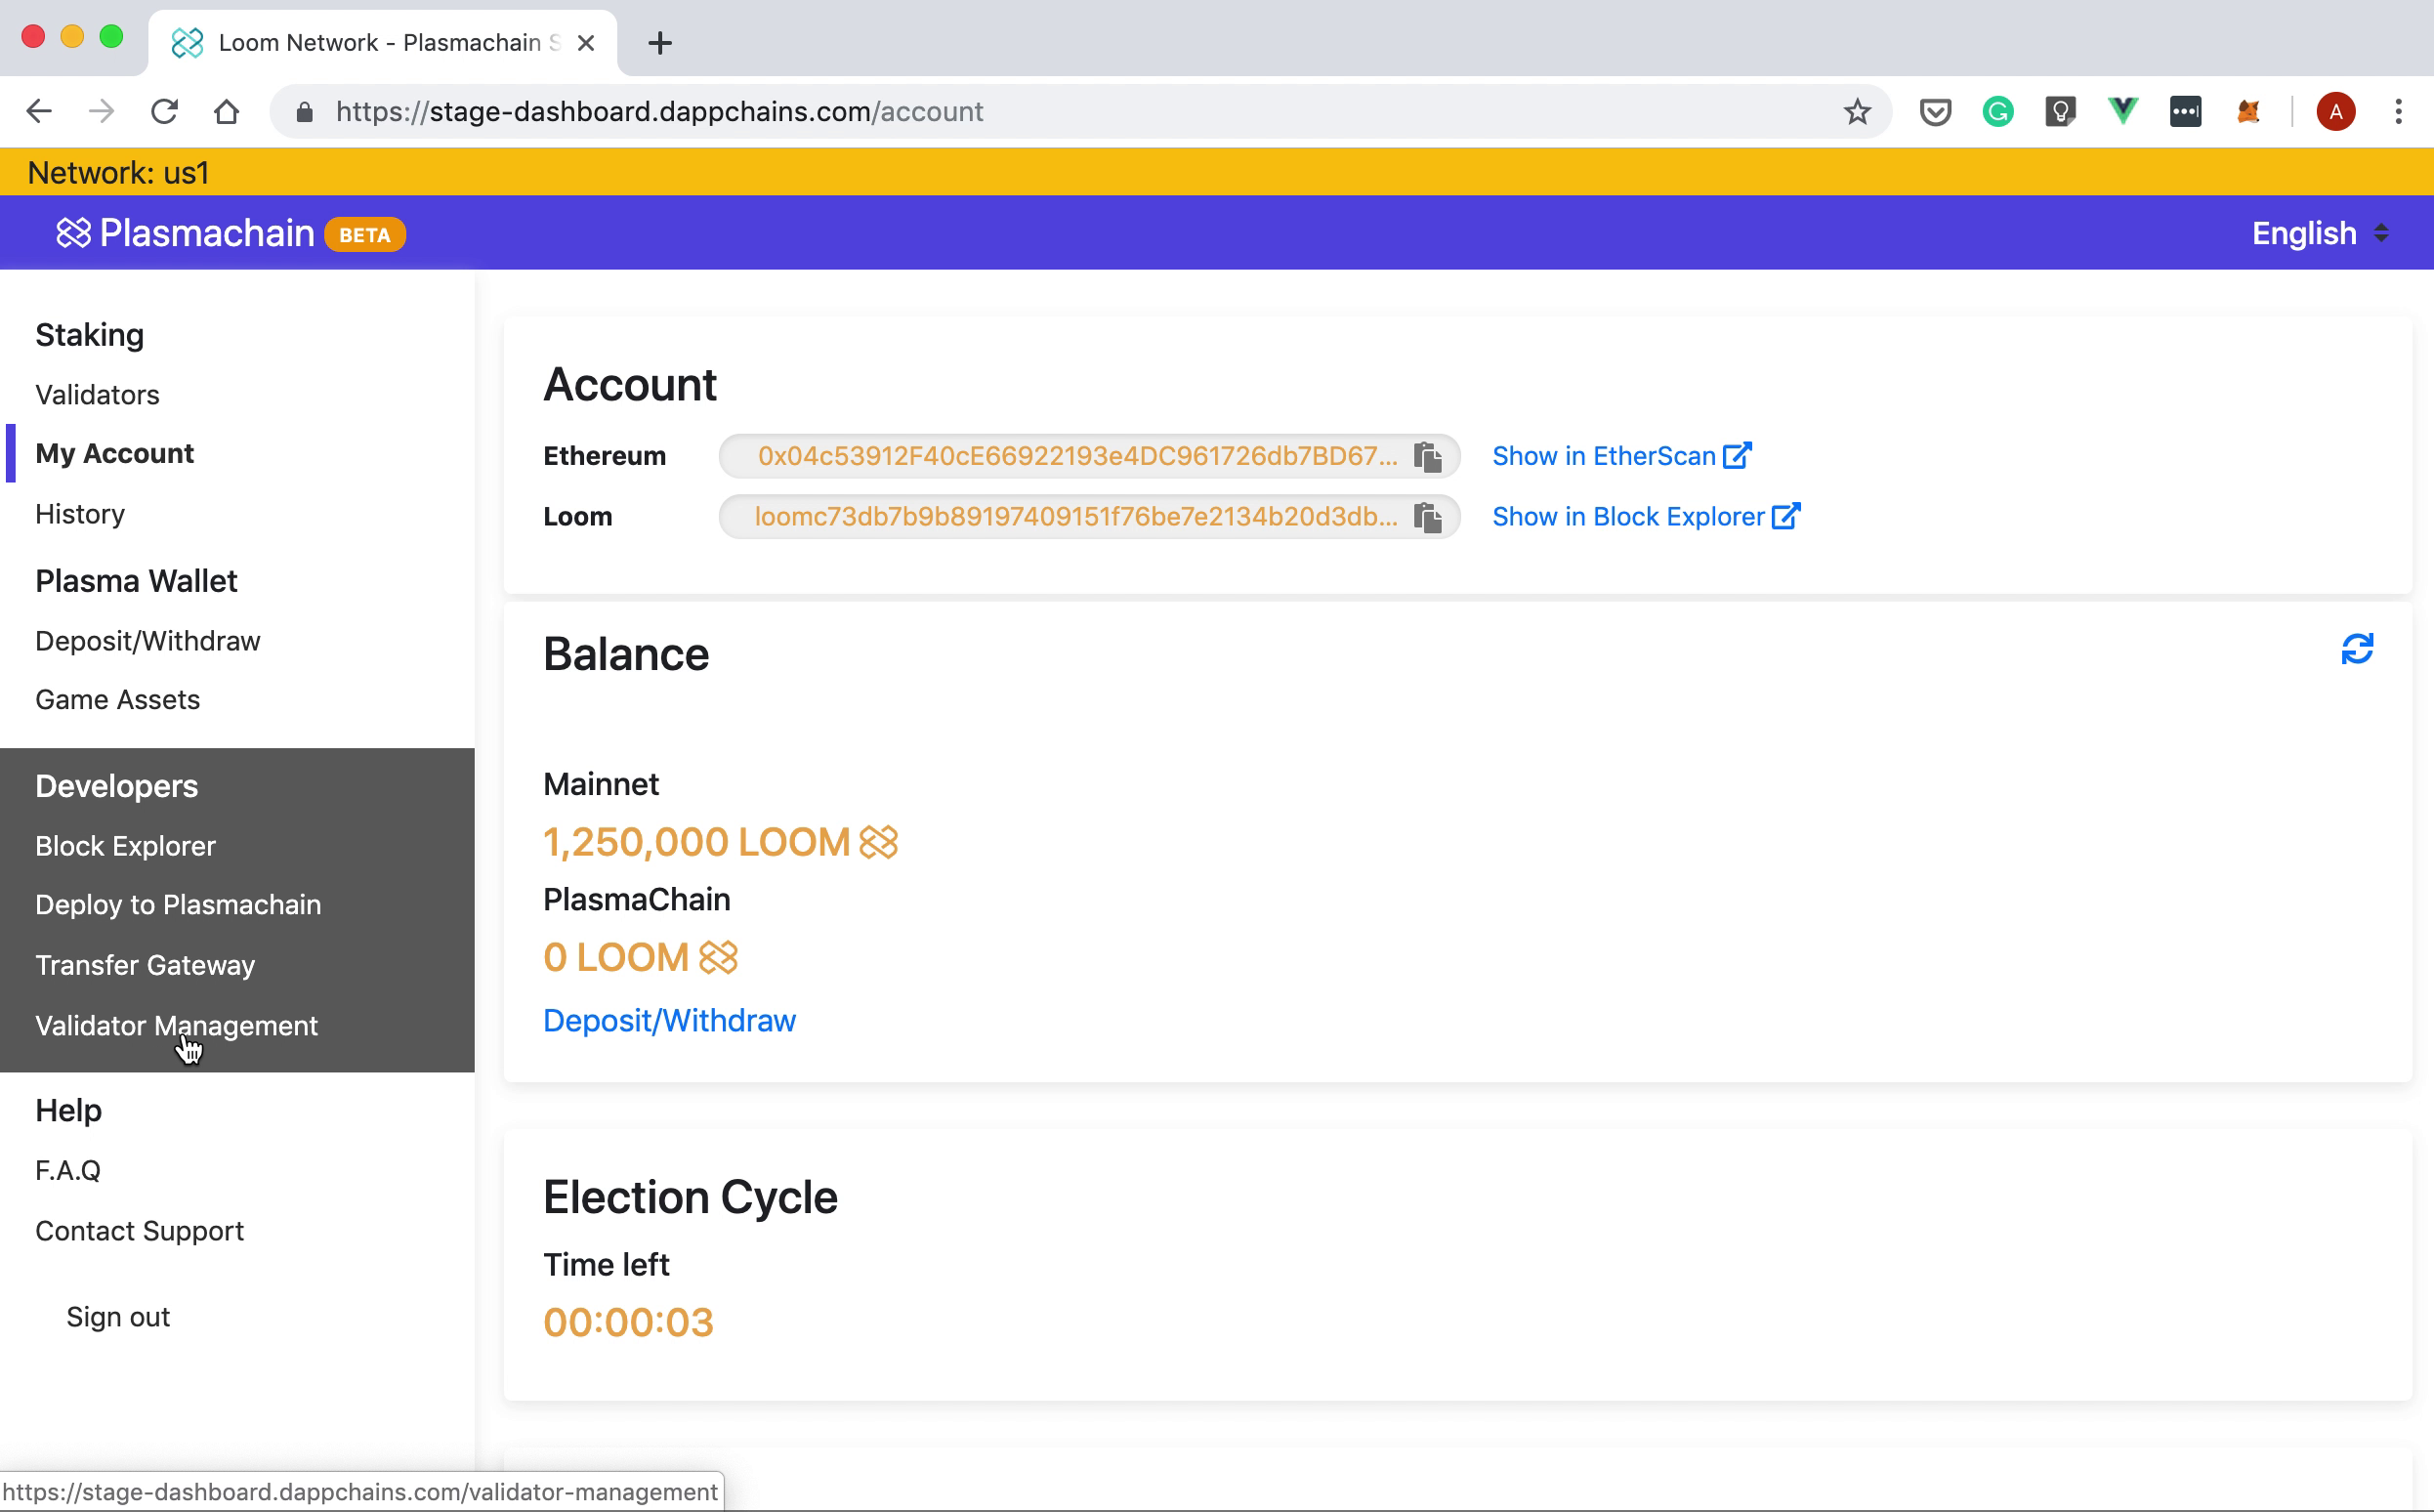
Once the mapping is created and verified you will be redirected to your account page:
Depositing Loom
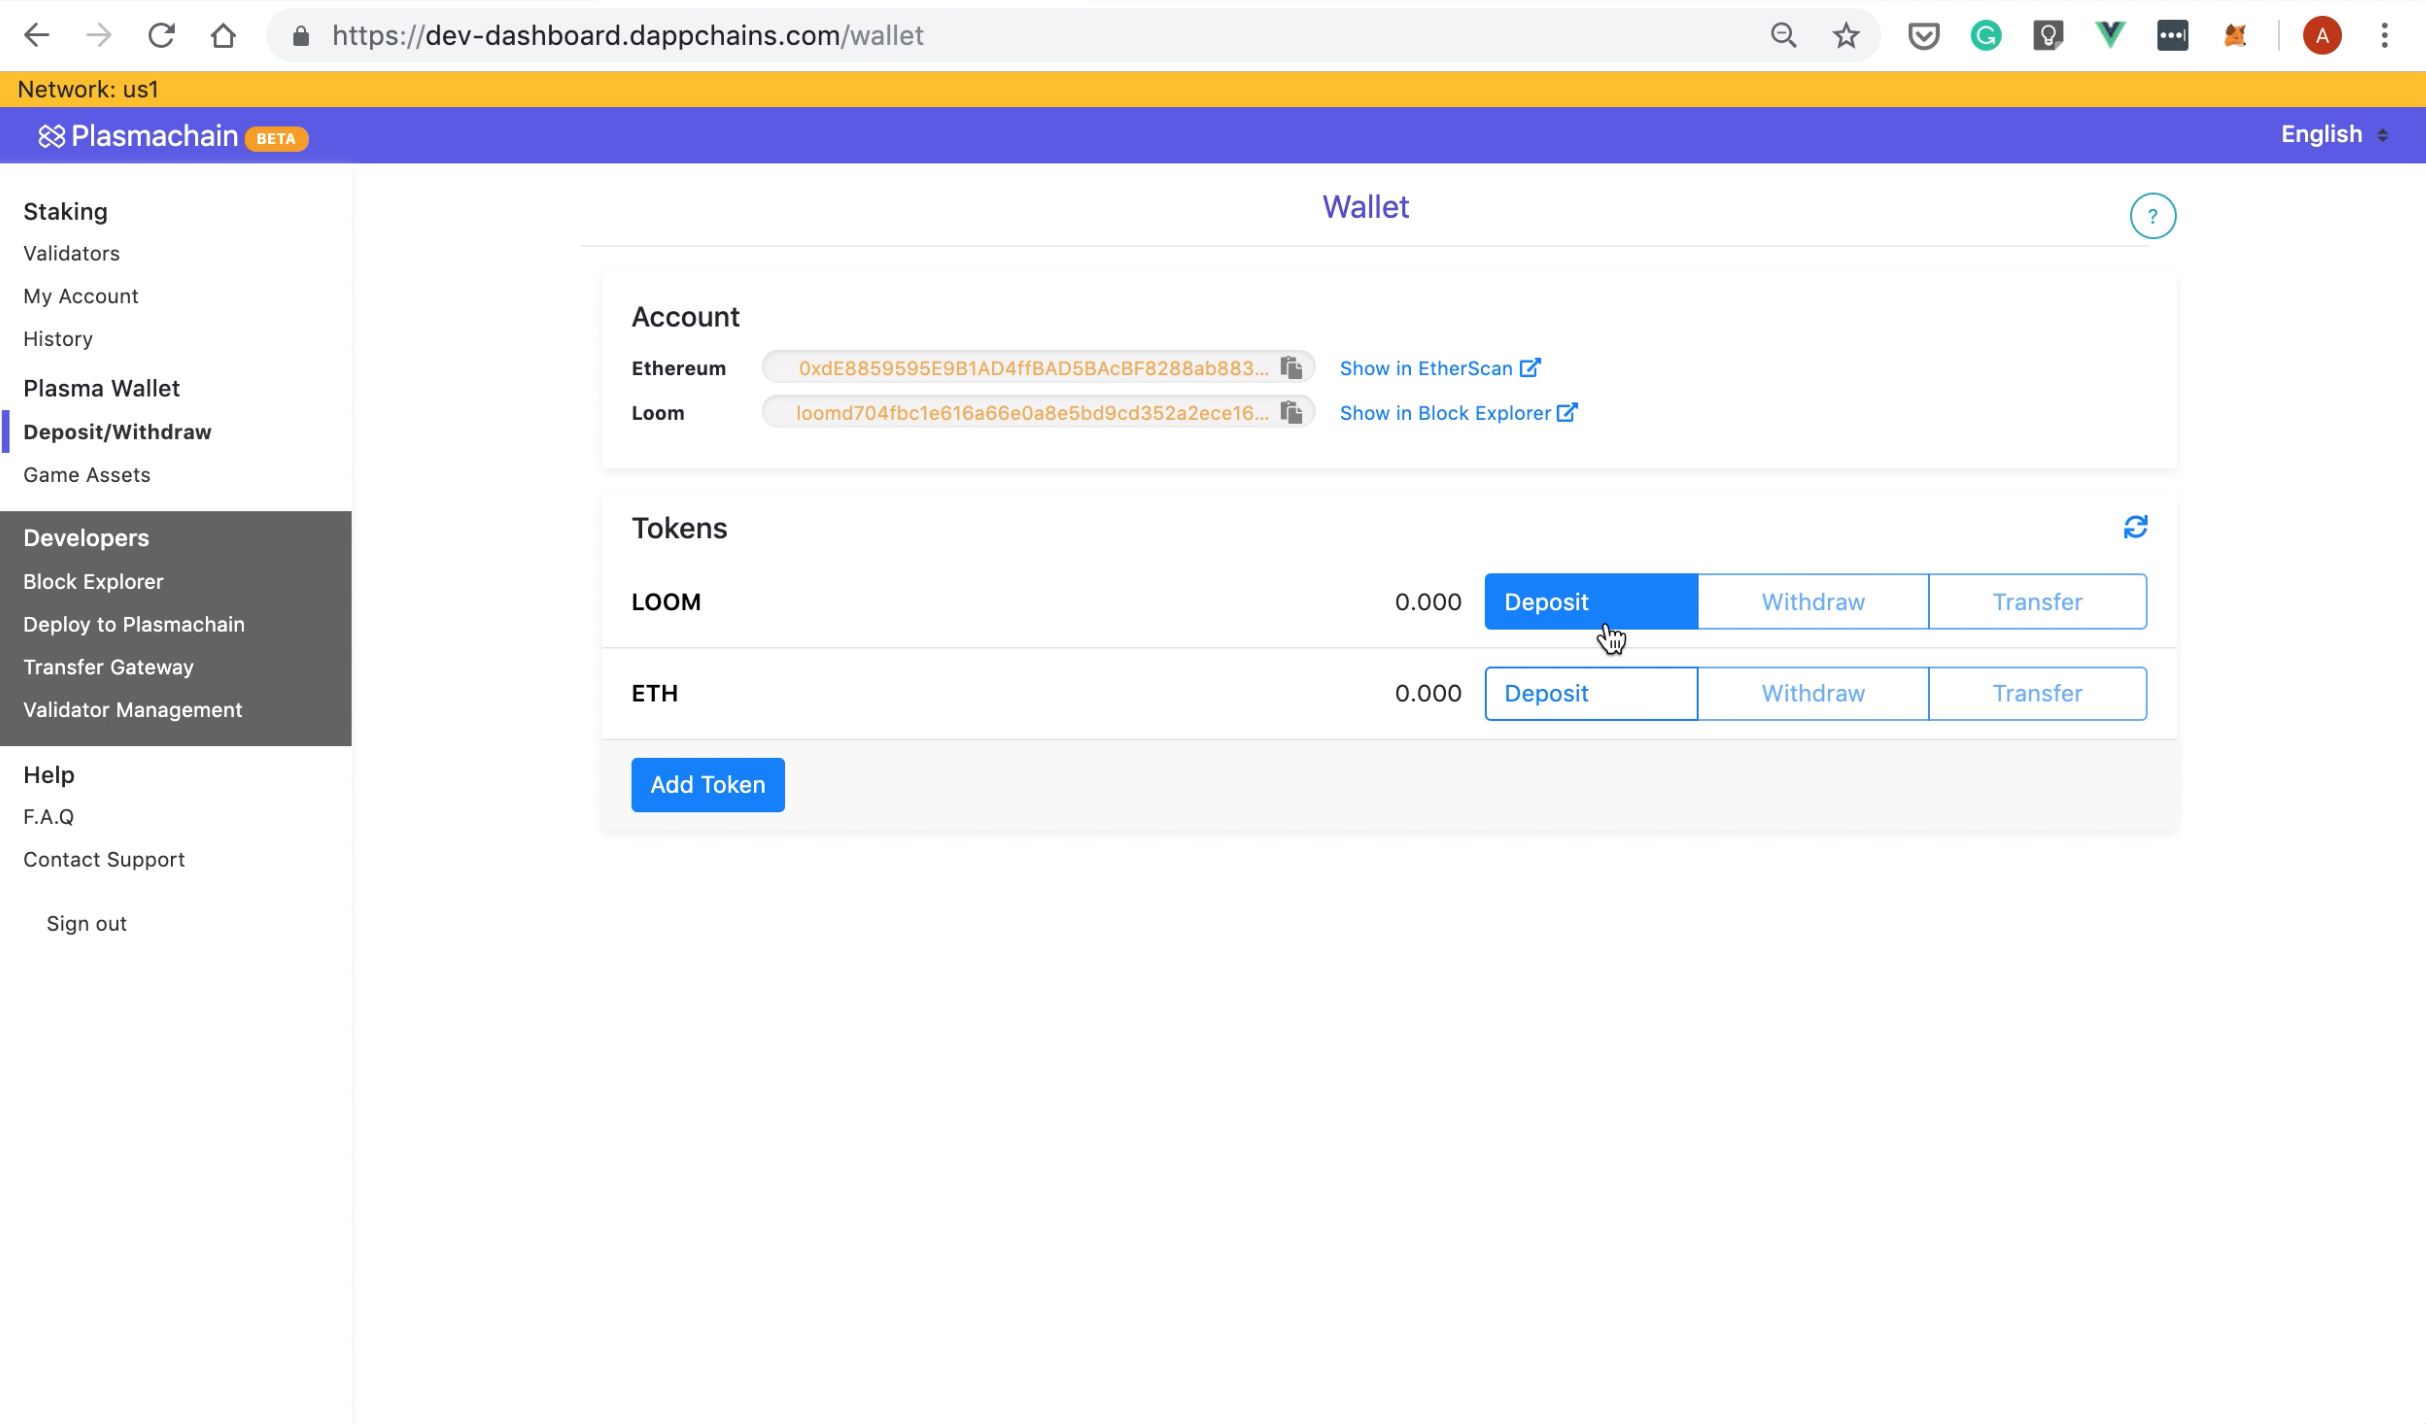
In the previous section, you learned how to map your accounts. Next, we will show you how to deposit tokens to Loom Mainnet.
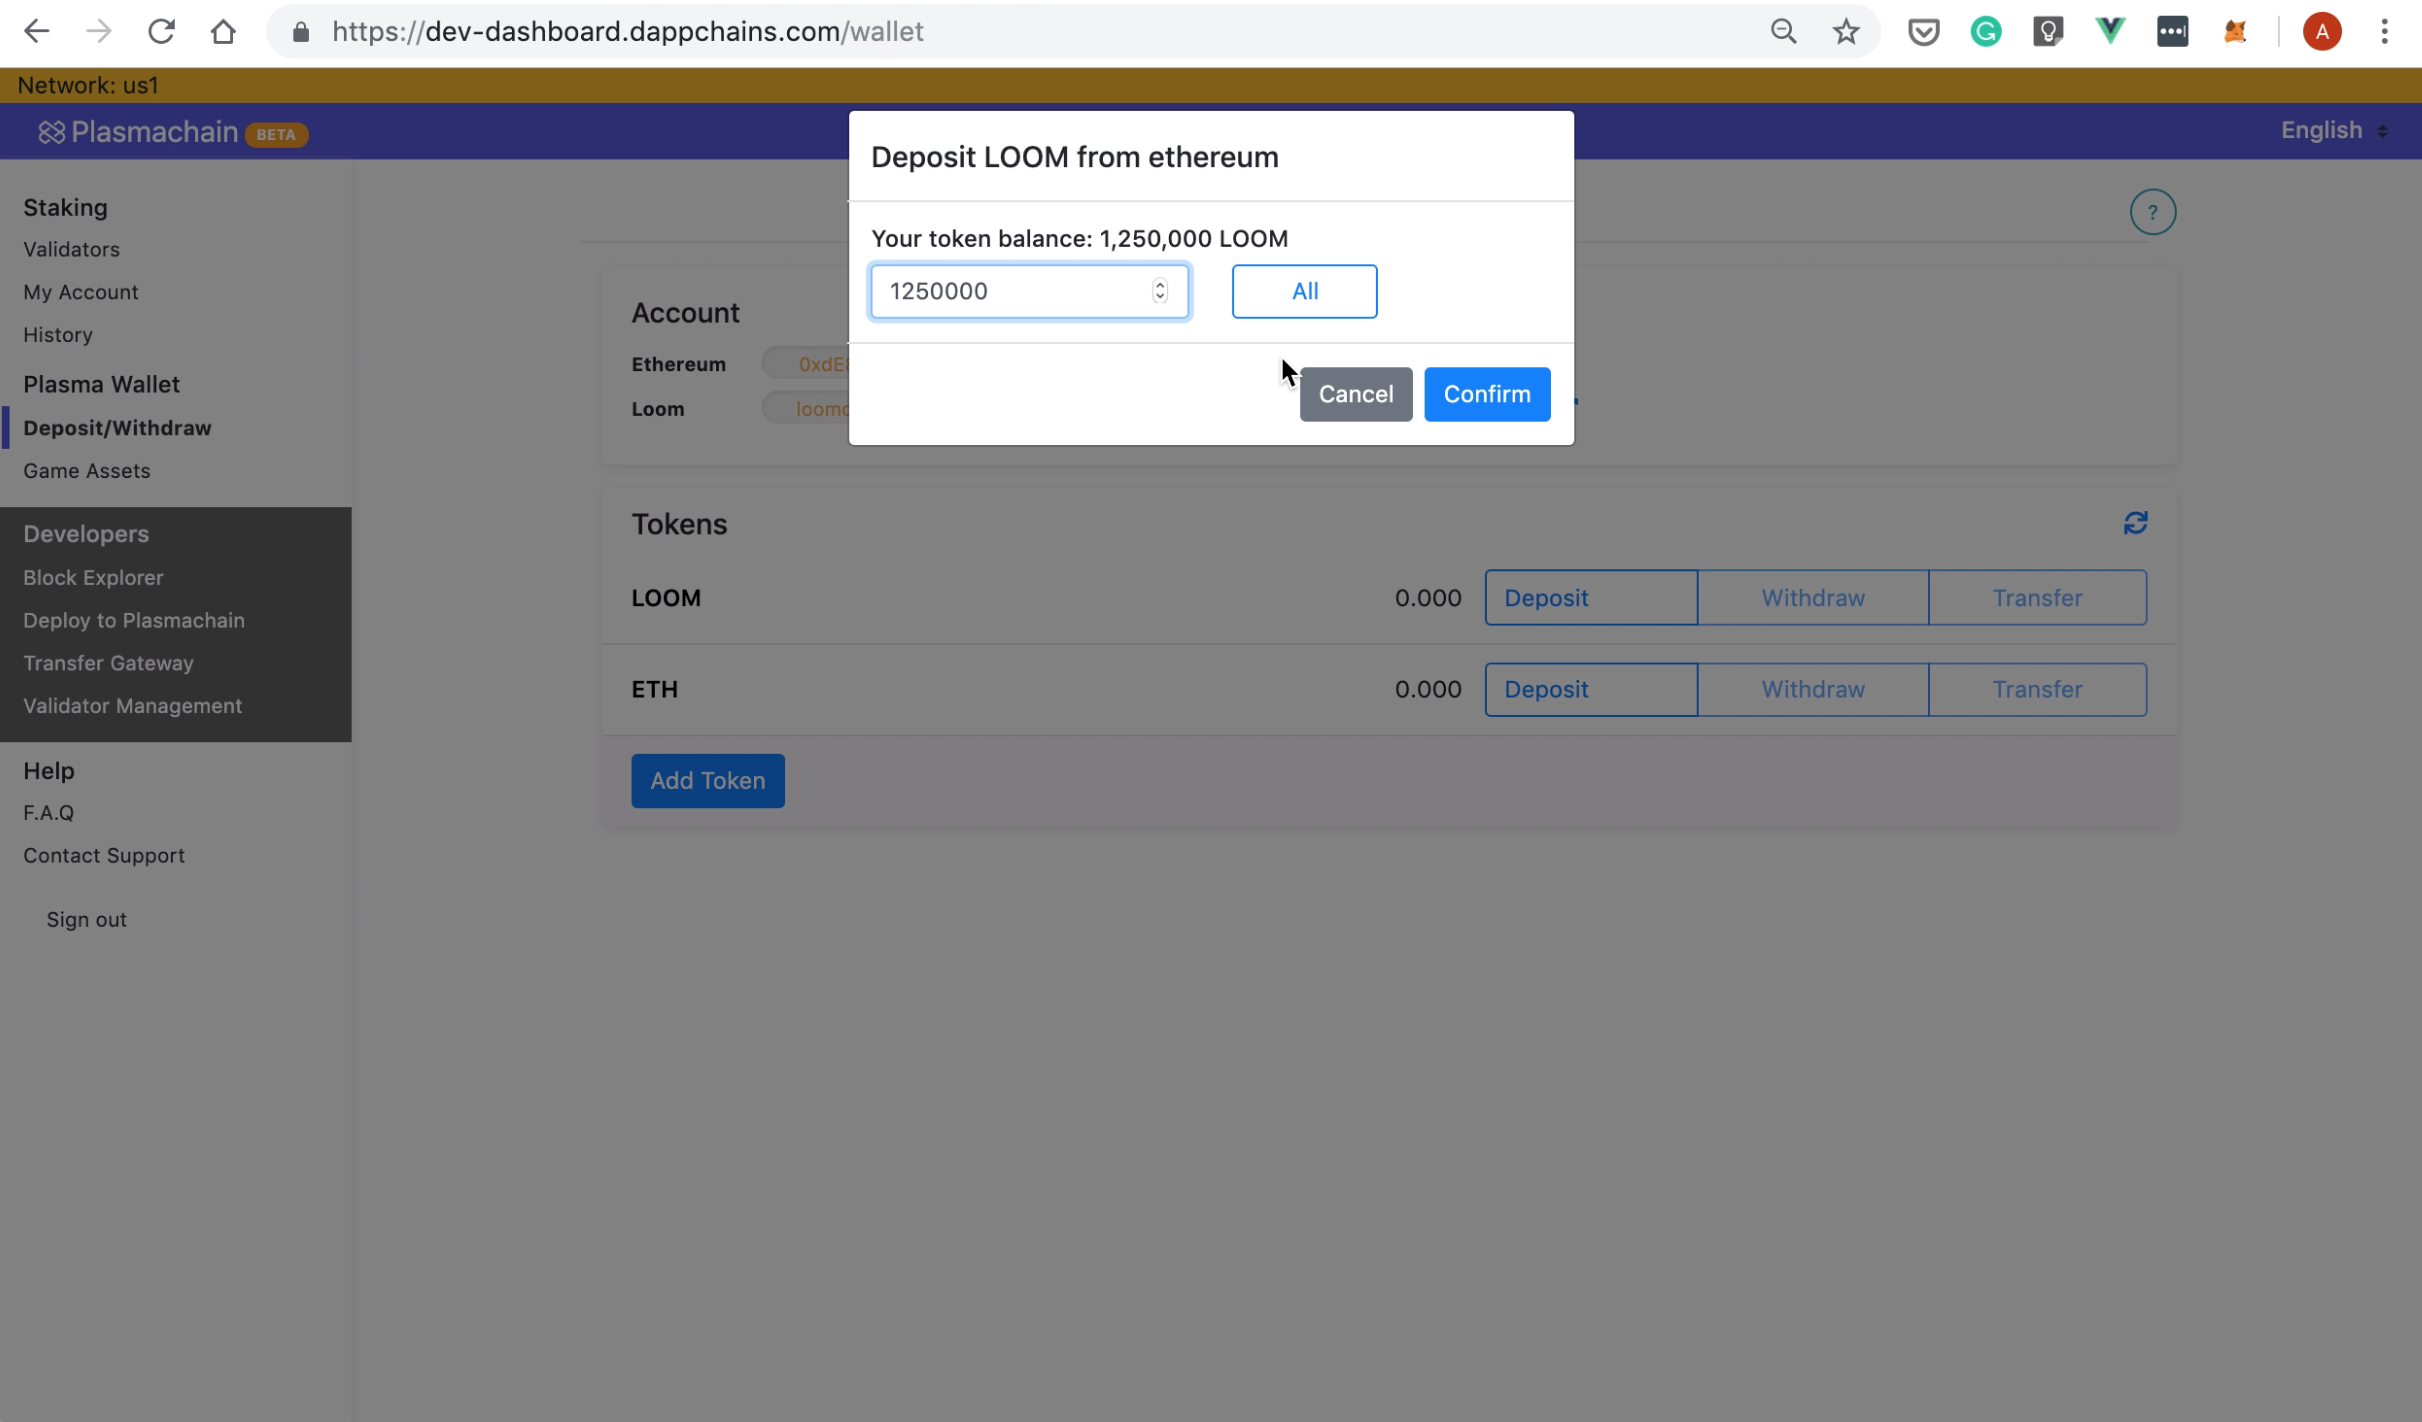
From the left pane, click on the "Deposit and Withdraw" and then select "Deposit" from the "LOOM" tab:
A popup will show, asking you to enter the amount of Loom you want to deposit. Type 1250000 and click "Confirm":
Next, Metamask will ask you to approve the transaction:
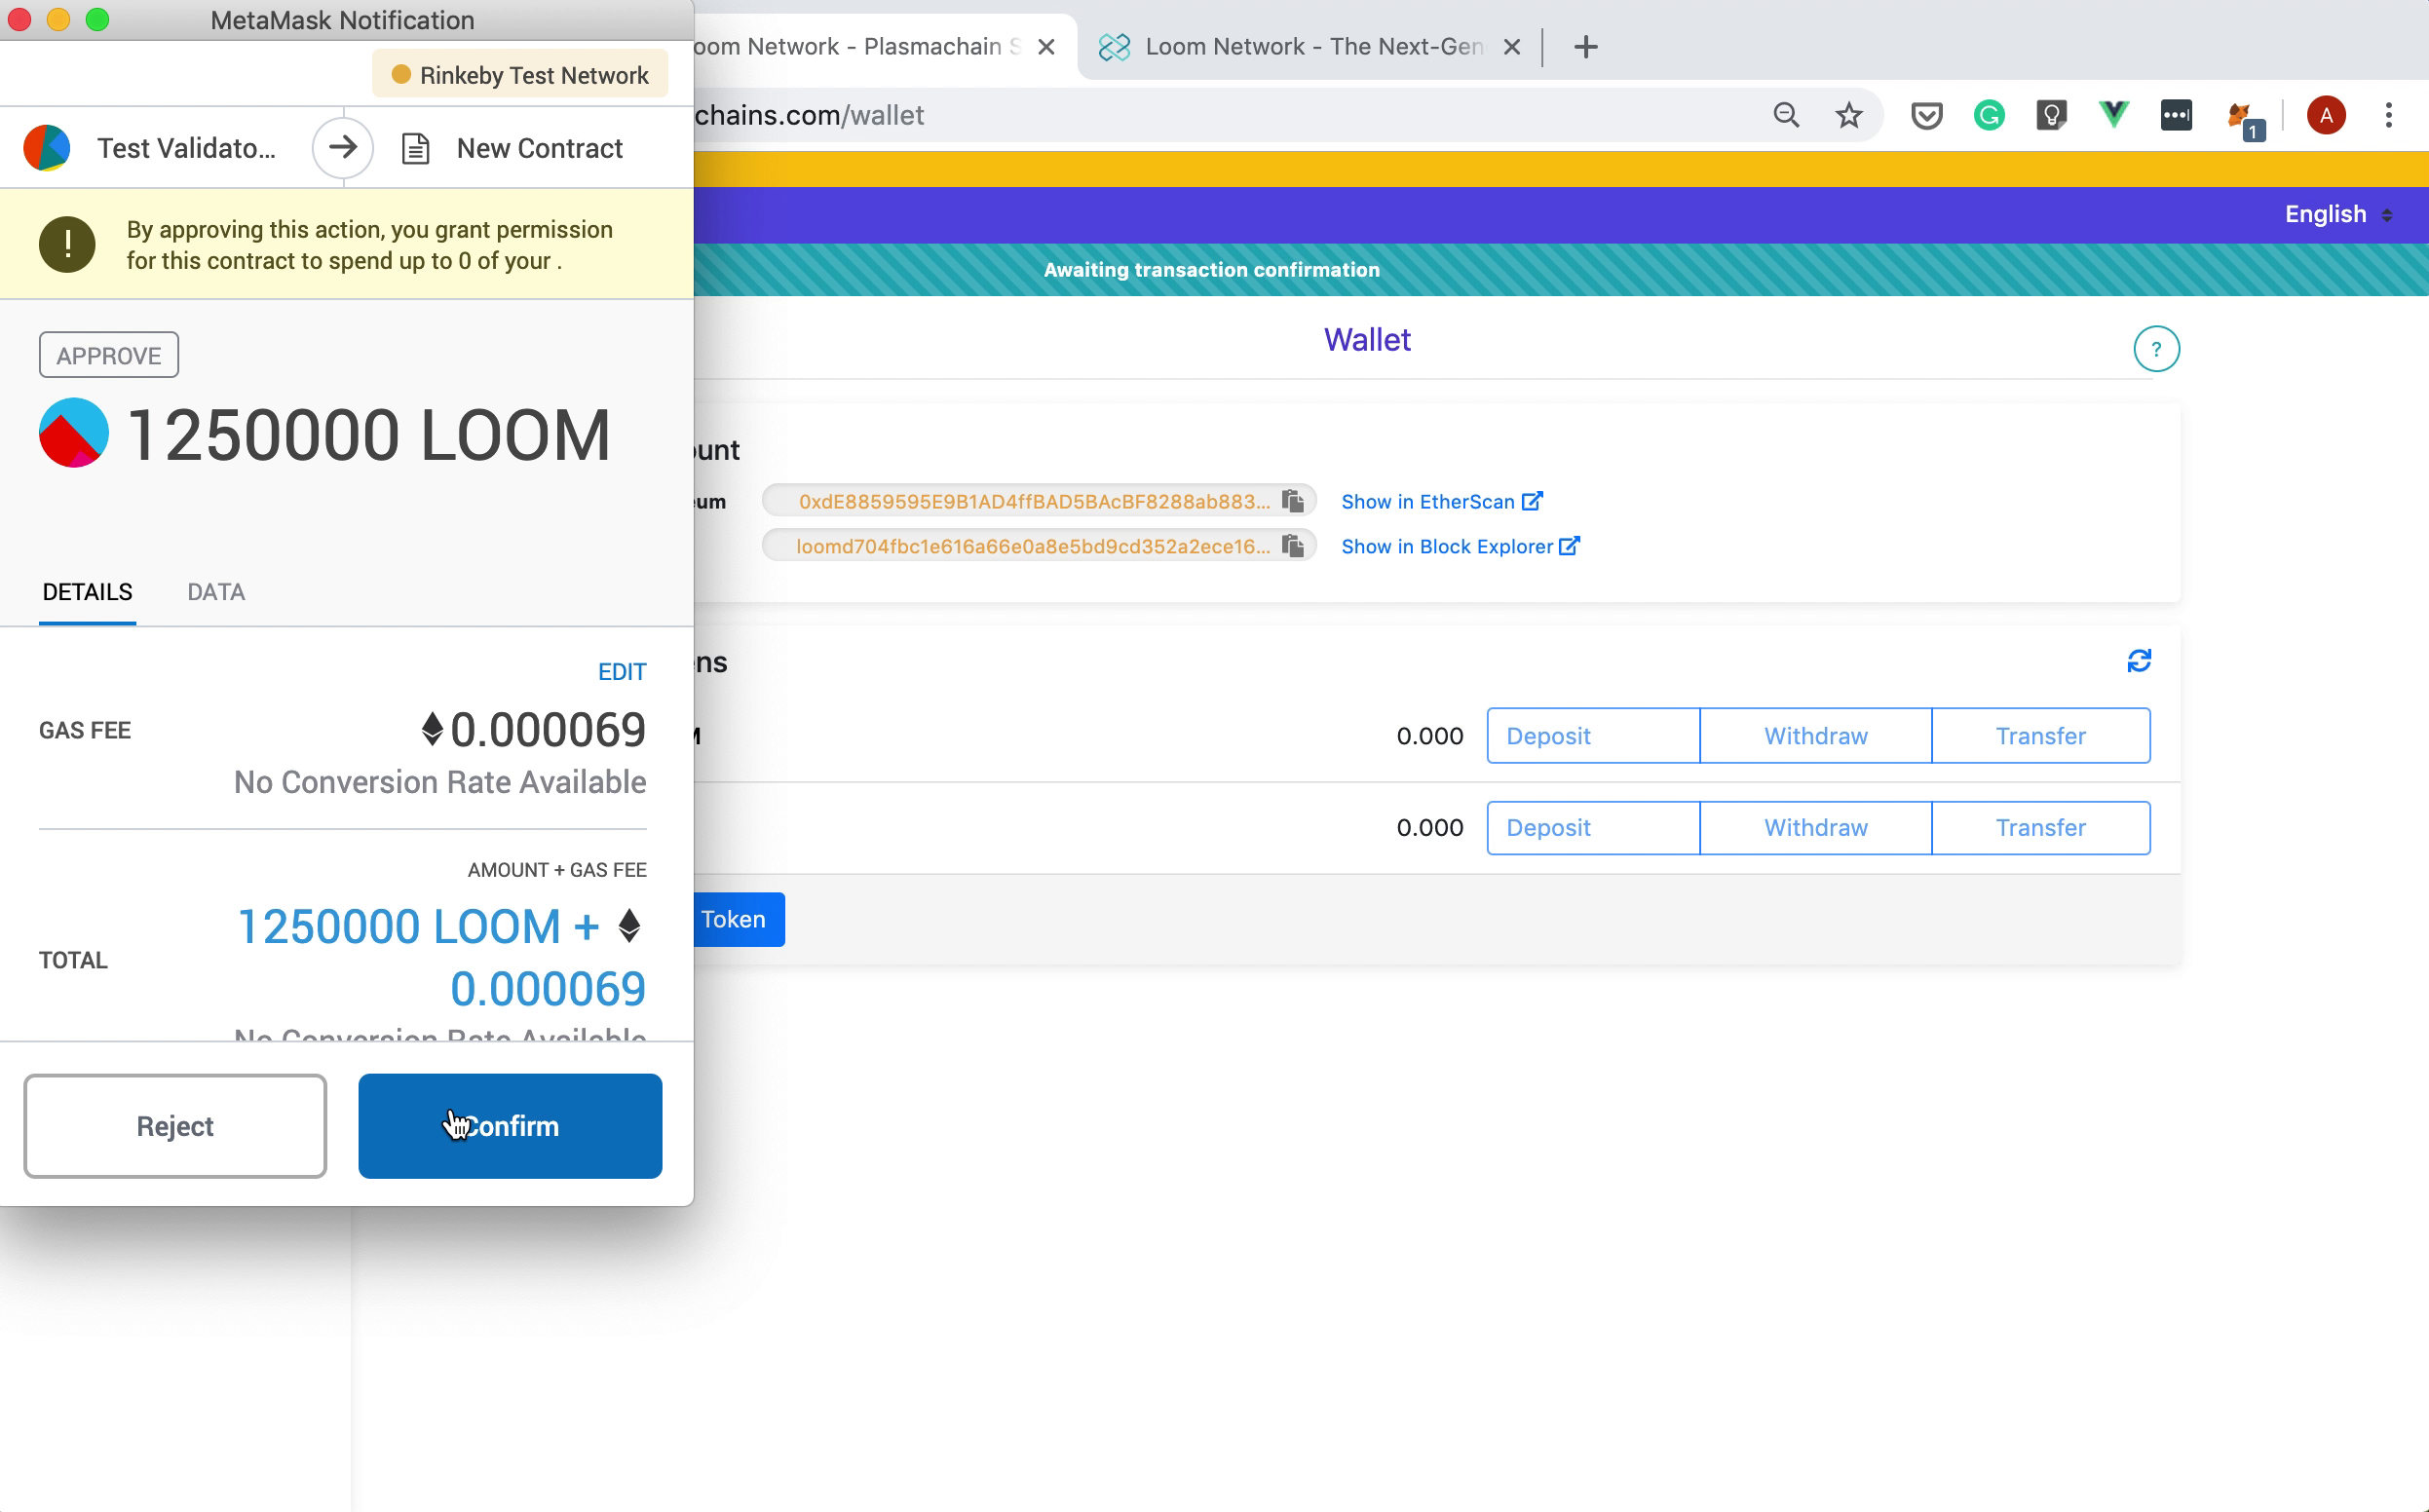
Click "Confirm" and wait a bit until a new popup will ask you to confirm the deposit:
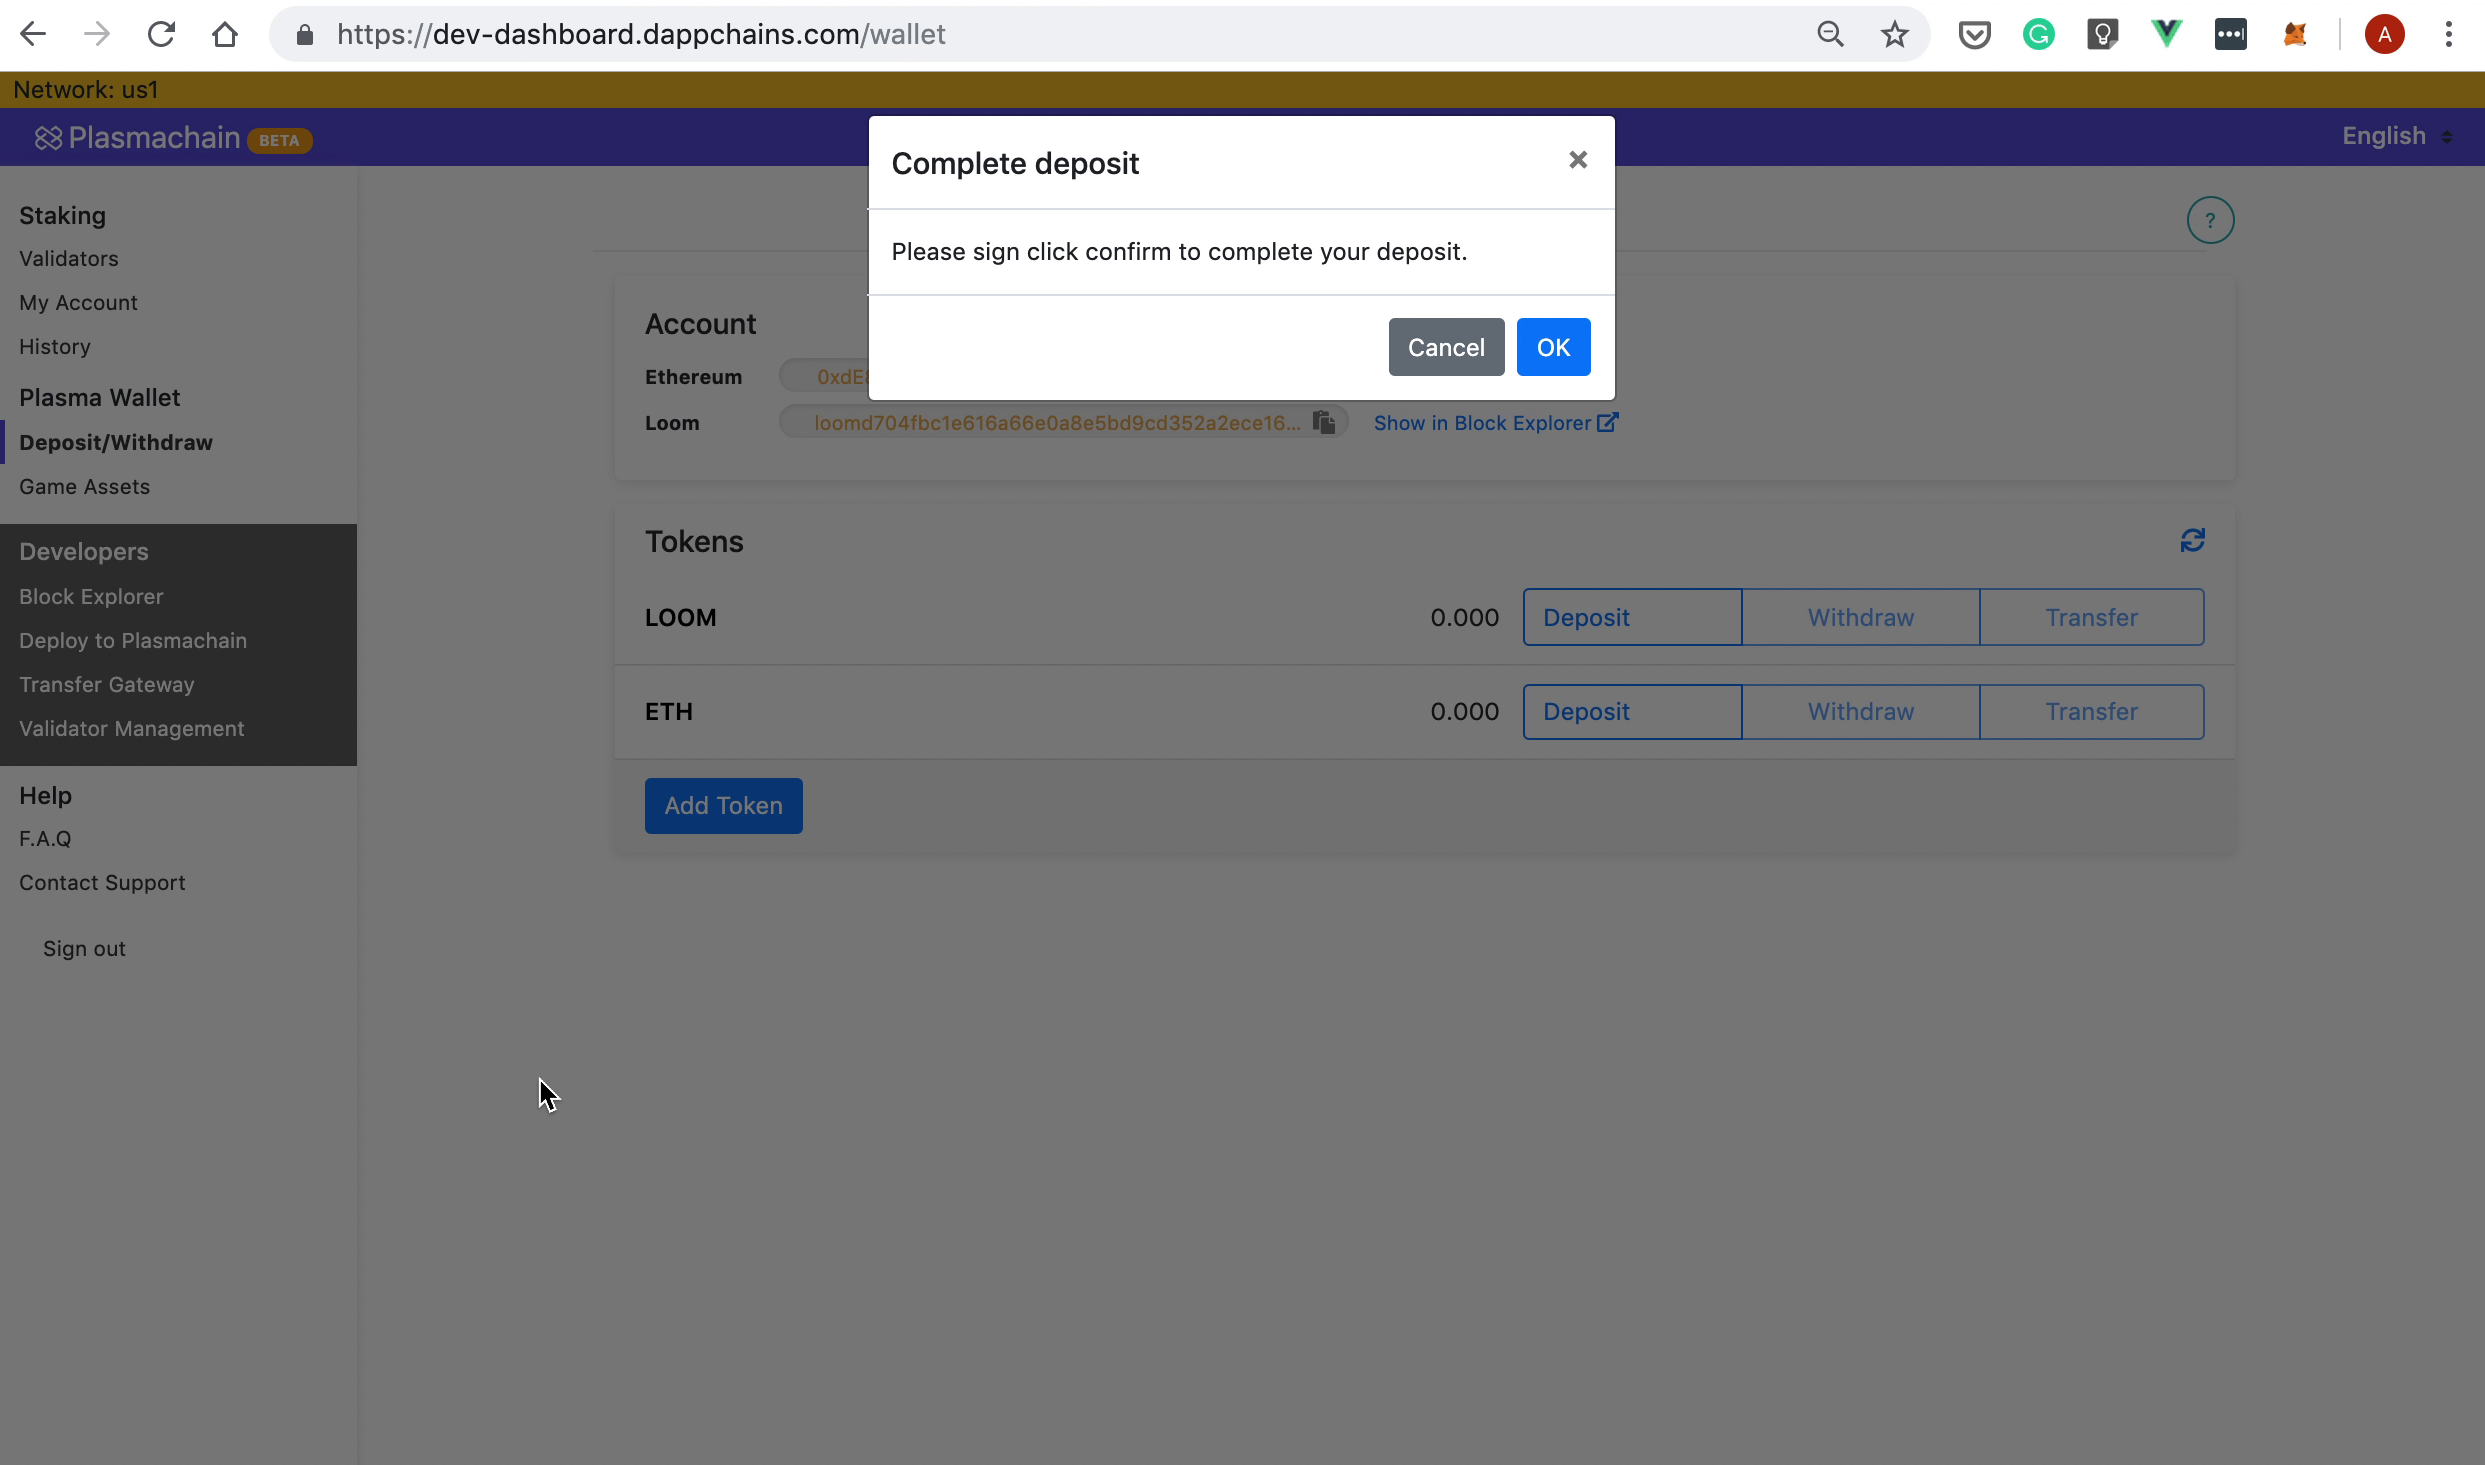
Then, Metamask will ask you once again to confirm the transaction:
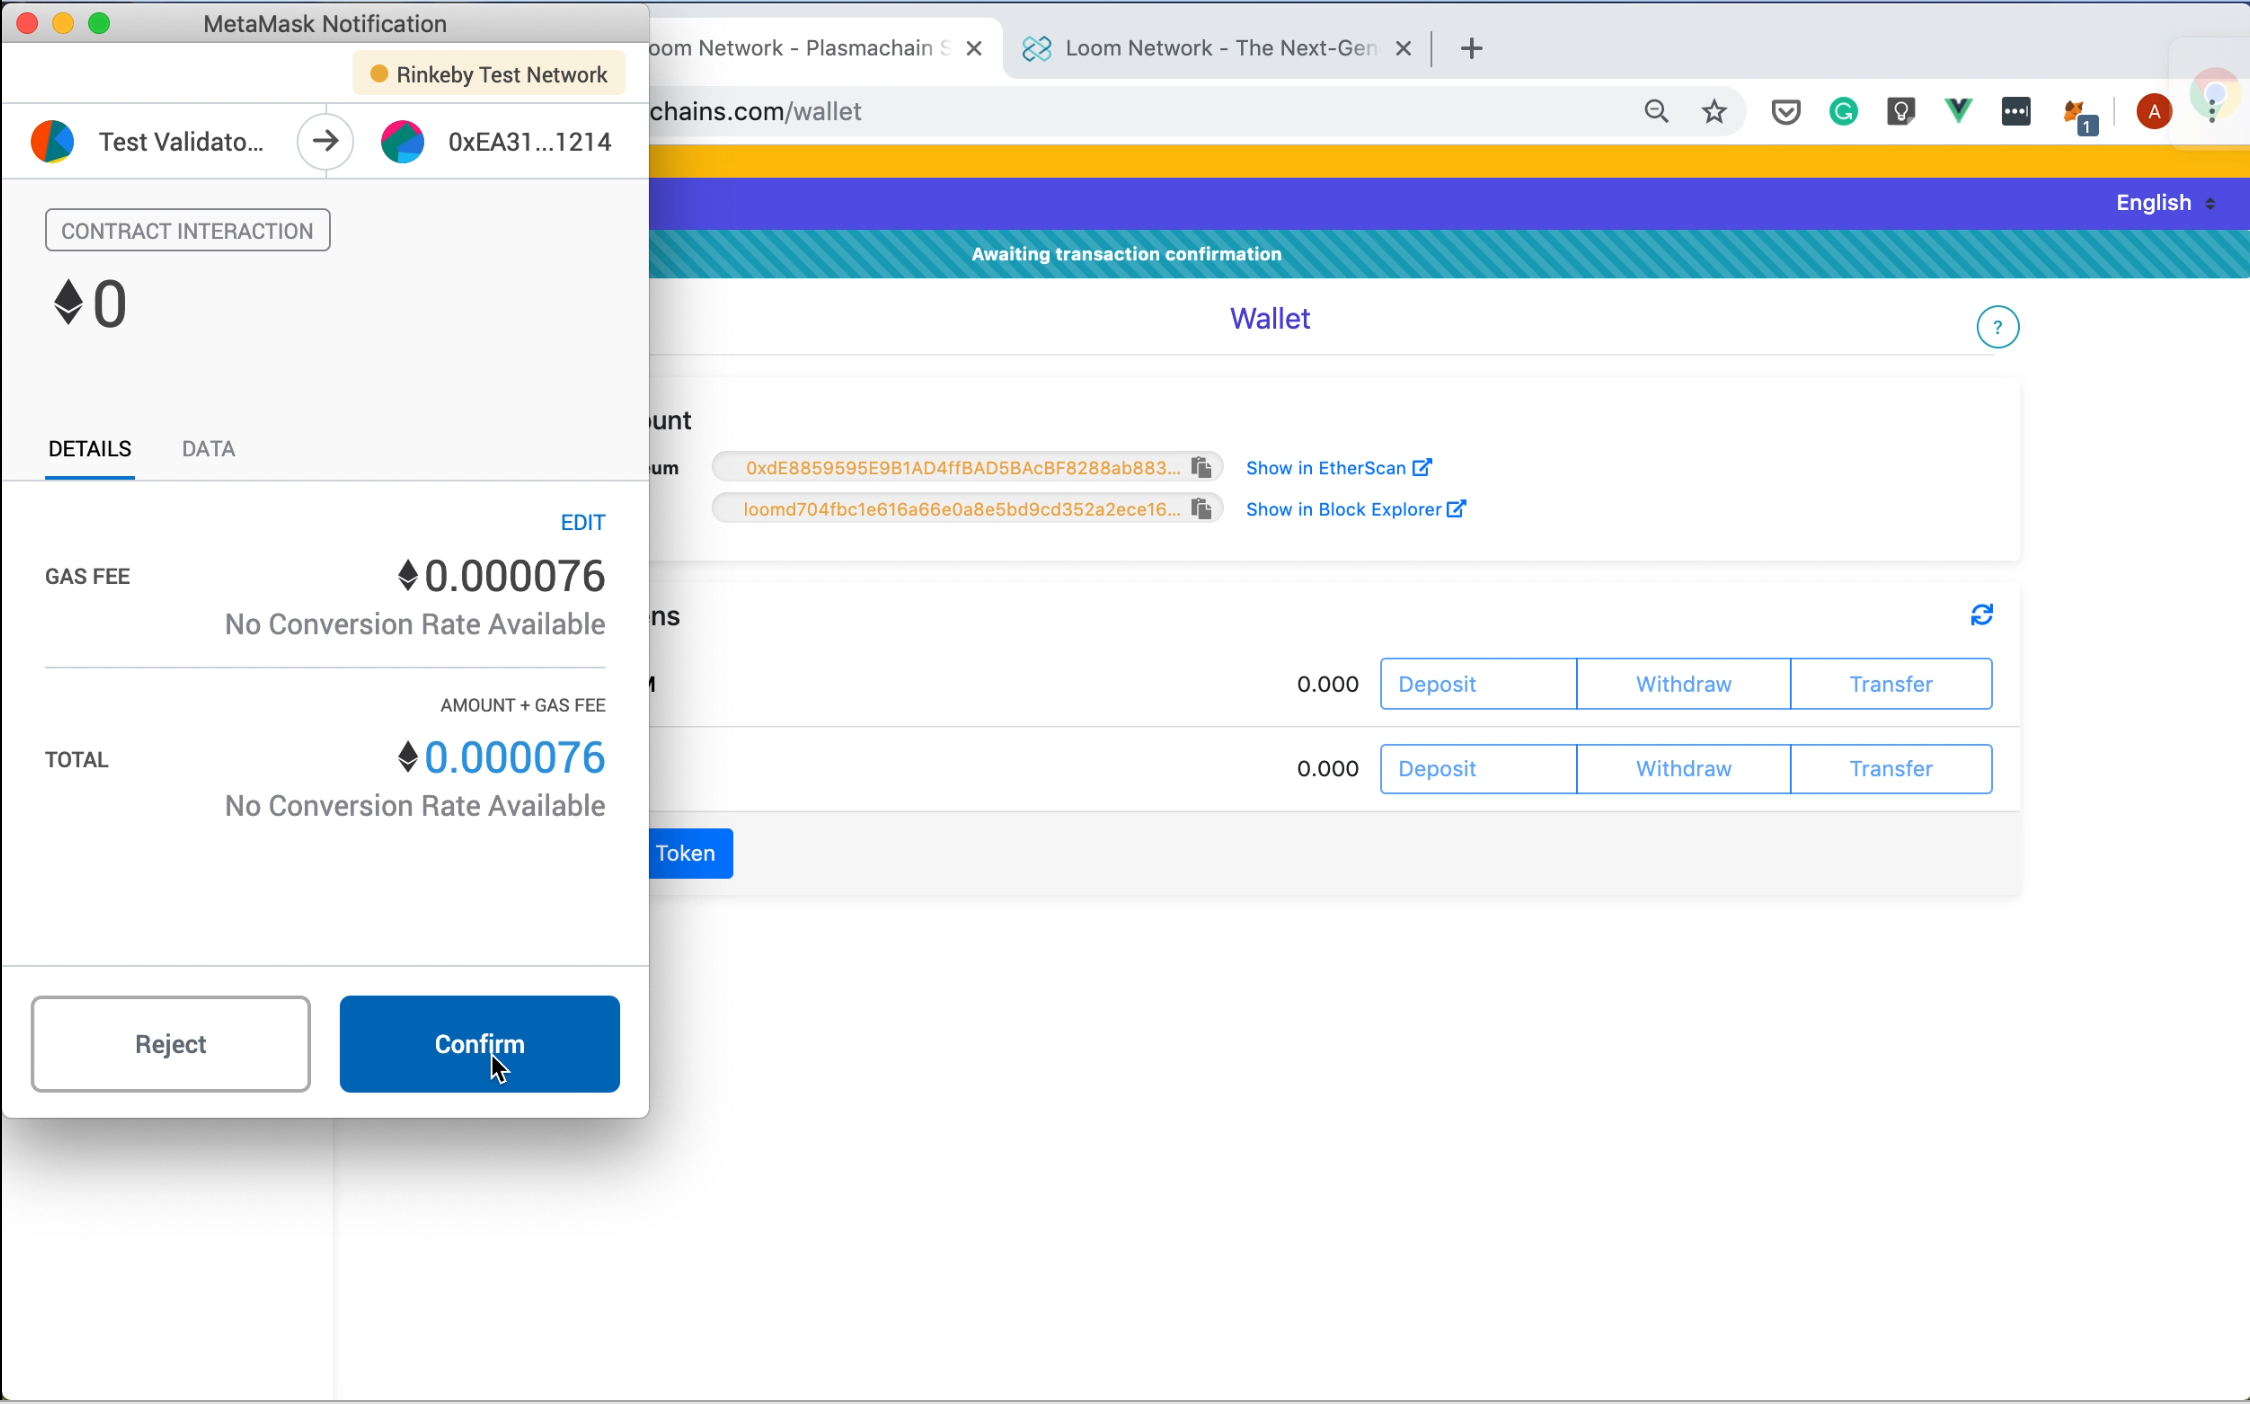
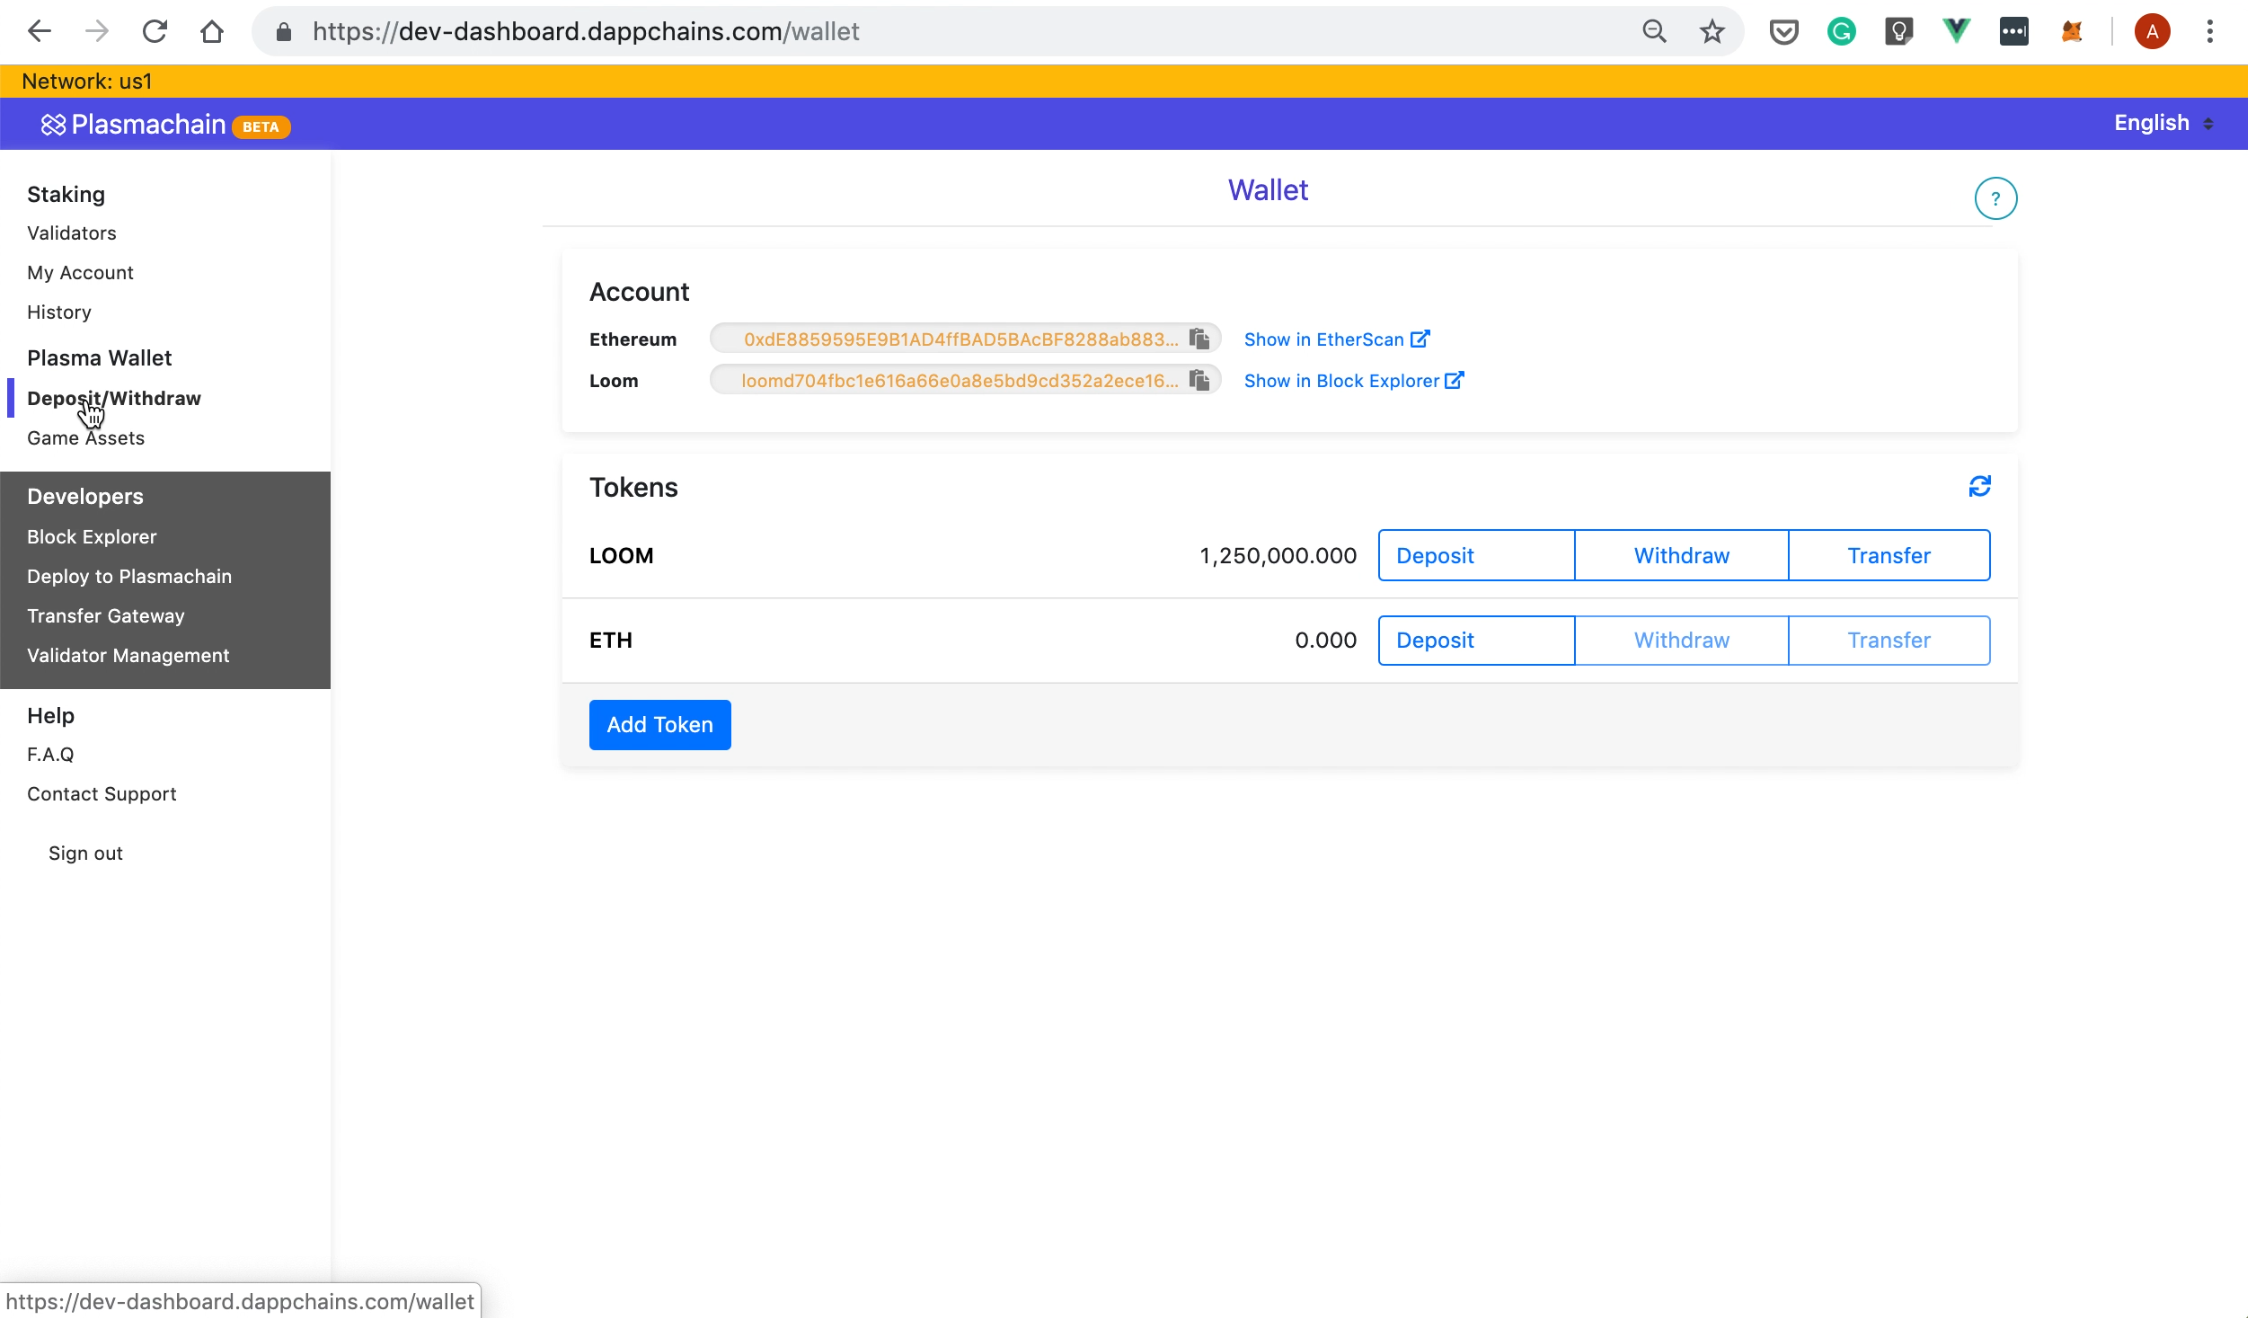
Note that your Loom Mainnet balance will get updated after 10 block confirmations:
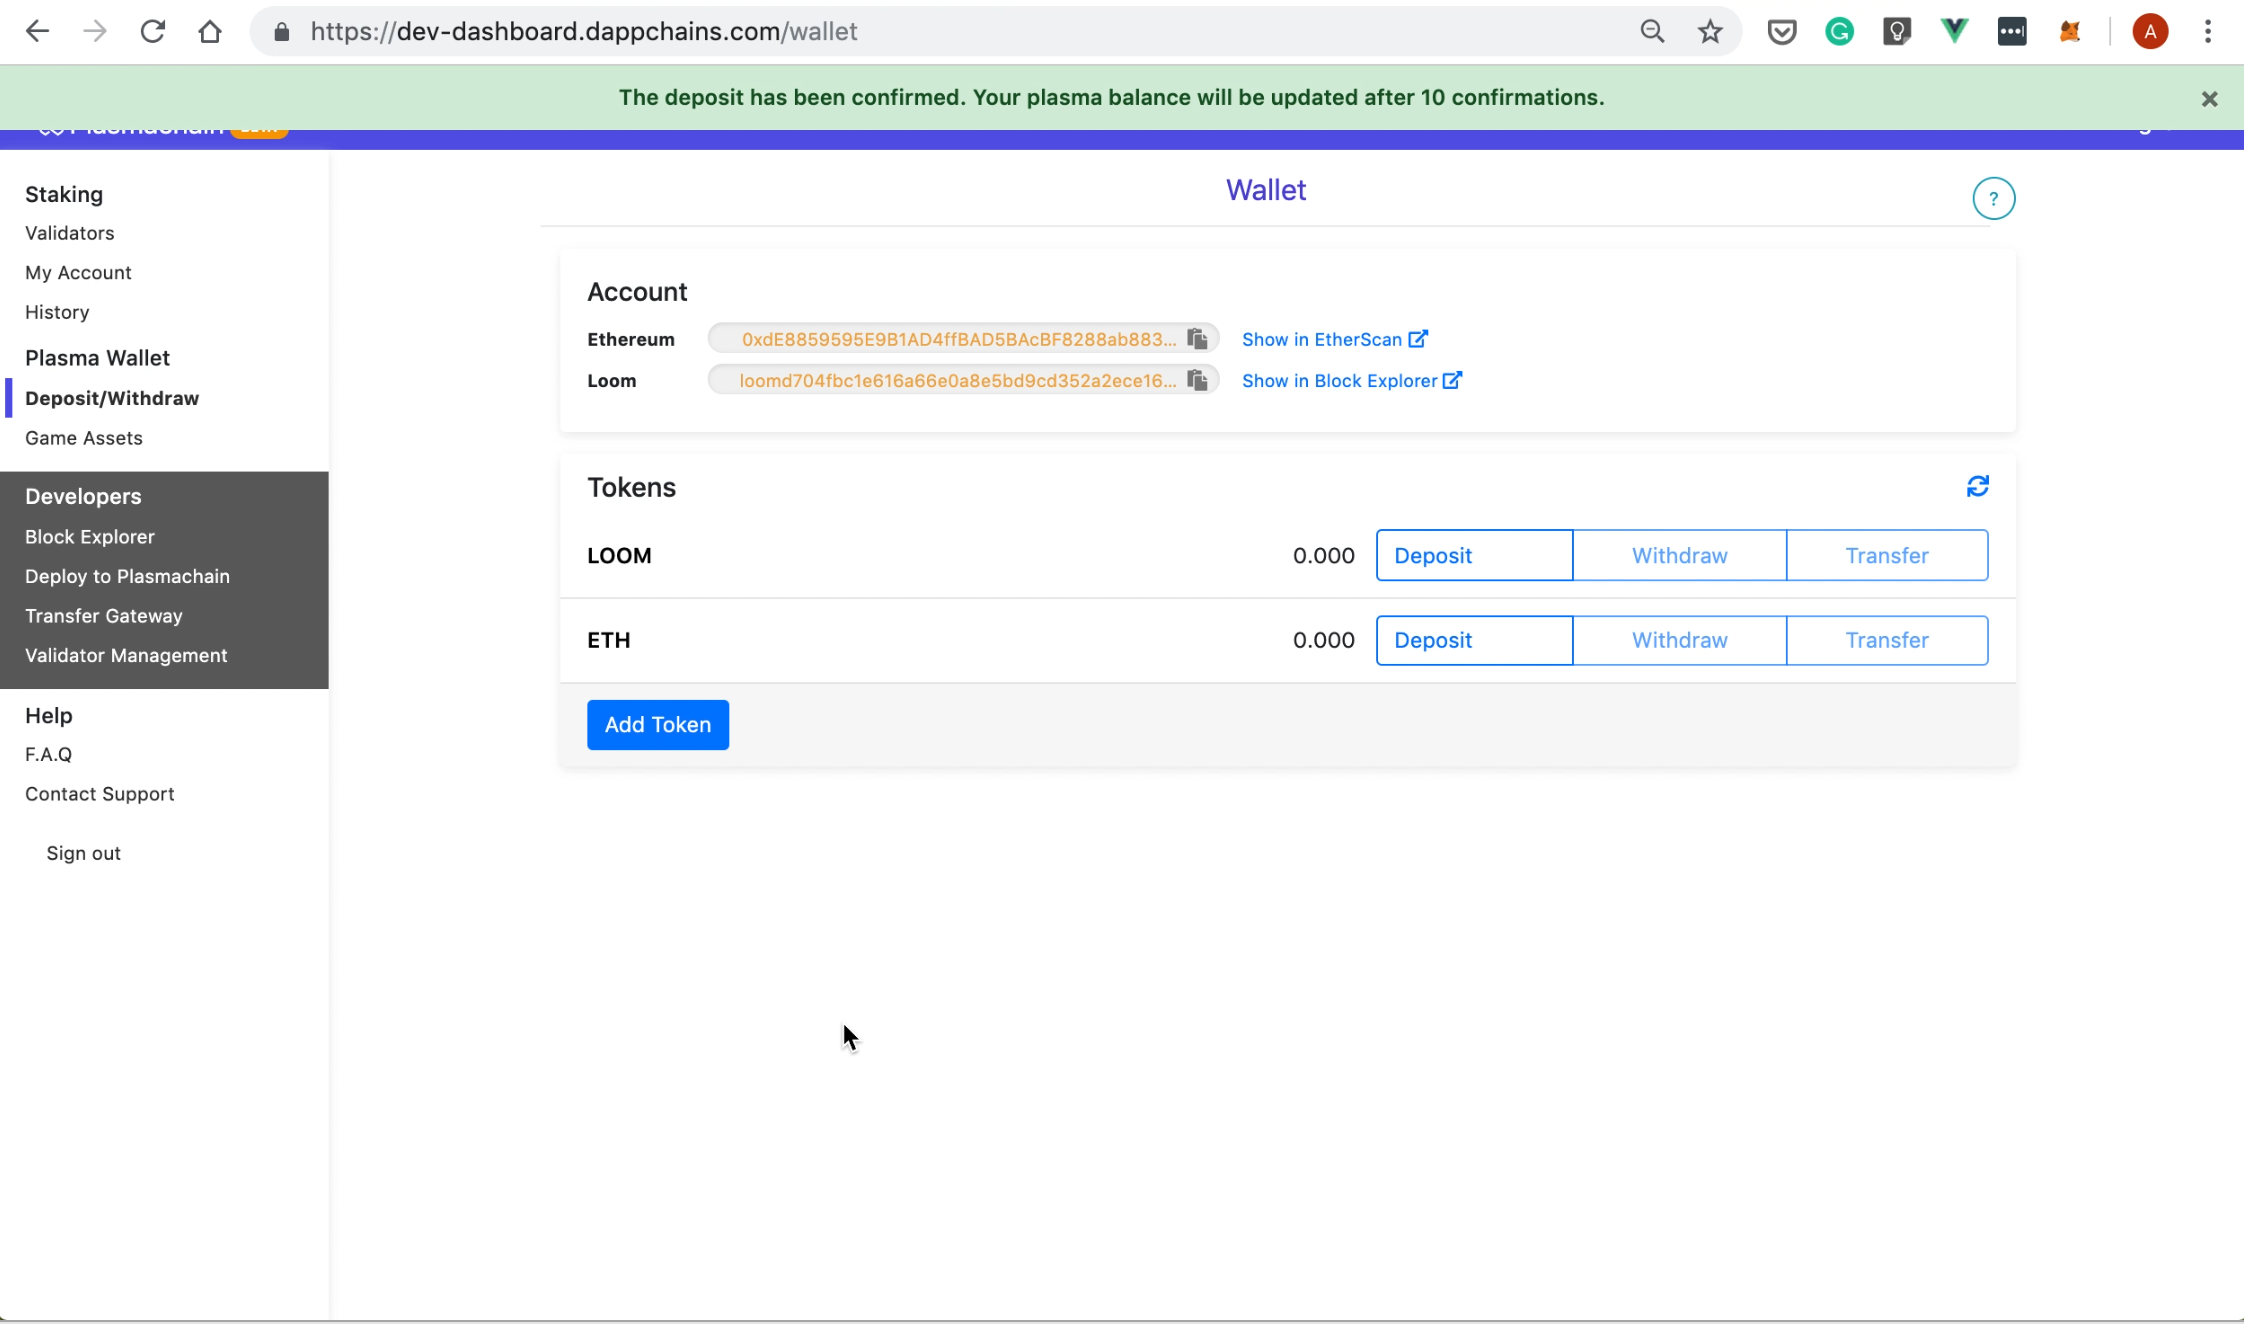
Once 10 blocks are confirmed, your balance on Loom Mainnet will get updated
Great! You're almost there. Next, we'll show you how to whitelist your address
Whitelisting your Address
Now, go to the left pane and click on the "Validator Management". You will be taken to a page looking like below:
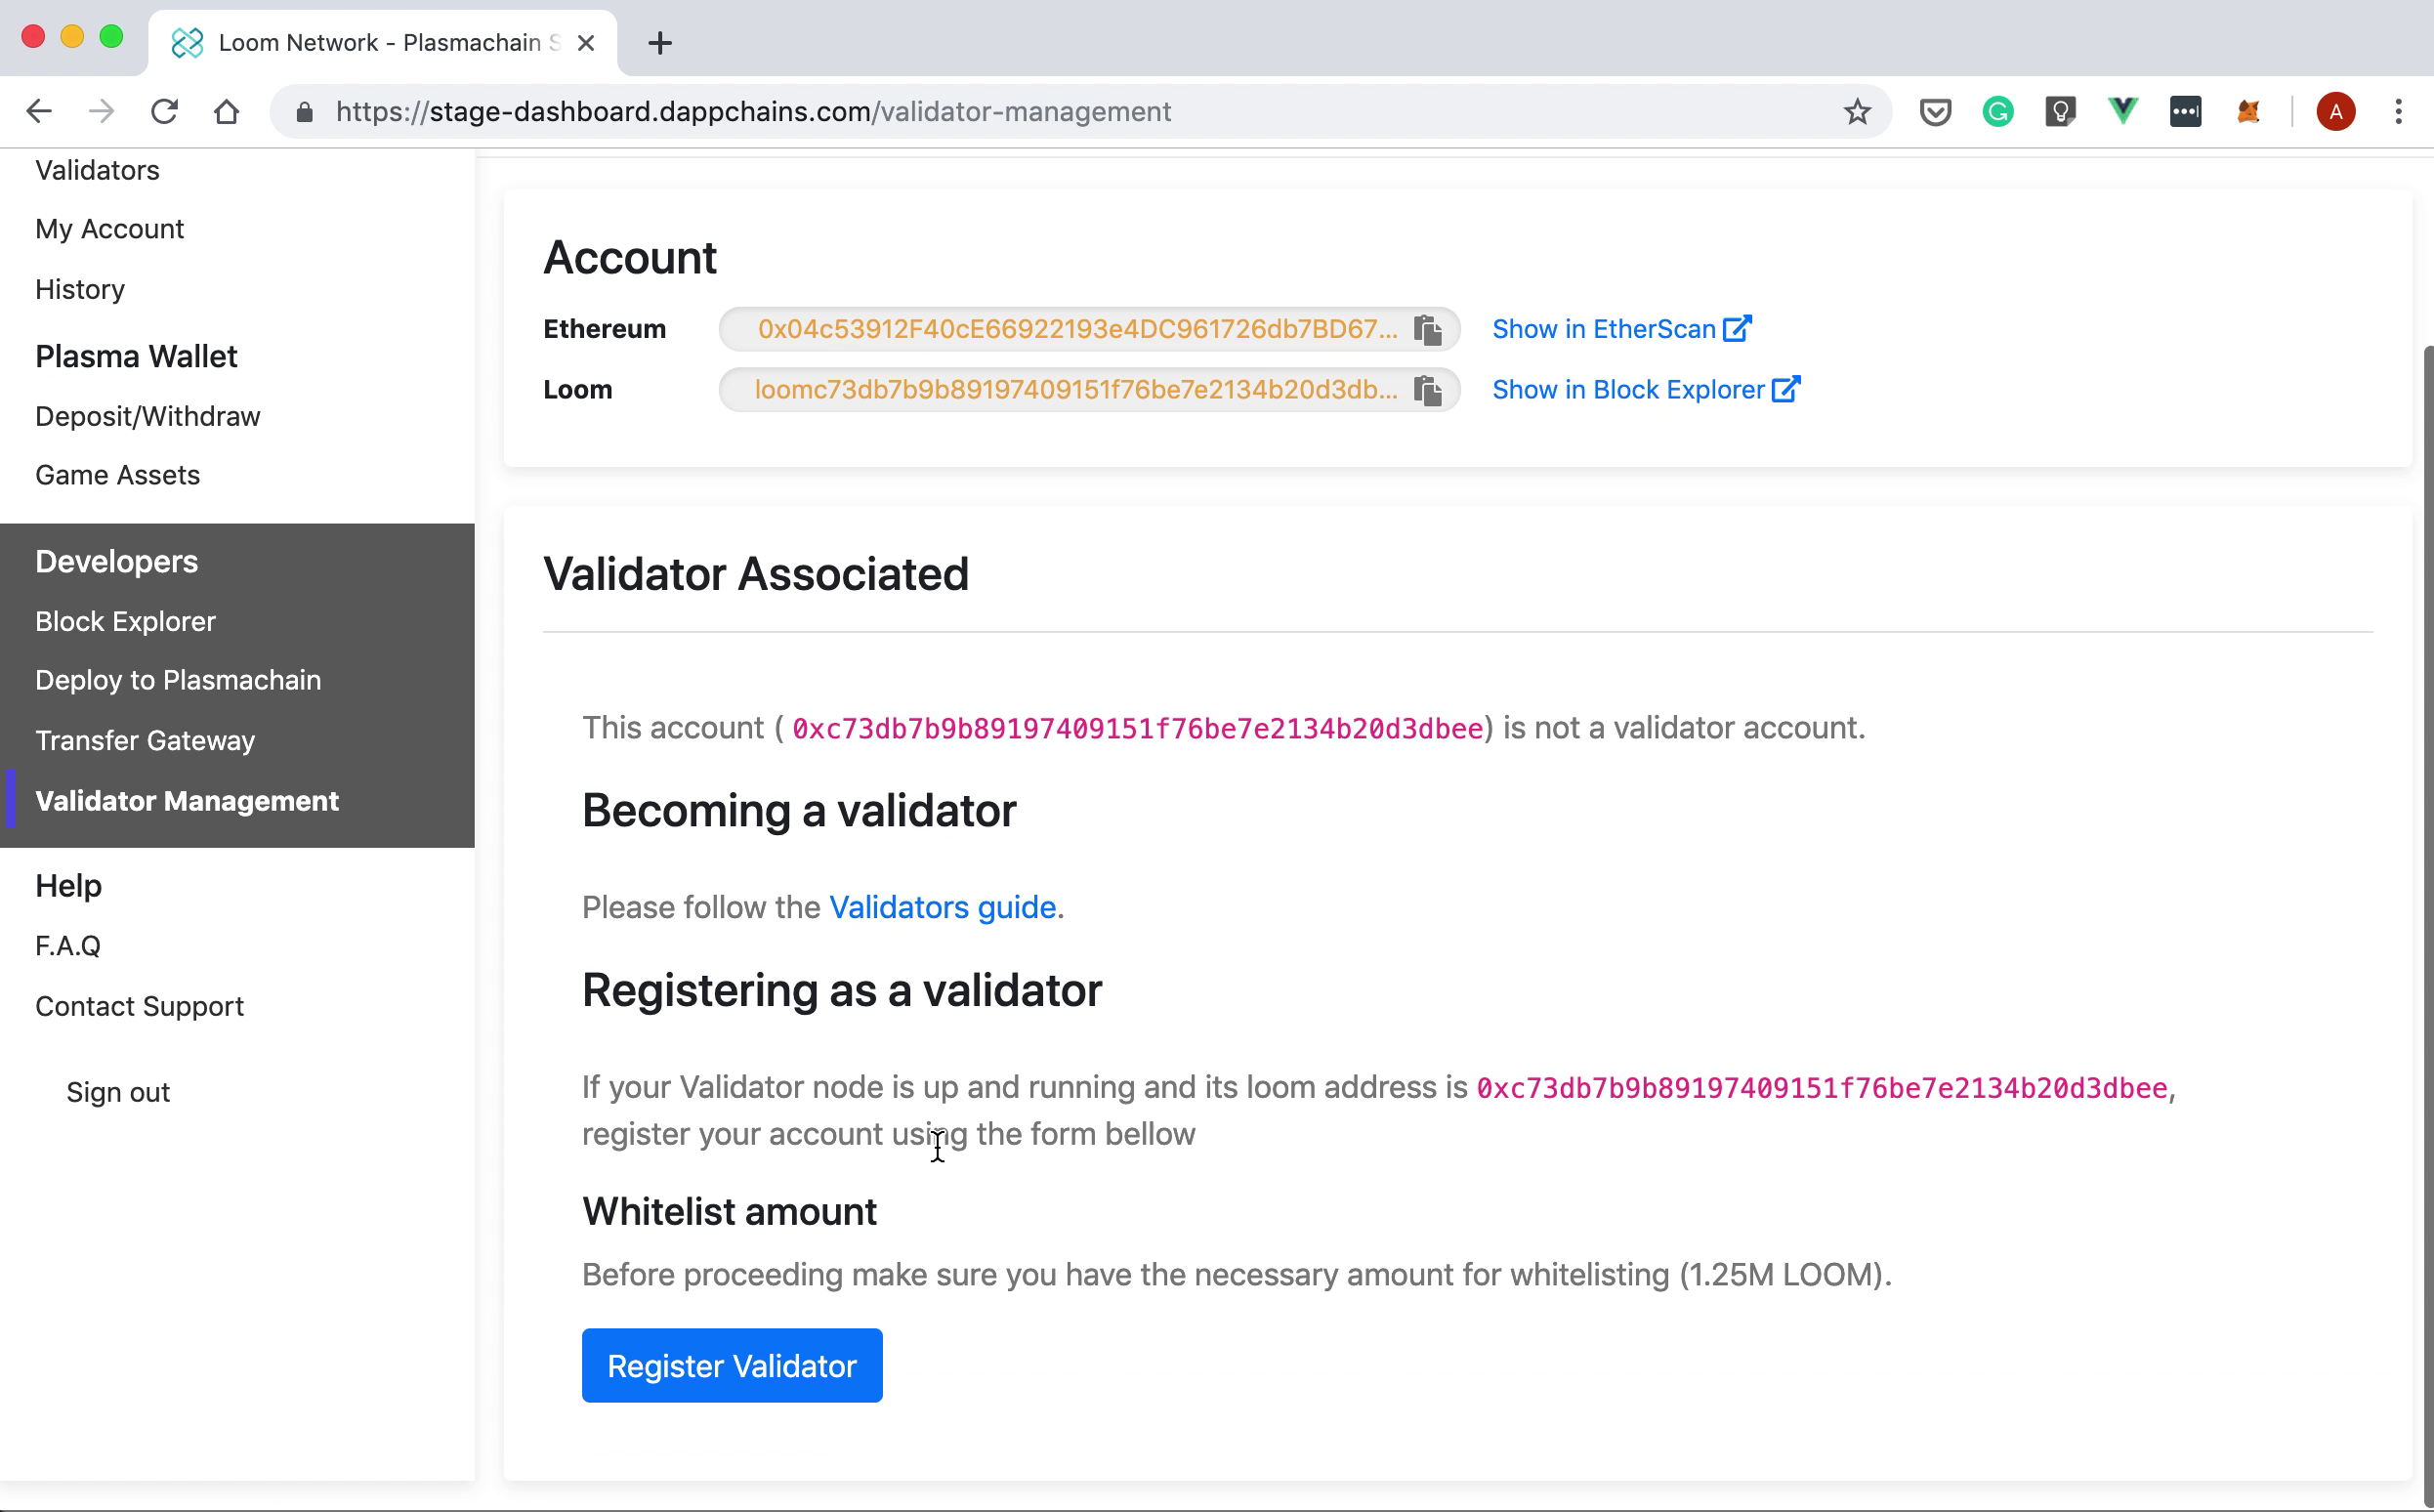
Click on the "Register Validator" button and you will be asked to fill in the following bits of information:
- Public key
- Validator Name
- Description
- Website
- Fee
Paste the content of your public key and, once you're finished filling in the form, click "Submit". A Metamask popup will ask you to sign the transaction:
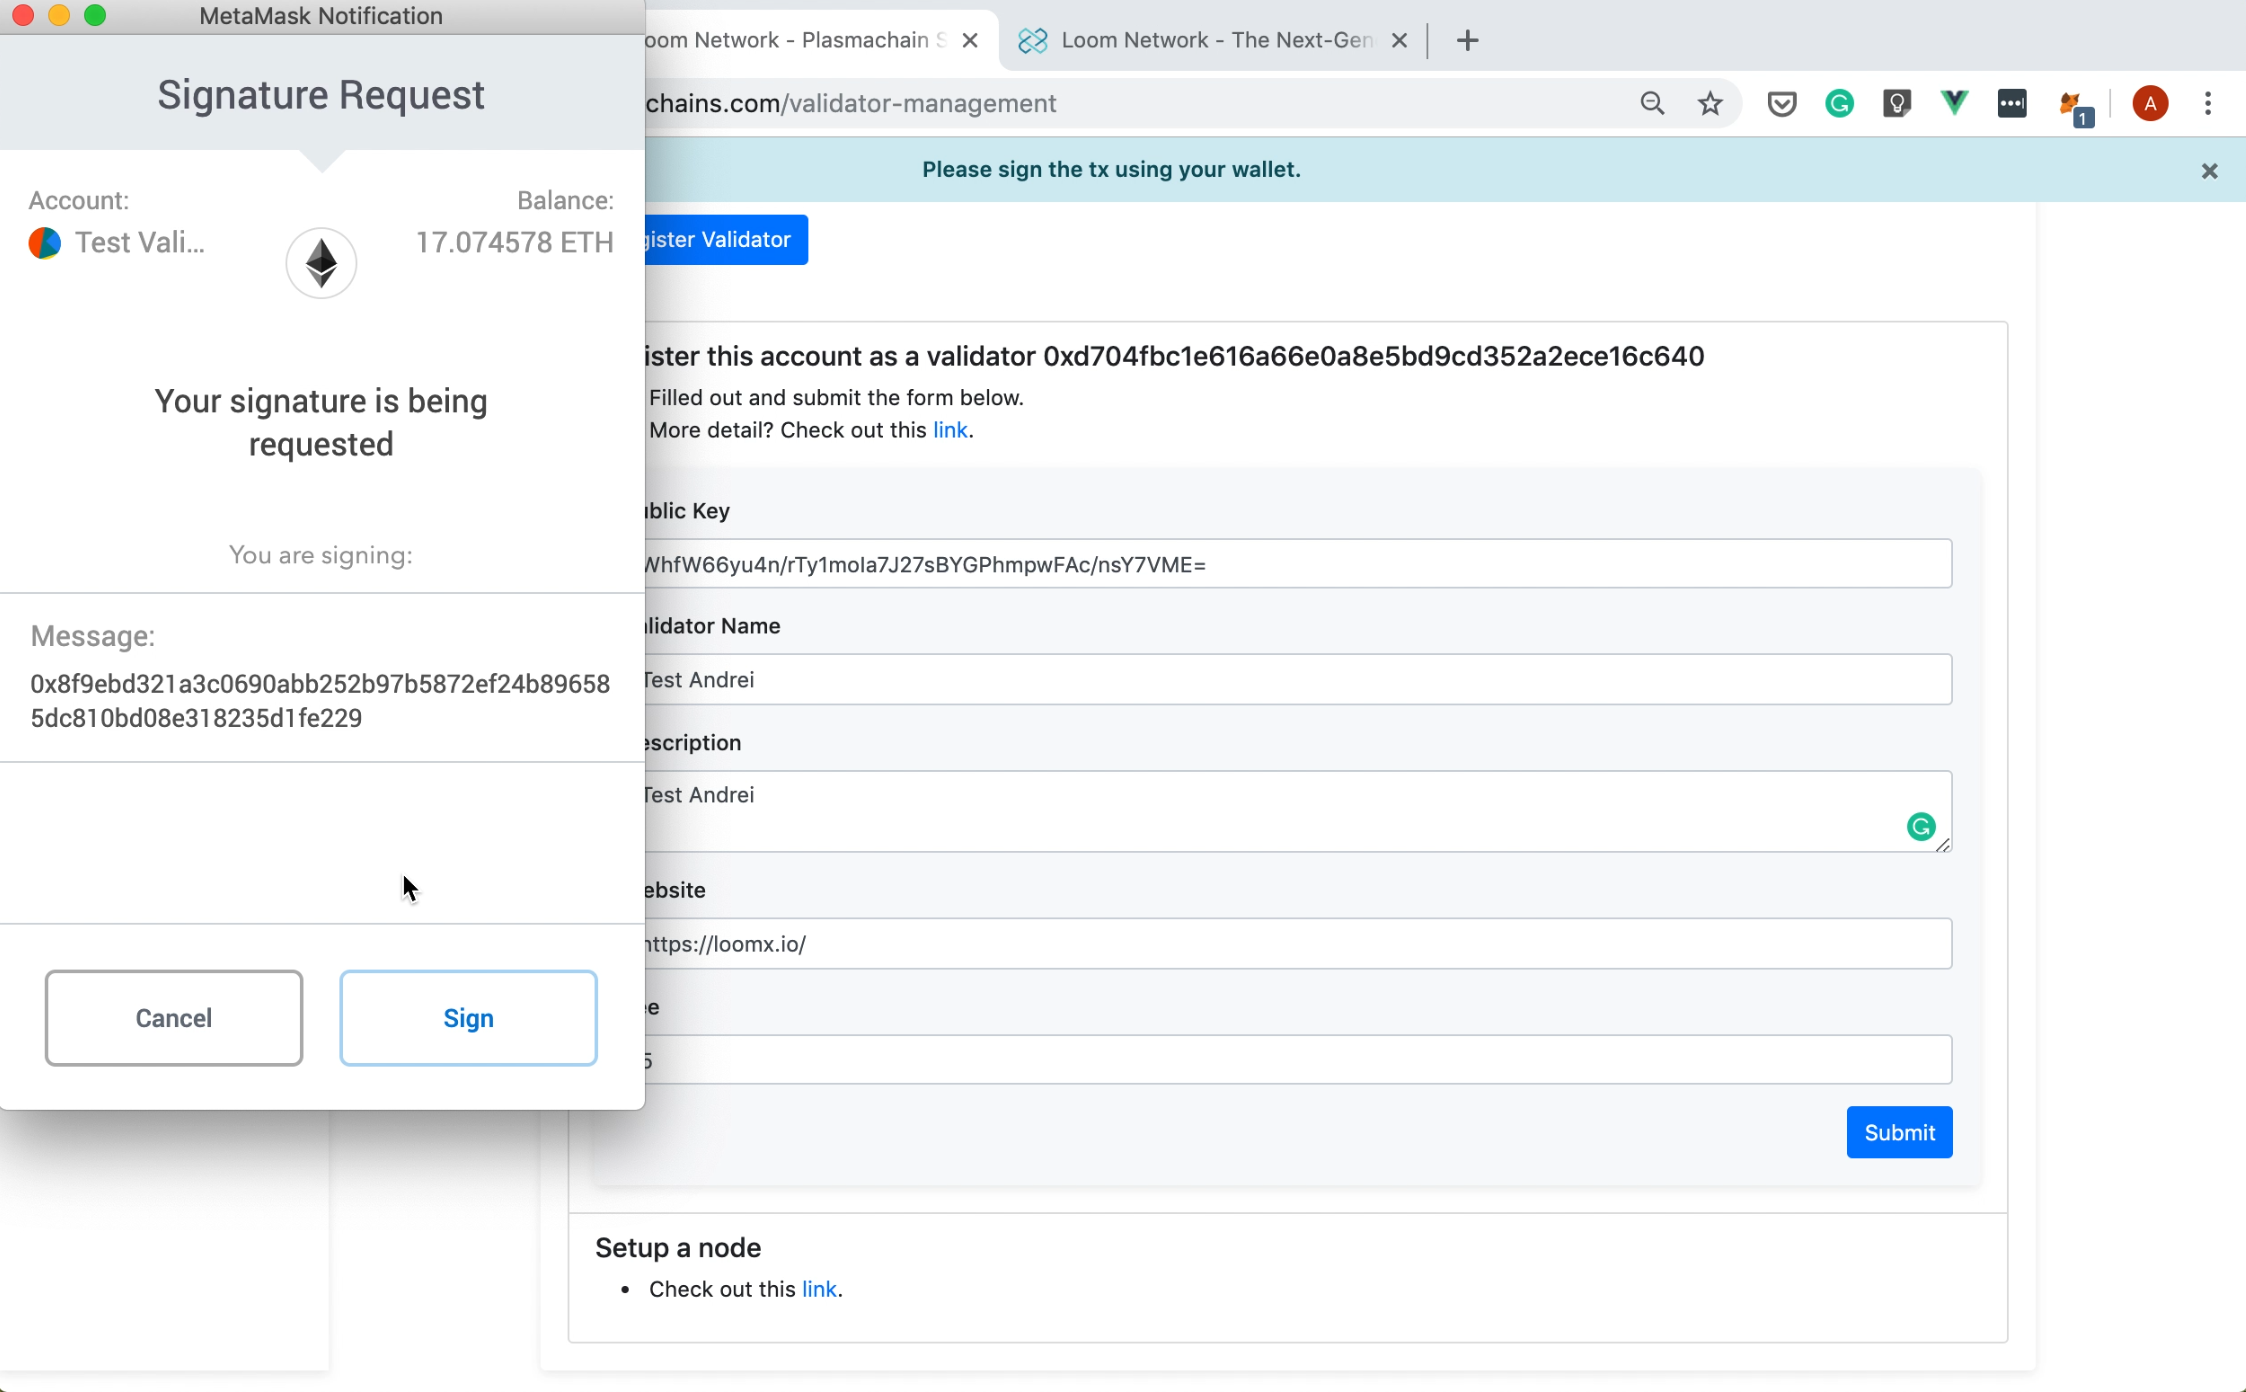
Lastly, you will need to sign a message similar to the one below:
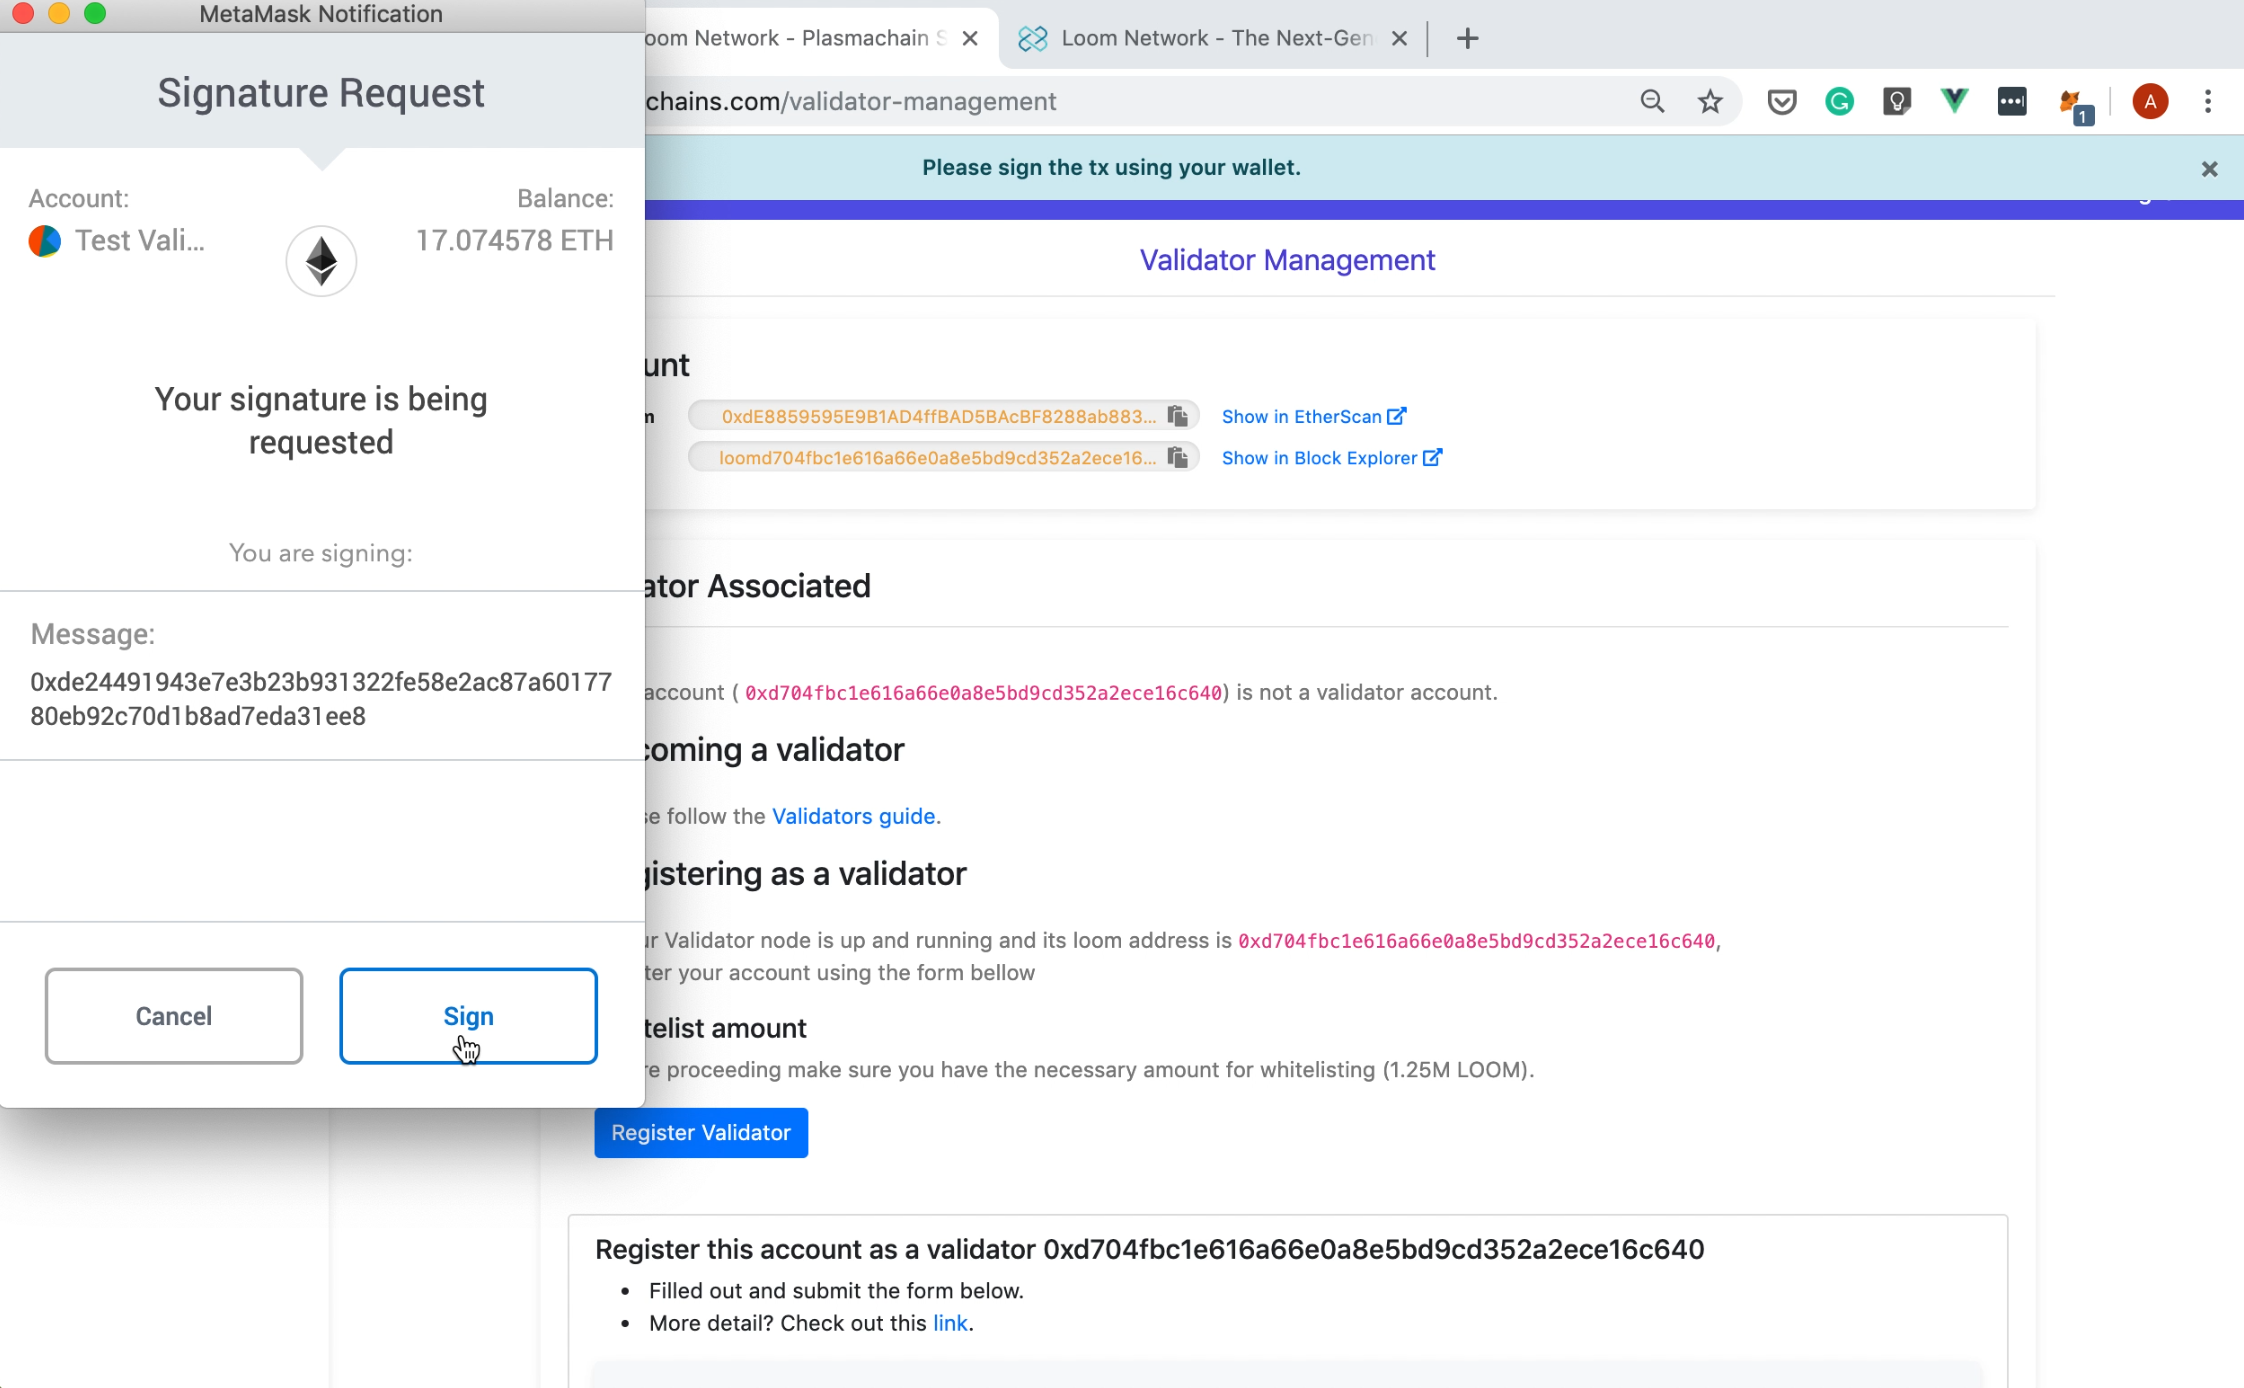
Hooray! You've just whitelisted your address. Now, the Validator Management page should look something like this:
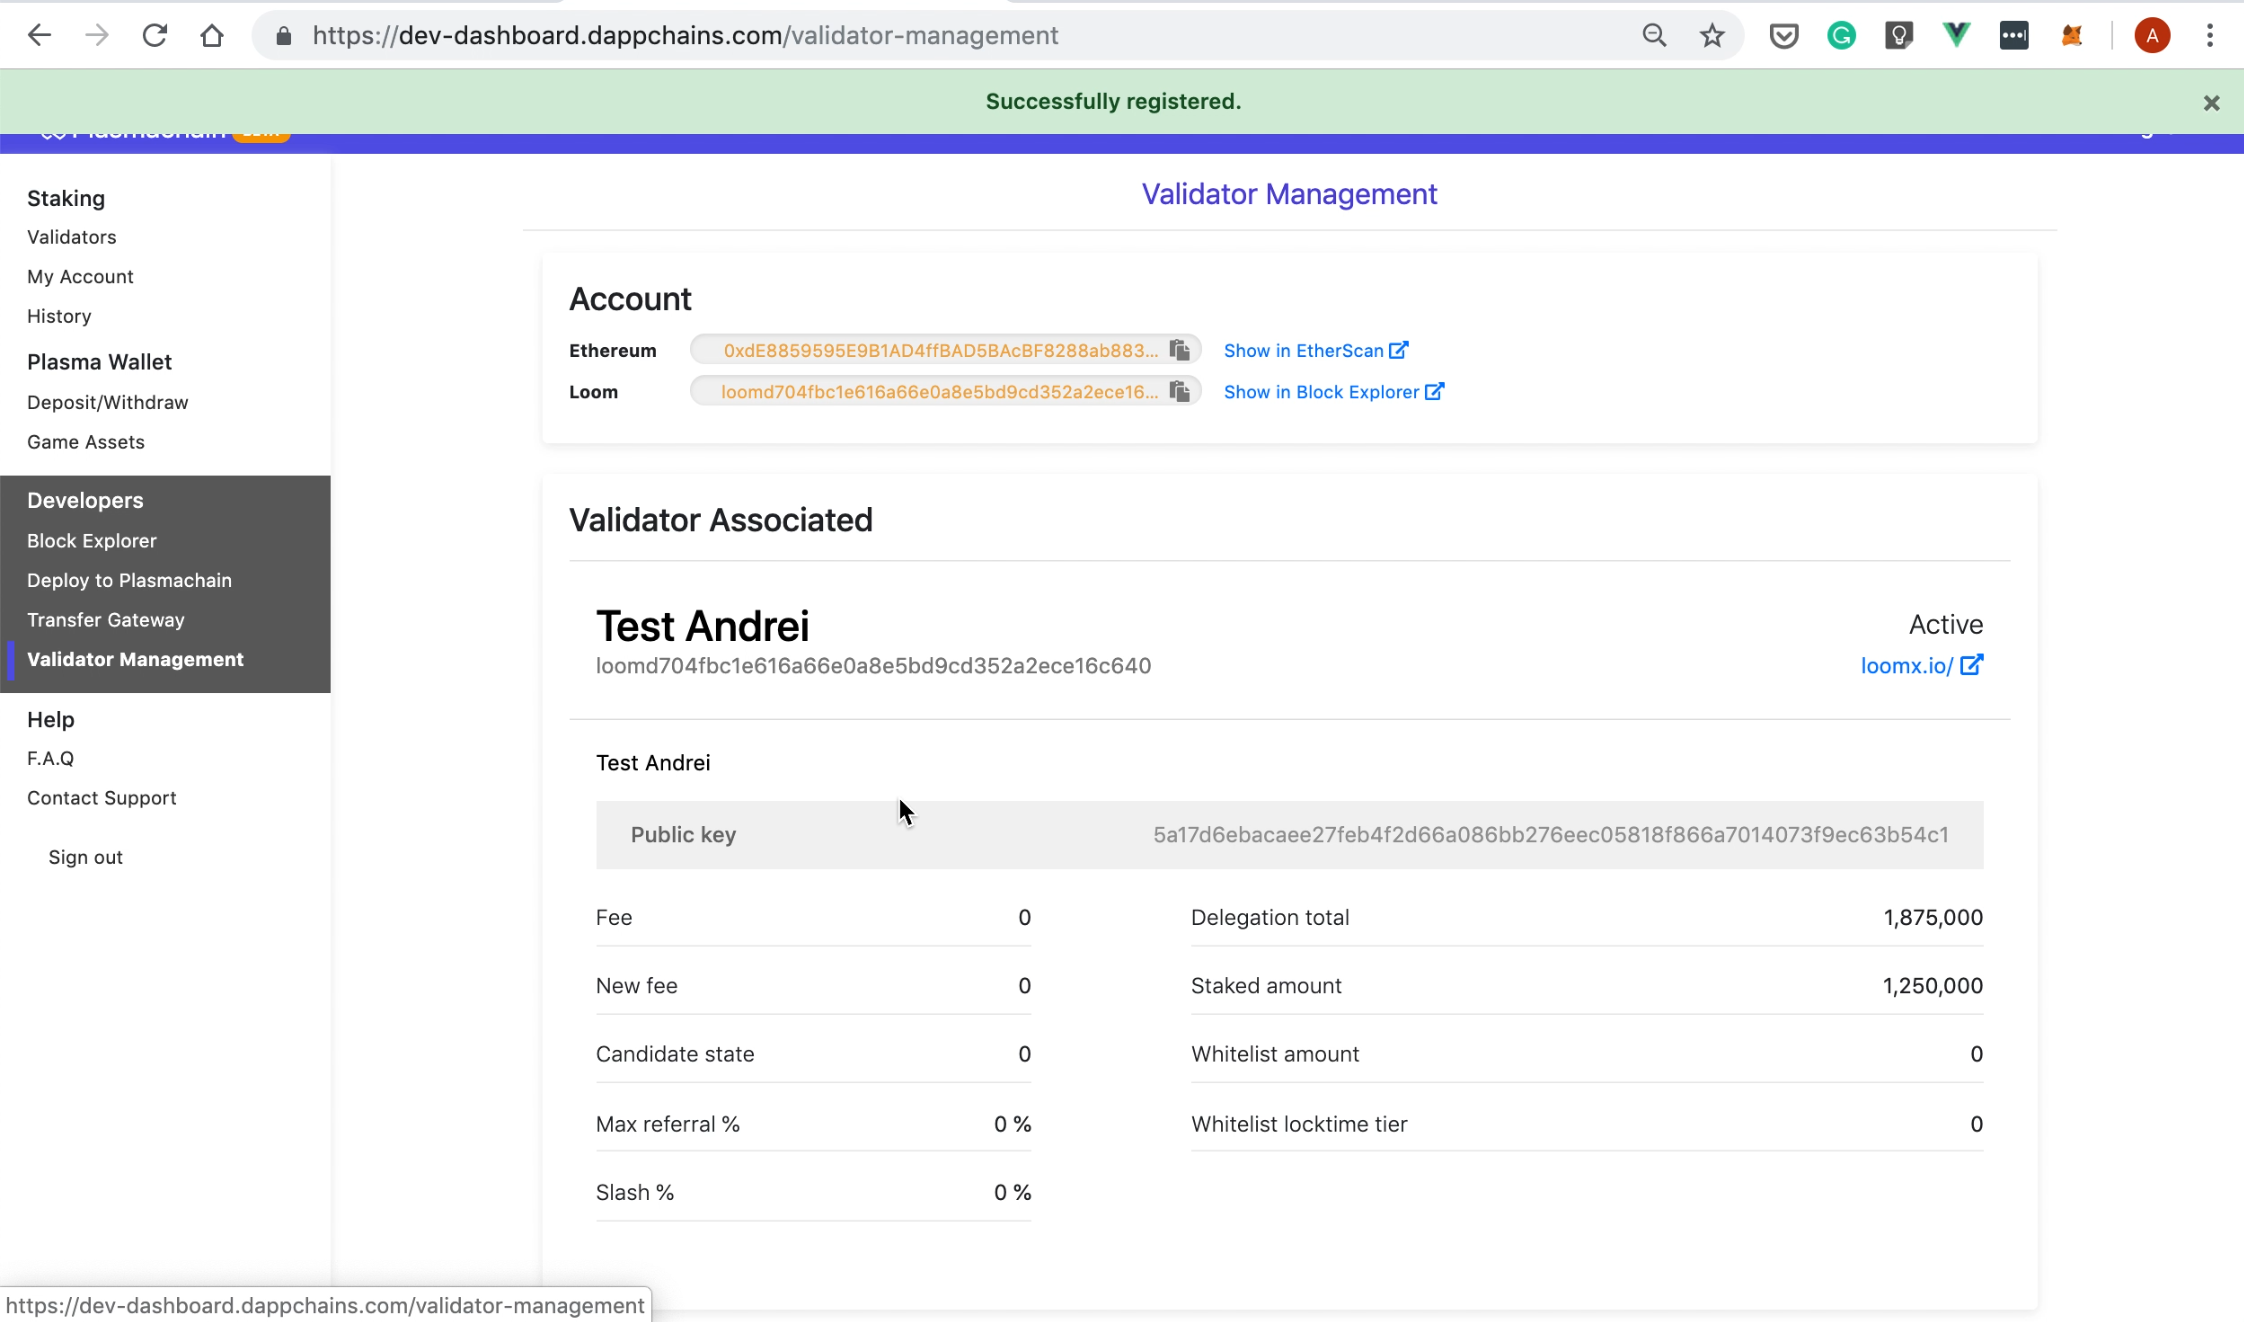
Awesome, right? You're on your way of becoming a validator on Loom!