
Purpose
Loom Network’s Basechain has recently integrated with Binance Chain, which means users can now easily deposit and withdraw BNB between Binance Chain and Loom.
This guide walks you through the basics of building a simple web app that lets users deposit and withdraw BNB between Binance Testnet and Loom Testnet.
Getting Started
The first thing we would want to do is to import a few things:
import {
  Client, LocalAddress, CryptoUtils, LoomProvider, Address, createDefaultTxMiddleware
} from 'loom-js'
import BN from 'bn.js'
import Web3 from 'web3'
import bnbToken from '../../truffle/build/contracts/BNBToken.json'
import { BinanceTransferGateway } from 'loom-js/dist/contracts'
import bech32 from 'bech32'
Next, we instantiate the client and configure the default middleware:
_createClient () {
    this.privateKey = this._getPrivateKey()
    this.publicKey = CryptoUtils.publicKeyFromPrivateKey(this.privateKey)
    const writeUrl = 'wss://extdev-basechain-us1.dappchains.com/websocket'
    const readUrl = 'wss://extdev-basechain-us1.dappchains.com/queryws'
    const networkId = 'extdev-plasma-us1'
    this.client = new Client(networkId, writeUrl, readUrl)
    this.client.on('error', msg => {
      console.error('Error connecting to extdev.', msg)
    })
    this.client.txMiddleware = createDefaultTxMiddleware(this.client, this.privateKey)
  }
Instantiating the BNB Coin Contract
On Loom, your BNB get automatically deposited to pre-deployed contract. Let's instantiate it using something like this:
  _getLoomBNBContract () {
    const bnbCoinAddress = '0x9ab4e22d56c0c4f7d494442714c82a605d2f28e0'
    this.loomBNBContract = new this.web3.eth.Contract(bnbToken.abi, bnbCoinAddress)
  }
The Loom Transfer Gateway Smart Contract
To withdraw BNB from Extdev to Binance Chain, we'll need to instantiate the Binance Transfer Gateway smart contract:
  async _getLoomBNBTransferGatewayContract () {
    this.loomBNBGateway = await BinanceTransferGateway.createAsync(
      this.client,
      Address.fromString('extdev-plasma-us1:' + this.loomUserAddress)
    )
  }
Deposit BNB
You can easily deposit BNB from Binance. First, you will need to create a wallet by following the instructions from this page. Next, head over to the testnet faucet to add testnet funds to your account.
Now, your can transfer some BNB to the Extdev hot wallet address: tbnb1gc7azhlup5a34t8us84x6d0fluw57deuf47q9w. There's something you must pay attention to: copy Extdev address and paste it into the memo field. Our demo will generate a private key for you and compute the extdev address:
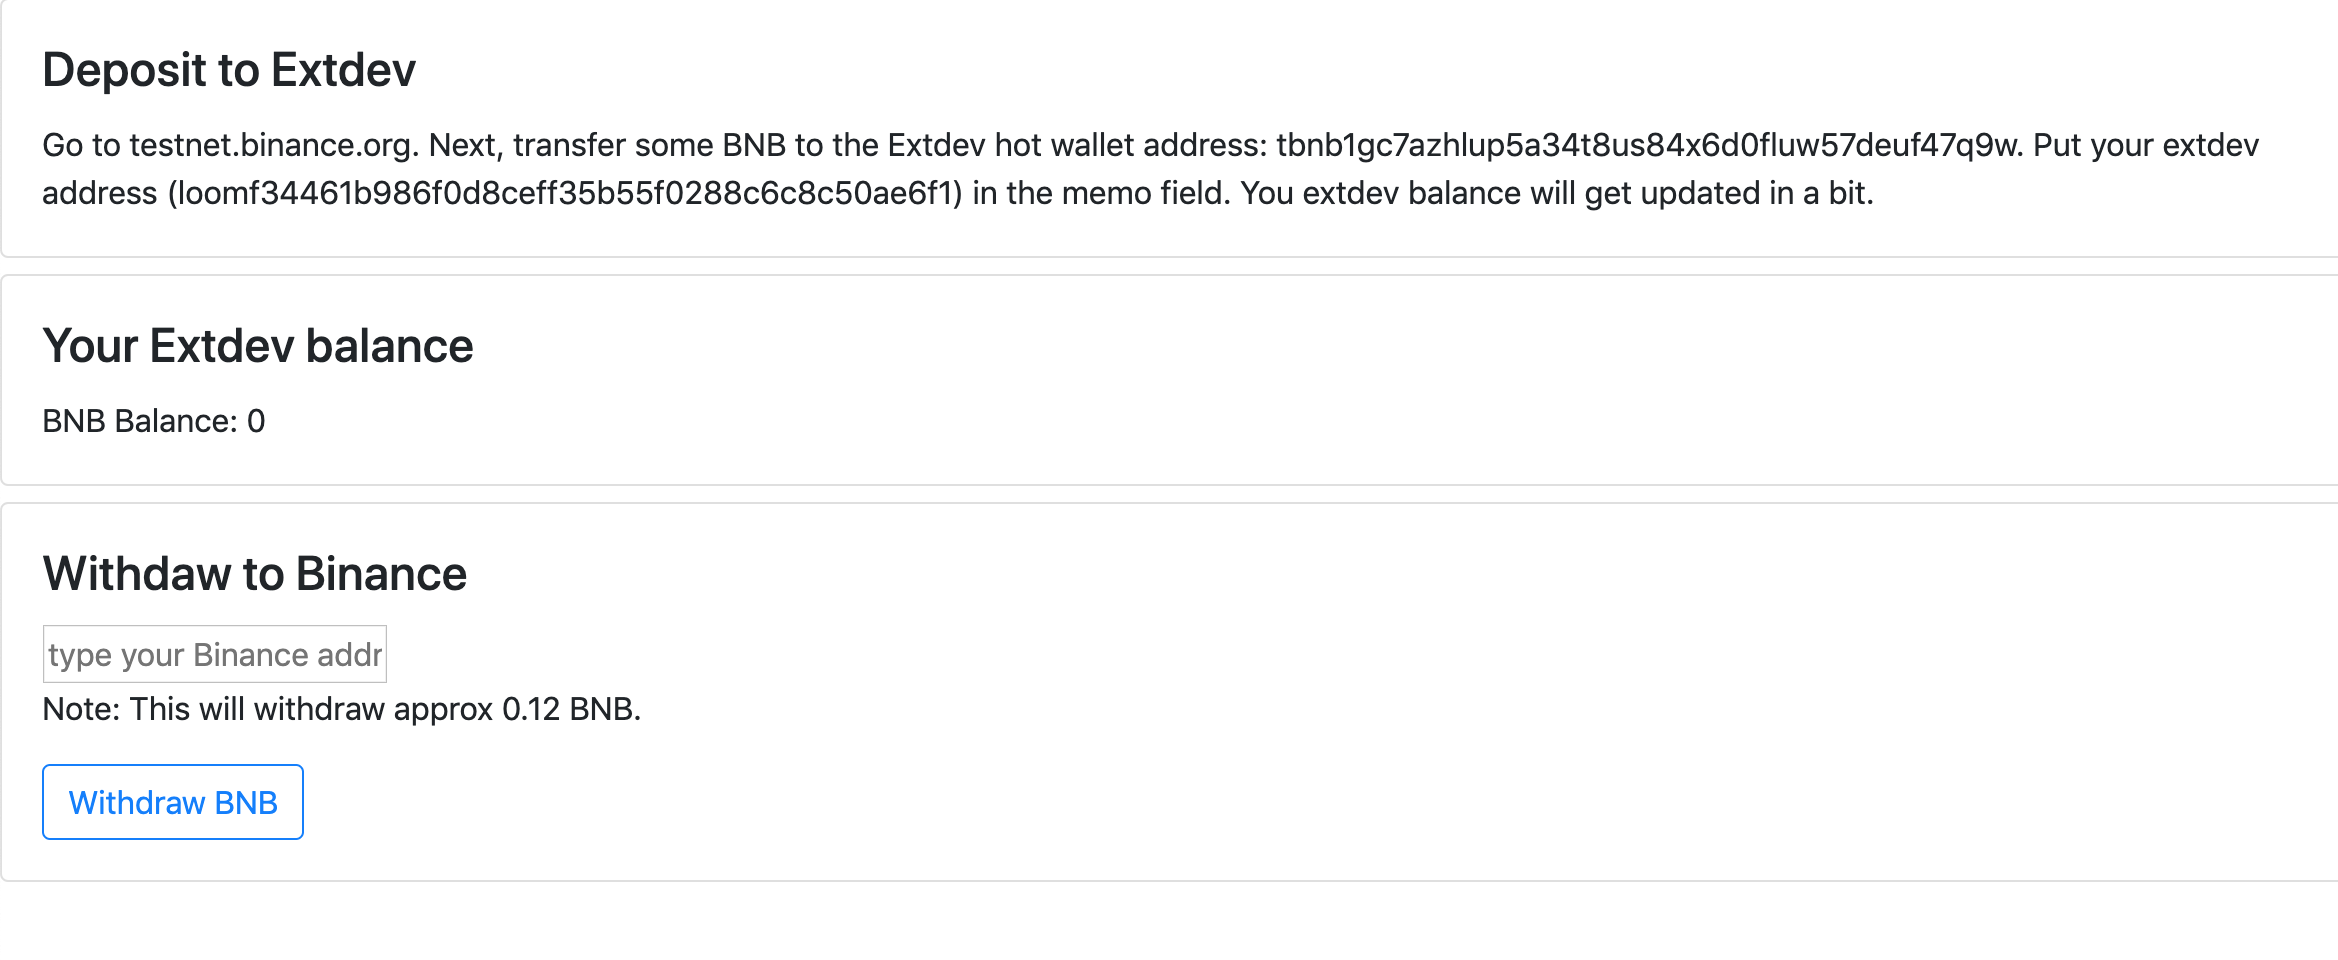
Just follow the instructions and you're set.
Withdraw BNB
To withdraw BNB, you should basically follow classic approve and transfer flow:
- Approve the Transfer Gateway to take the token:
await this.loomBNBContract.methods.approve(loomBNBTransferGatewayAddress, amountInt + fee).send({ from: this.loomUserAddress })
- Withdraw using something like this:
await this.loomBNBGateway.withdrawTokenAsync(new BN(amountInt - fee, 10), bnbTokenAddress, recipient)
Refreshing the BNB Balance
To automatically refresh the BNB balance, we're listening to events like so:
  async _filterEvents () {
    this.loomBNBContract.events.Transfer({ filter: { address: this.loomUserAddress } }, async (err, event) => {
      if (err) console.error('Error on event', err)
      this._refreshBalance()
    })
  }
Next, we refresh the balance with:
  async _refreshBalance () {
    this.bnbBalance = await this.loomBNBContract.methods.balanceOf(this.loomUserAddress).call({ from: this.loomUserAddress })
    this.bnbBalance = this.bnbBalance / 100000000
    EventBus.$emit('updateBalance', { newBalance: this.bnbBalance })
  }
Demo Project
We've built a small demo project to showcase this functionality. The source code is available here.