
Purpose
A payable function is a special type of function that can receive ETH. This way, the developers can require a certain payment to the contract to execute a function.
This tutorial shows how you can receive funds using payable functions on Loom. This tutorial is laid out in a fashion that allows you to use it as a reference while you’re building your DApp and is intended for readers who have prior exposure to JavaScript programming and Solidity.
Prerequisites
- Node.js 10 or higher. To check out if Node.js is installed on your computer, issue the following command in a terminal window:
node -v
If Node.js is already installed, you'll see something like the following:
v10.15.3
If Node.js is not installed, you can download the installer from the Download page.
- Git. To check if Git is installed on your system enter, type the following command:
git version
If Git is installed on your computer, you'll see something like the following:
git version 2.18.2
If Git is not installed, you can refer to the Getting Started - Installing Git page for details about installing Git.
- A Rinkeby account with some ETH in it.
1. Setting Things Up
To showcase how payable functions work, we've written a simple Solidity contract called PayableDemo, and added a user interface on top of it.
In this section, we'll walk you the steps required to clone the loom-examples repo and deploy the PayableDemo contract.
- First, let's clone the
loom-examplesrepository. Fire up a new terminal window, move into your projects directory, and enter the following command:
git clone https://github.com/loomnetwork/loom-examples.git
- Move into the
loom-examplesdirectory and then install the dependencies with:
cd loom-examples && npm install
- To deploy the
PayableDemosmart contract, you need a private key. Use the following command to generate a private key:
npm run gen:loom-key
The above command saves your private key into the loom/loom_private_key file:
ls -la loom/loom_private_key
-rw-r--r-- 1 andrei staff 88 Feb 24 23:14 loom/loom_private_key
- At this point, you can deploy the
PayableDemocontract by entering the following command:
npm run migrate:payable-demo
If everything went well, you should see something like the following printed to the console:
> [email protected] migrate:payable-demo /Users/andrei/Documents/test/loom-examples
>  cd loom && npx truffle migrate --network extdev -f 6 --to 6

Starting migrations...
======================
> Network name:    'extdev'
> Network id:      9545242630824
> Block gas limit: 0x0


6_payable_demo.js
=================

   Replacing 'PayableDemo'
   -----------------------
   > transaction hash:    0x865488e8a27badbde24ea6fd2e39a5cca42e919521aa141a4cbf1dfdbb152902
   > Blocks: 2            Seconds: 4
   > contract address:    0x57dA2E46d75558d99E445FE6838c2149401509a8
   > block number:        11079852
   > block timestamp:     1582612615
   > account:             0x240F14c57a3F48B277109046FaC35cA09C6F5E2E
   > balance:             0
   > gas used:            0
   > gas price:           0 gwei
   > value sent:          0 ETH
   > total cost:          0 ETH


*************************************************************************

PayableDemo Contract Address: 0x57dA2E46d75558d99E445FE6838c2149401509a8

*************************************************************************


   > Saving migration to chain.
   > Saving artifacts
   -------------------------------------
   > Total cost:                   0 ETH


Summary
=======
> Total deployments:   1
> Final cost:          0 ETH
Note that the above output was truncated for brevity.
2. Transfer ETH to your Loom account
Now that you've deployed the PayableDemo contract let's transfer some ETH to your Extdev account.
- Run the following command to start the
loom-examplesdemo:
npm run start
The above command starts a web server on port 8080.
- Point your browser to http://localhost:8080, and you'll see something similar to the screenshot below:
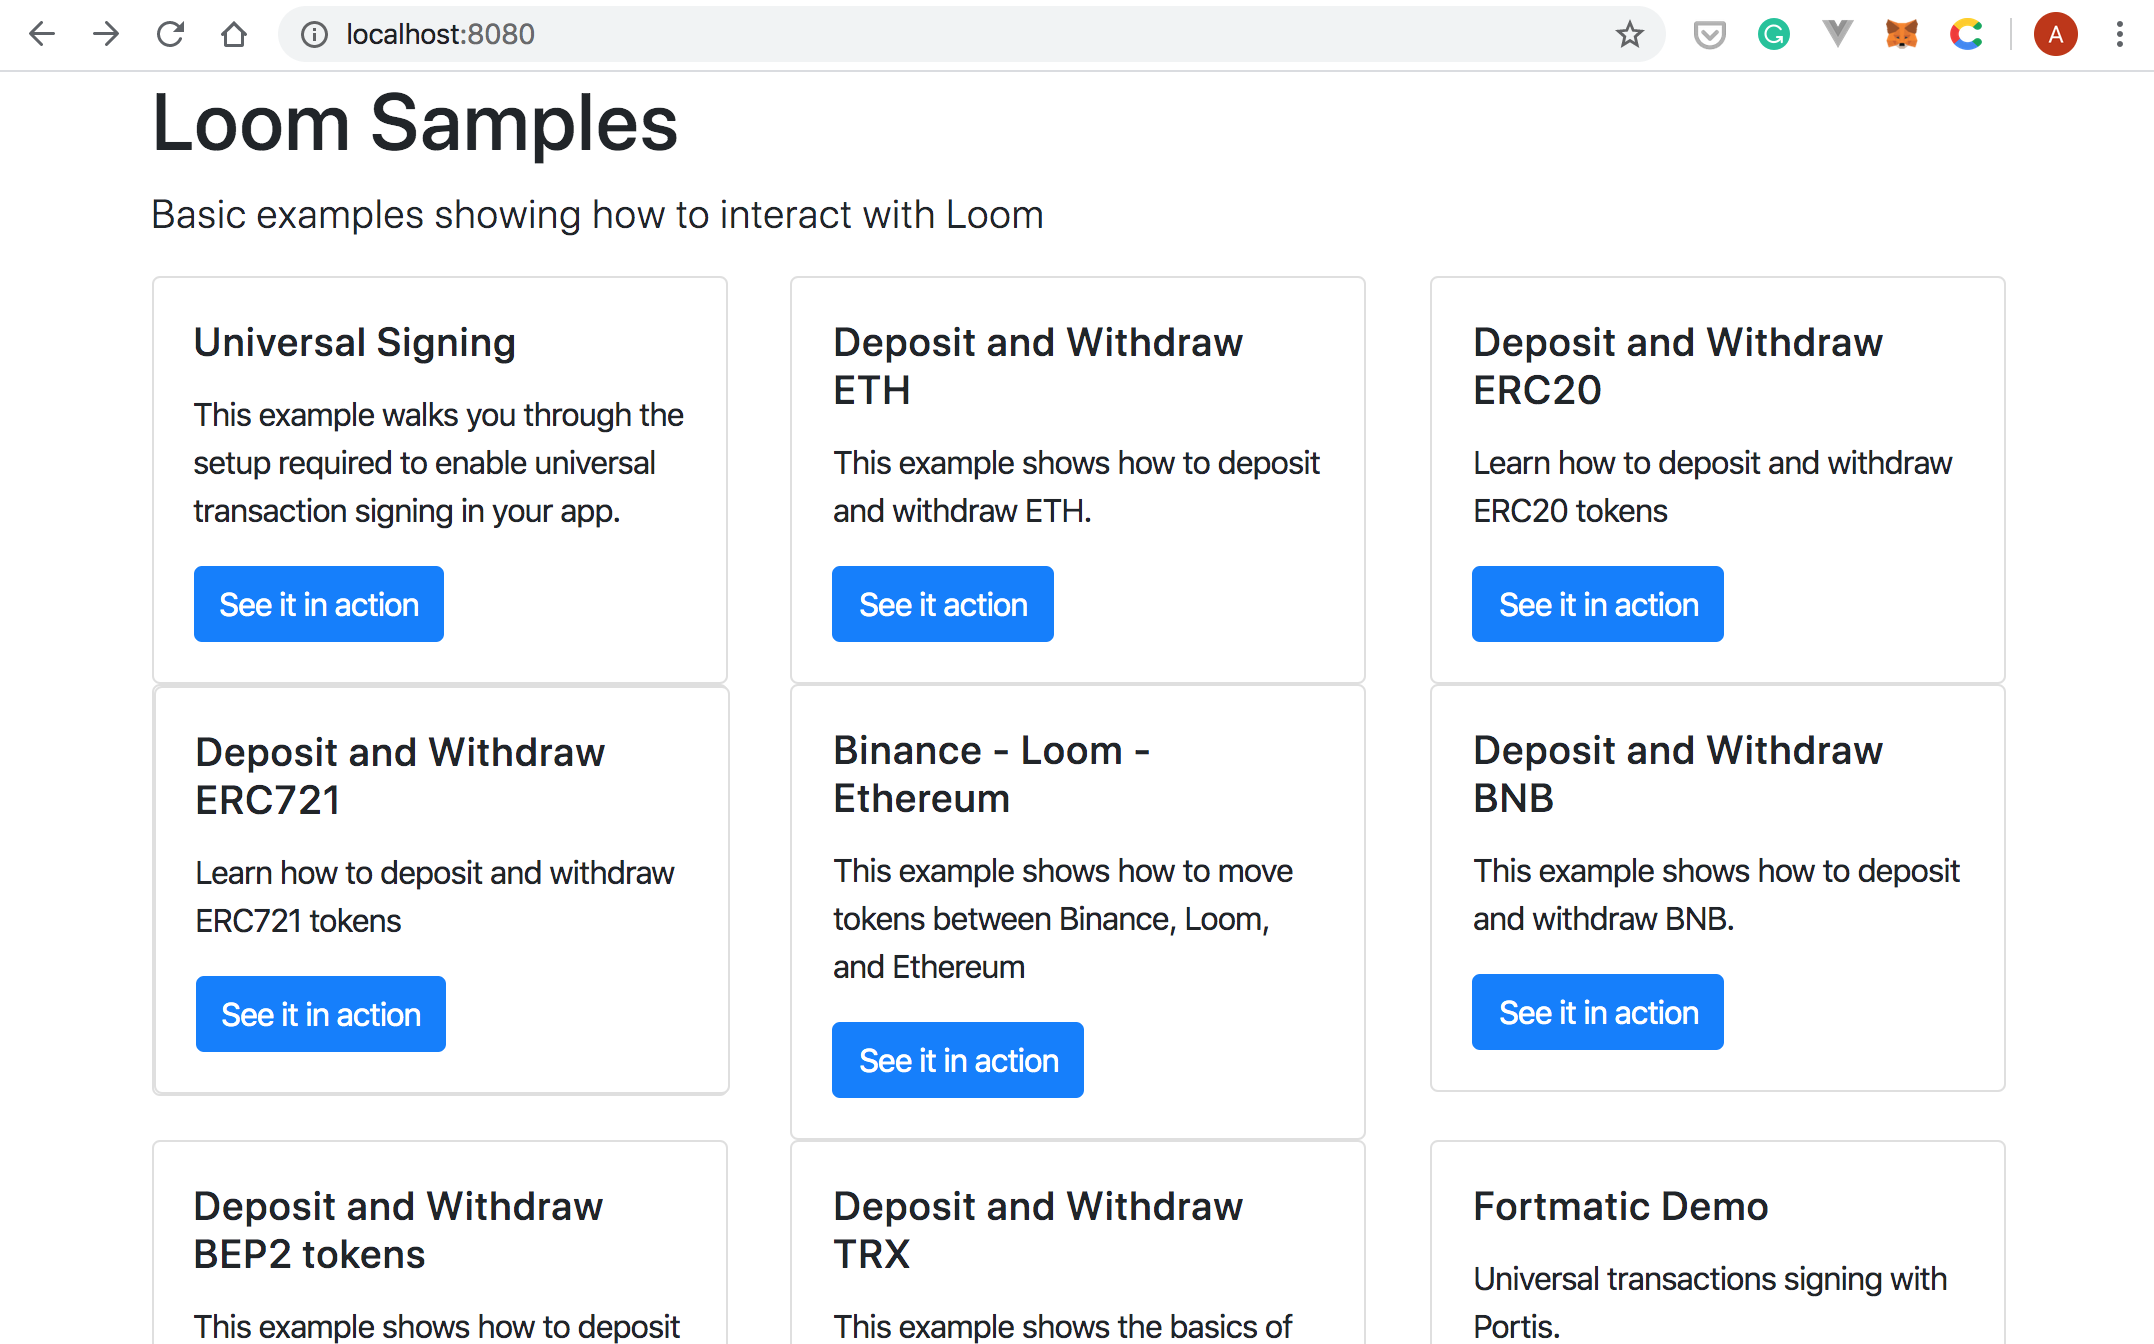
- Select
Deposit ETHand follow the instructions:
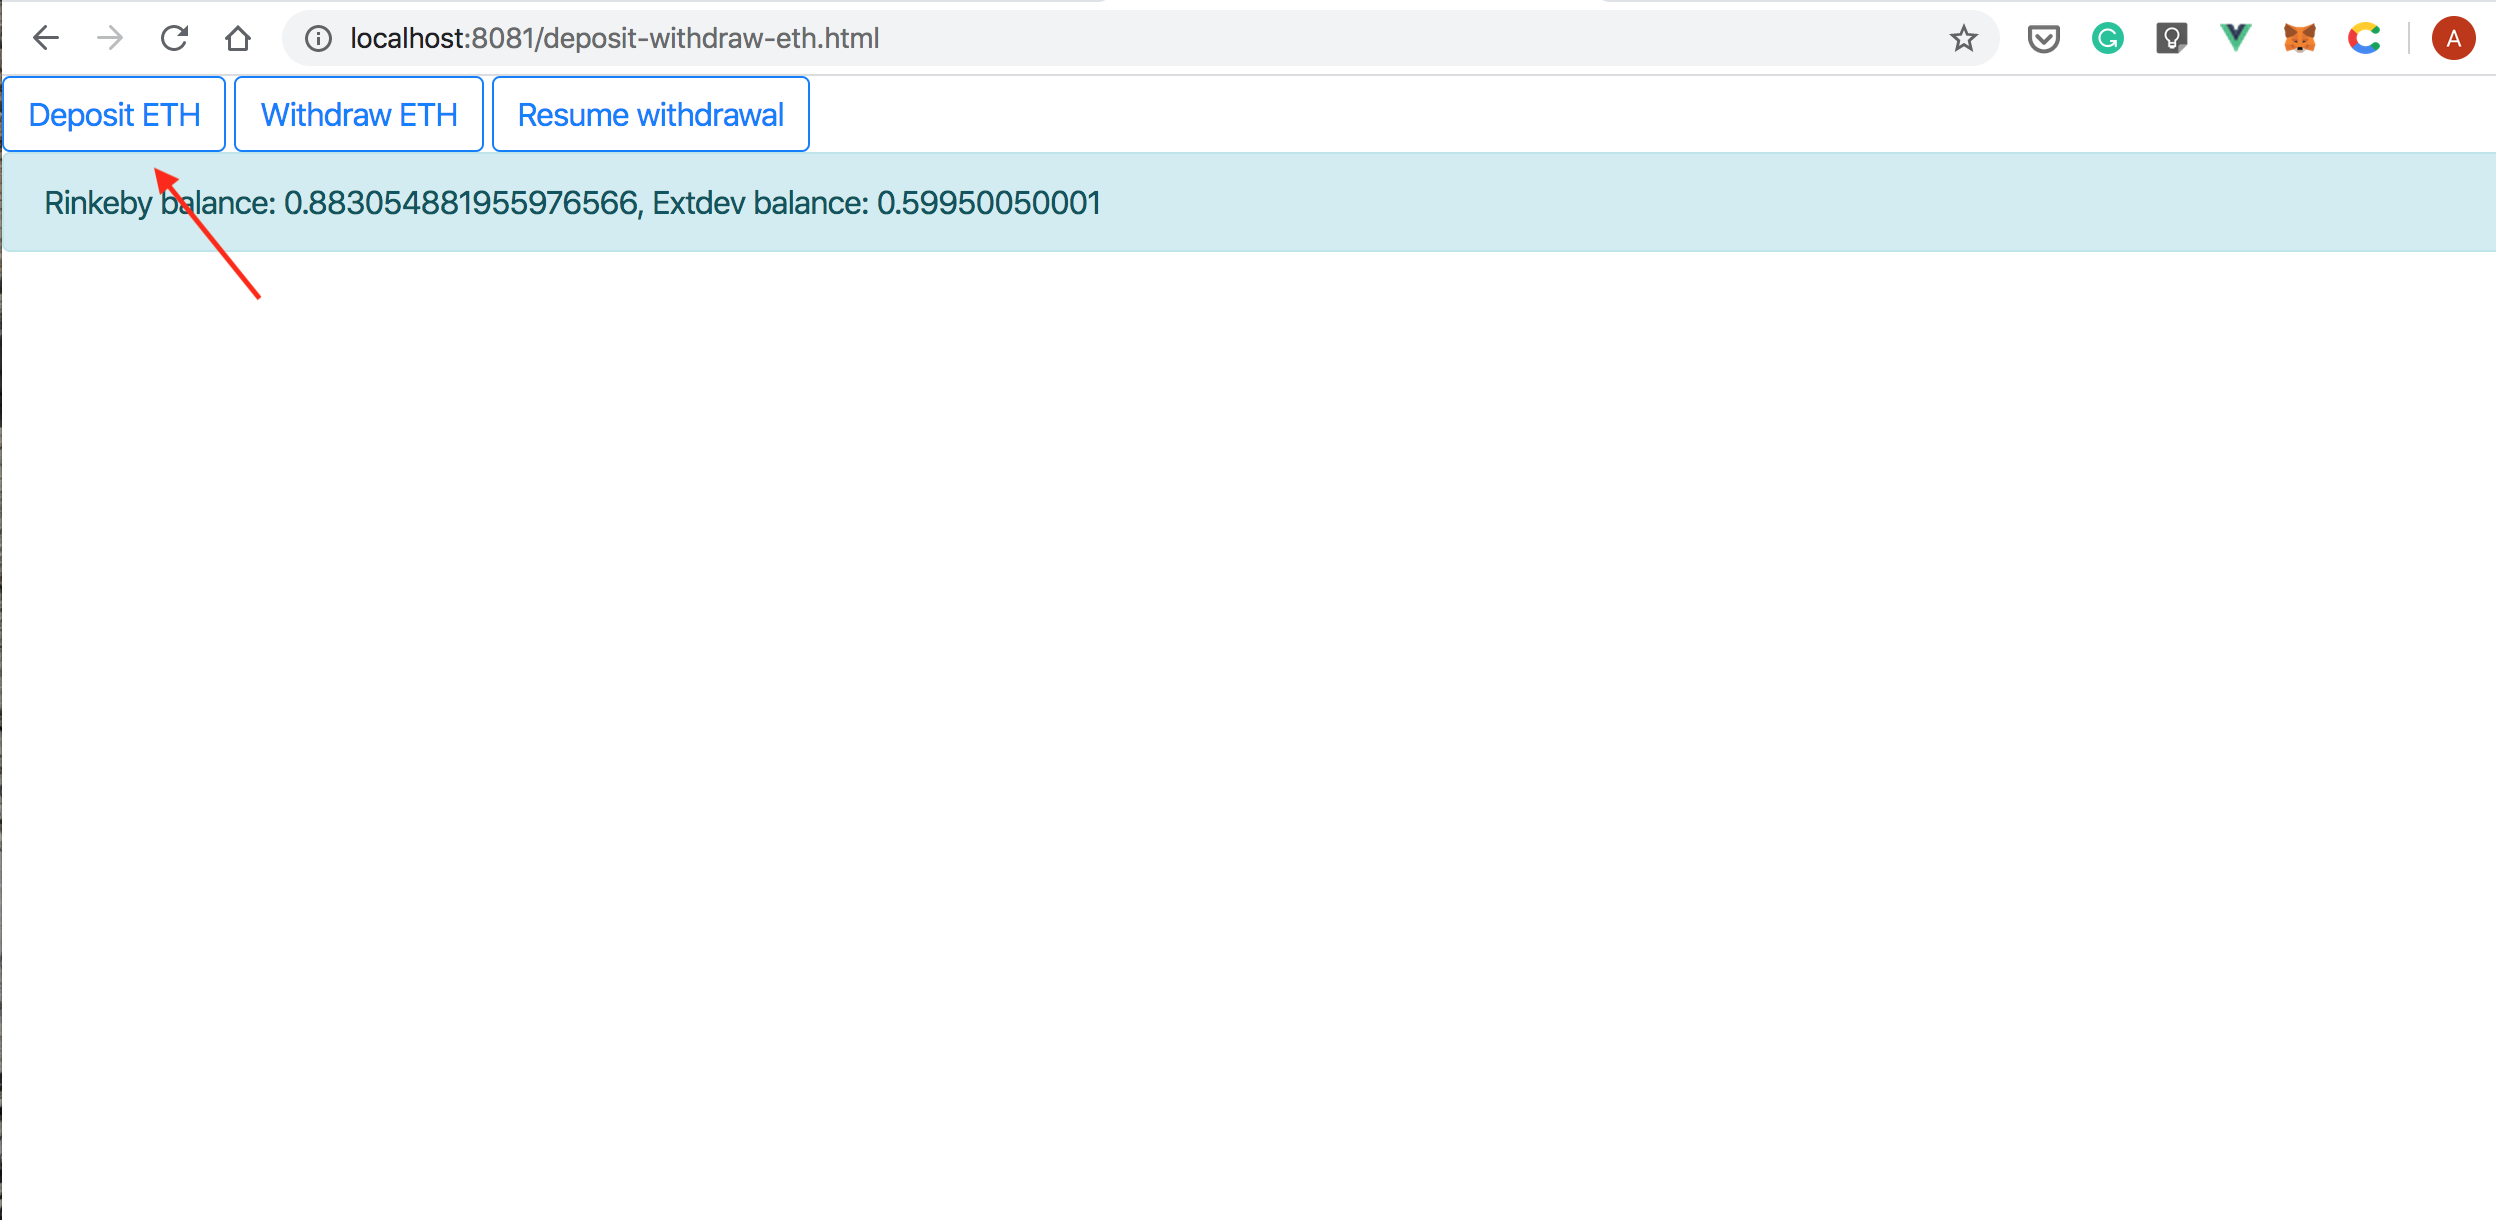
This transfers 0.2 ETH from Rinkeby to Extdev.
☞ The transfer gateway waits for 10 blocks to be confirmed on Rinkeby. Thus, it'll take a bit of time until the balances are updated.
3. Call the payable function
- Move back to the Loom Examples Landing page and, this time, select
Payable Demo:
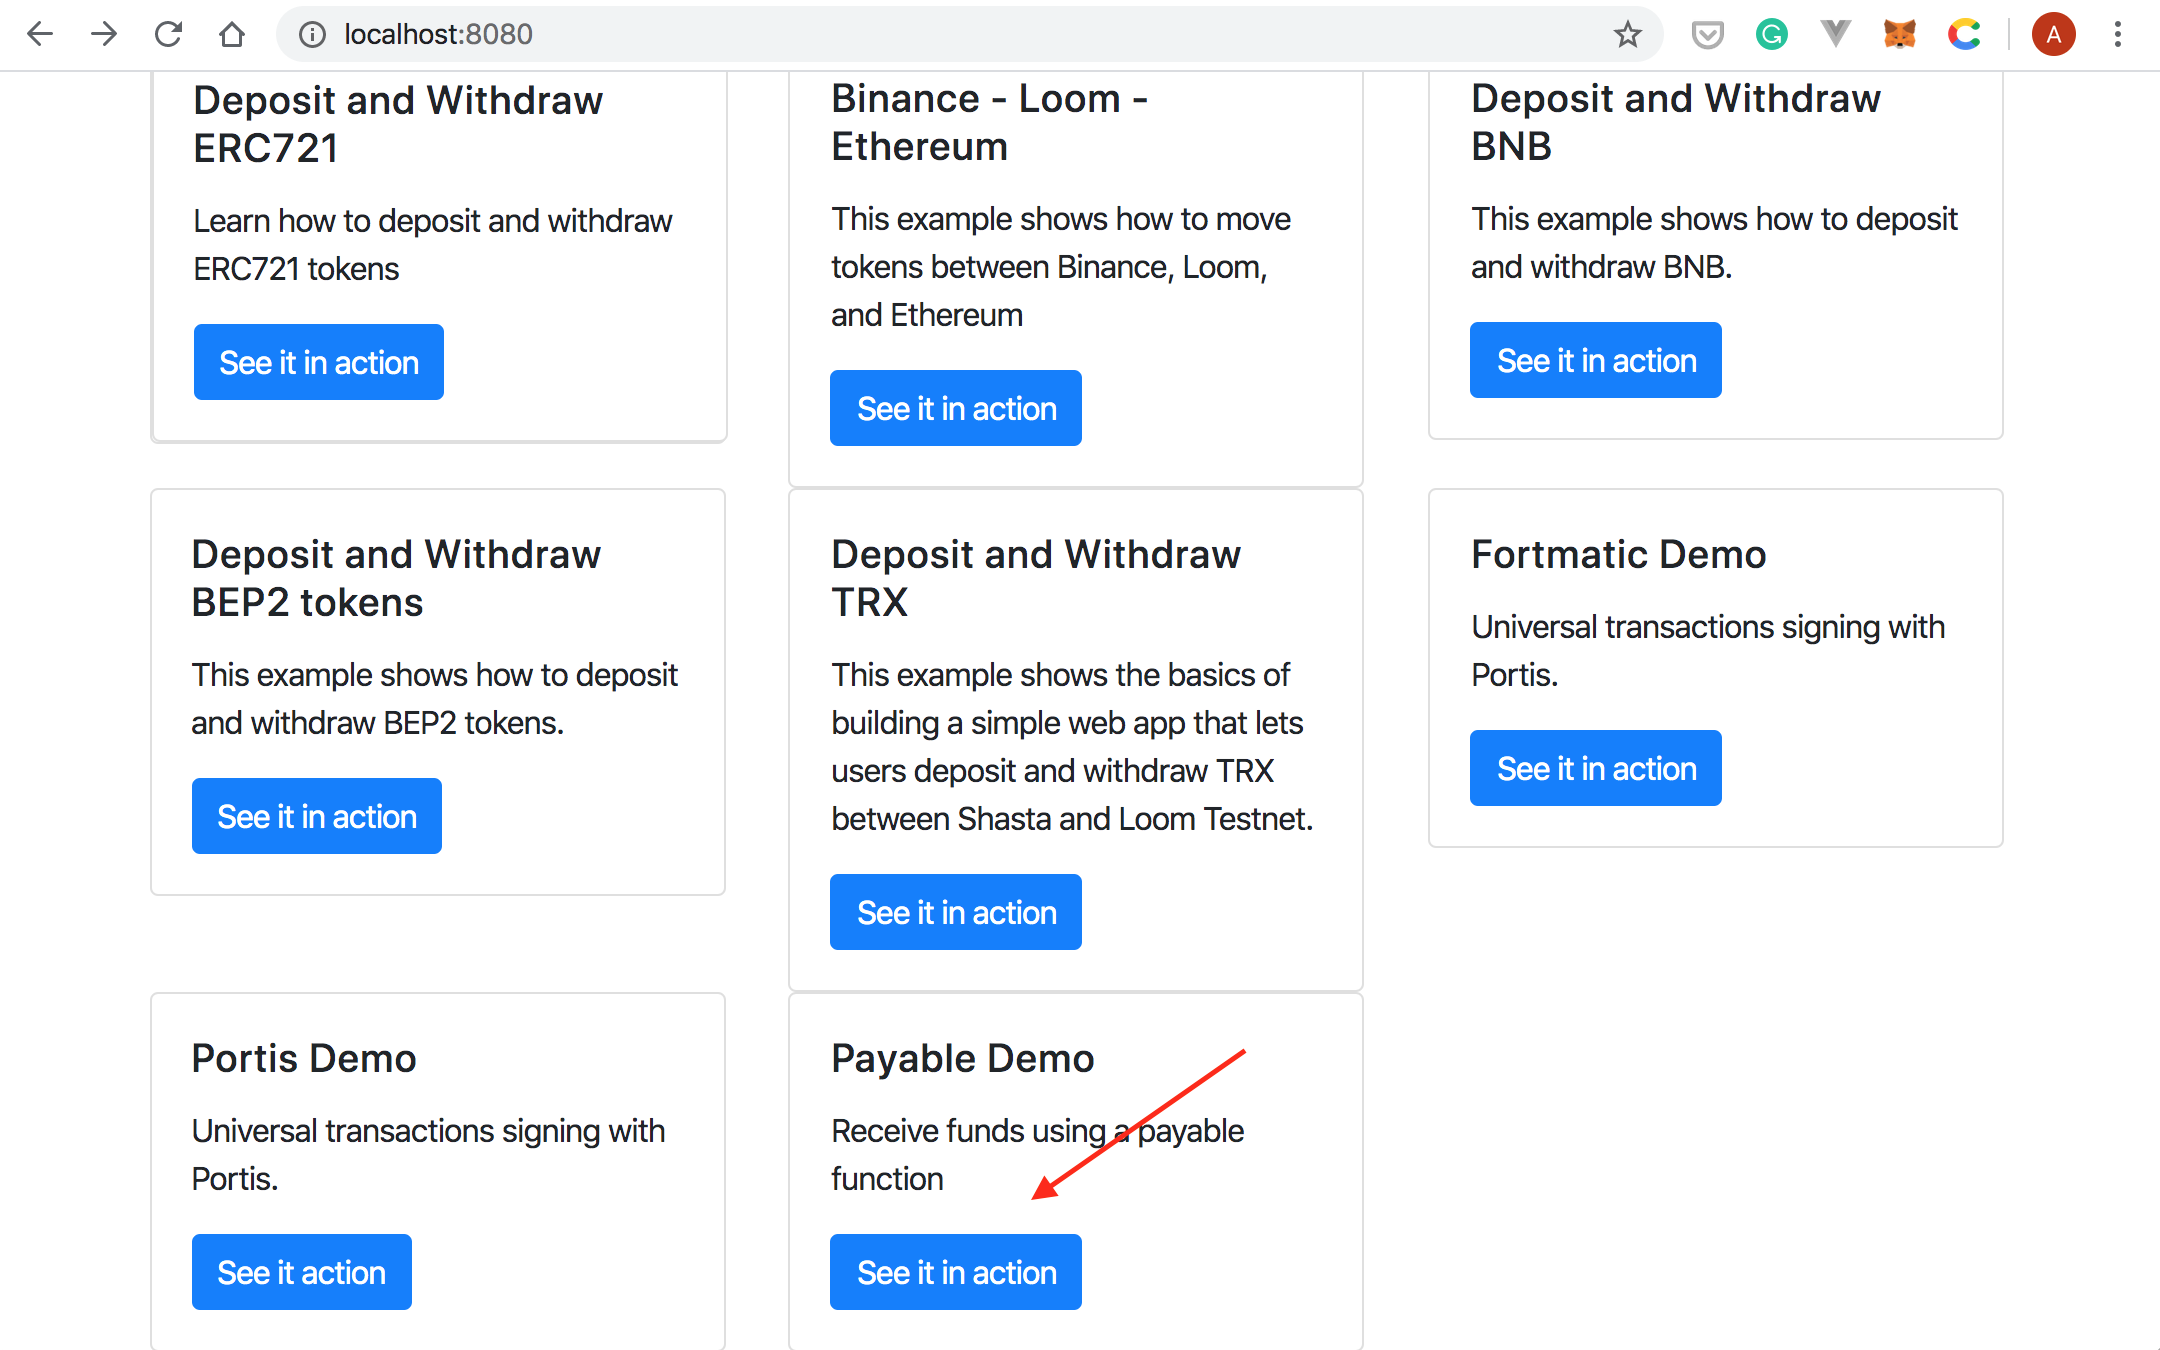
This shows the Payable Demo page:
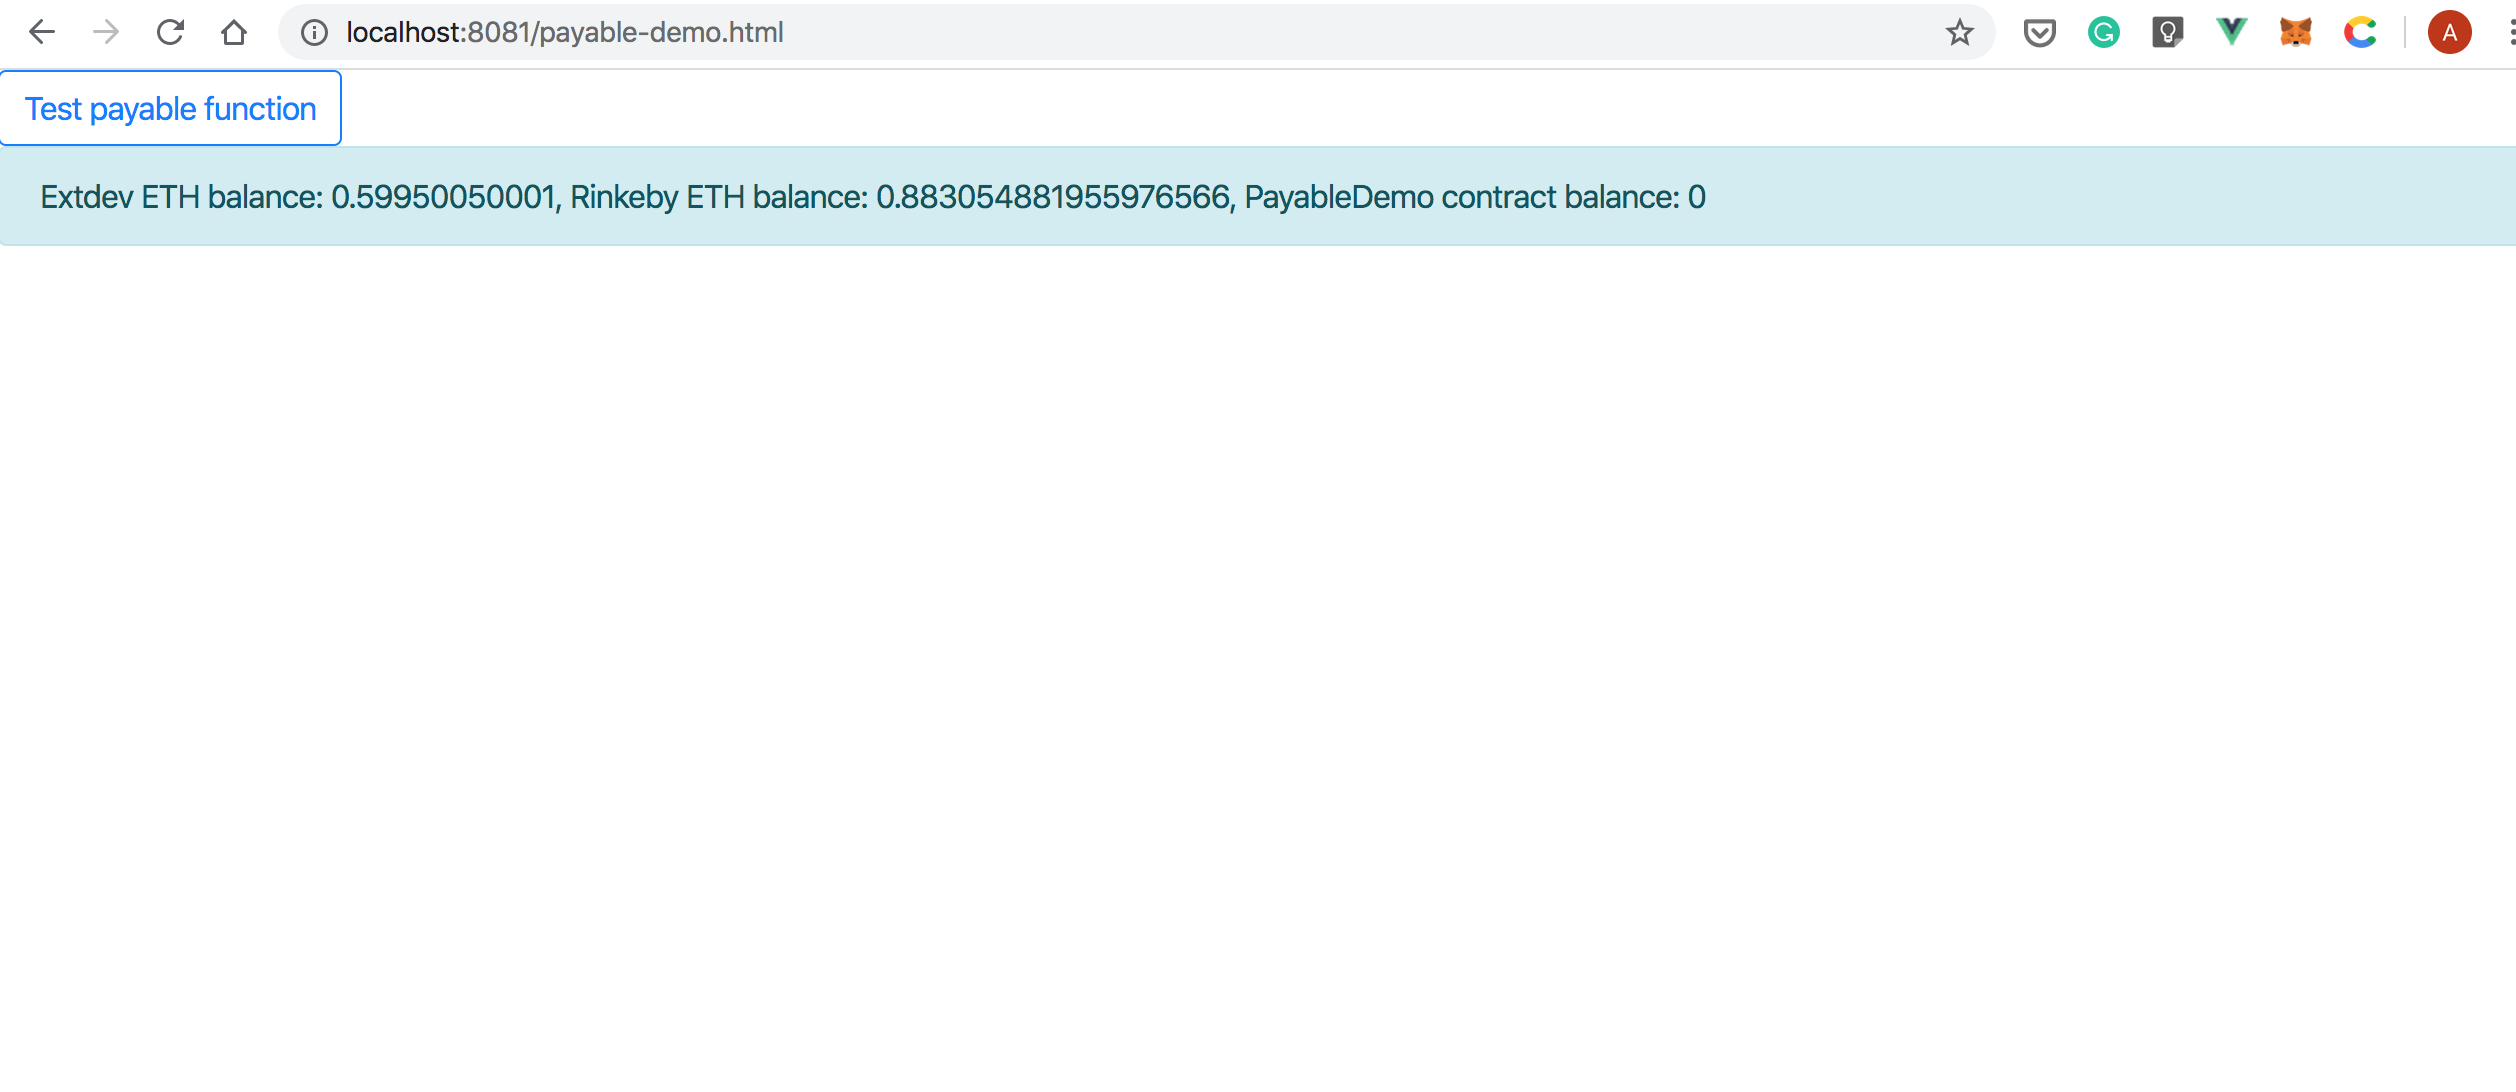
In the above screenshot, note that the balance of the PayableDemo contract is 0.
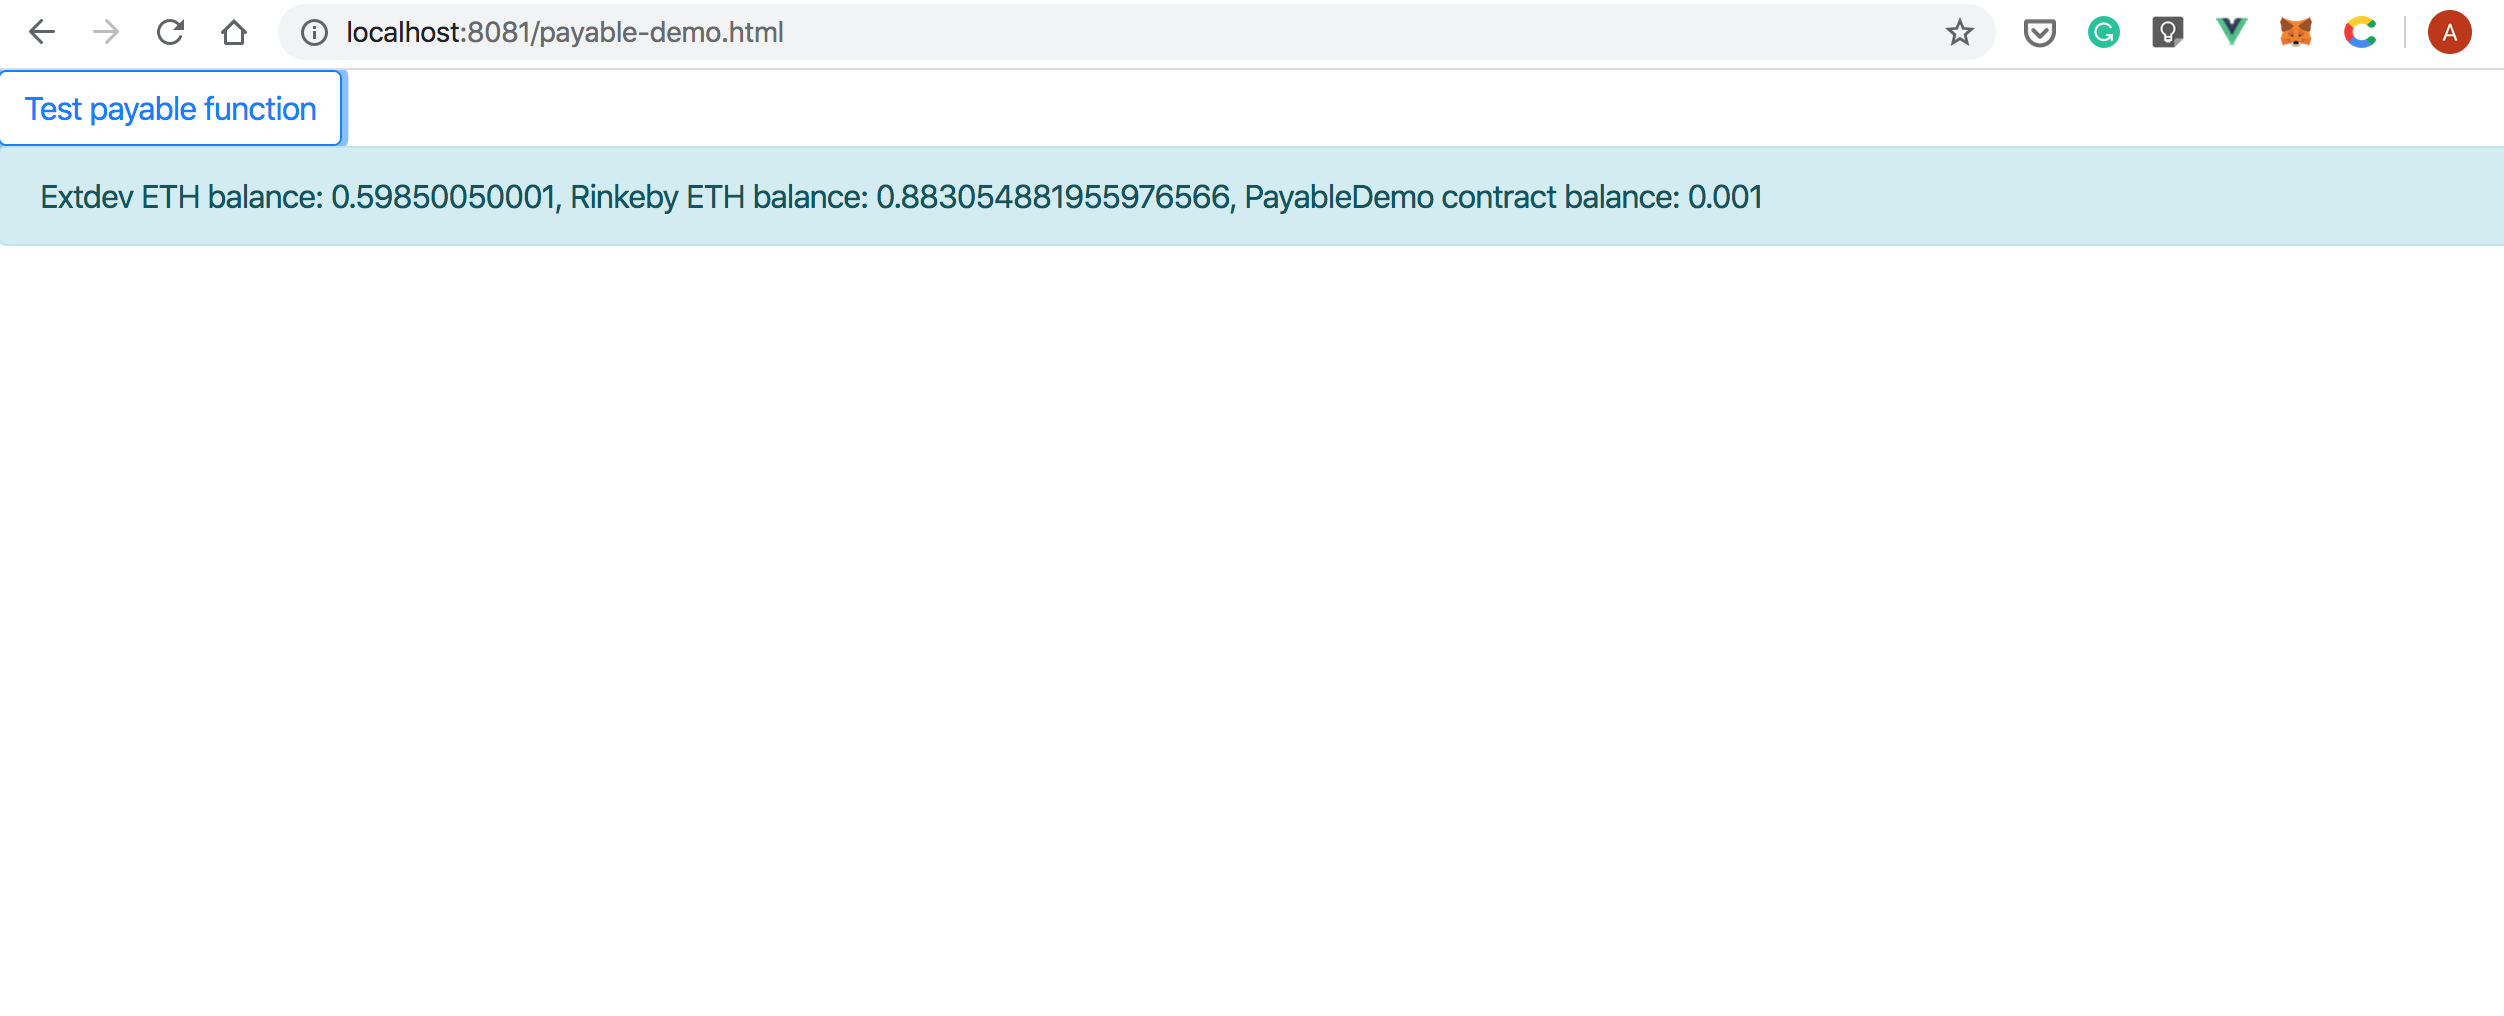
- Select the
Test Payable Functionbutton, and you will be prompted to sign a message:
Once you sign the message, you'll notice that your Extdev balance has decreased by 0.001 ETH, and the PayableDemo contract balance has increased by the same amount:
4. Withdraw the Funds from Your Contract
In this section, we'll show how you can withdraw the funds from the PayableDemo smart contract.
- In a terminal window, move into the
loom-examplesdirectory, and then issue the following command:
npm run payable-demo:withdraw-funds
You'll see something like the following:
> [email protected] payable-demo:withdraw-funds /Users/andrei/Documents/test/loom-examples
>  node scripts/withdraw-from-payable-demo-contract

0x240F14c57a3F48B277109046FaC35cA09C6F5E2E has withdrawn 0.001 ETH.
Owner's balance: 0.001
Things to note:
In the above output,
0x240F14c57a3F48B277109046FaC35cA09C6F5E2Eis the test account we used to deploy the contract. Your address will be different.The private key for this account has been generated in step
1.3, and you can find it in theloom/loom_private_keyfile.
5. The Payable Demo - Under the Hood
The purpose of the previous sections was to show how you can run our demo. In the next sections, I'll briefly walk you through the code.
5.1 The PayableDemo Smart Contract
The PayableDemo smart contract implements two functions- buySomething and withdrawFunds
Let's take a look at the buySomething function:
function buySomething() external payable {
  require(msg.value >= 0.001 ether, "You must send at least 0.001 ETH");
  // Implement your logic here
  emit BuySomething(msg.sender);
}
Things to note:
- The
payablekeyword makes it possible for you to call a function and send ETH to the contract at the same time. - The amount of ETH sent is available in the
msg.valuevariable. - We intentionally omitted the logic of the
buySomethingfunction because it's outside the scope of this tutorial. We've left a comment in the code to indicate where you should place your logic.
The purpose of the withdrawFunds function is to let the owner withdraw funds from the contract:
function withdrawFunds() public onlyOwner {
  uint balance = address(this).balance;
  require(balance > 0, "Balance should be > 0.");
  msg.sender.transfer(balance);
  emit WithdrawFunds(msg.sender, balance);
}
In the above listing, note that the onlyOwner modifier makes it so that only the owner can call this function.
5.2 The Front-End
We've placed the front-end code in the src/PayableDemo/PayableDemo.js file. Let's take a look at what's inside.
First, we import a couple of things:
import {
  Address,
  Contracts
} from 'loom-js'
import { EventBus } from '../EventBus/EventBus'
import networkConfigs from '../../network-configs.json'
import { UniversalSigning } from '../UniversalSigning/UniversalSigning'
import PayableDemoJSON from '../../loom/build/contracts/PayableDemo.json'

const EthCoin = Contracts.EthCoin
Next, similarly to our other examples, we declare a new class that inherits from UniversalSigning:
export default class PayableDemo extends UniversalSigning {
   ...
}
To initialize the demo, the load function is invoked:
async load (web3Ethereum) {
  this.extdevNetworkConfig = networkConfigs.networks['extdev']
  const { web3Loom, accountMapping, client } = await super._load(web3Ethereum)
  this.accountMapping = accountMapping
  this.web3Ethereum = web3Ethereum
  this.web3Loom = web3Loom
  this.client = client
  await this._getContracts()
  setInterval(async () => {
    await this._updateBalances()
  }, 2000)
  }
We're using setInterval to call the _updateBalances() function every two seconds. This is because EthCoin is a native Go contract, and it doesn't emit events.
5.2.1 Instanting the Smart Contracts
Once we've initialized the demo, we have to instantiate the PayableDemo and EthCoin contracts:
  async _getContracts () {
  const payableDemoContractAddress = PayableDemoJSON.networks[this.extdevNetworkConfig['networkId']].address
  this.payableDemoContract = new this.web3Loom.eth.Contract(PayableDemoJSON.abi, payableDemoContractAddress)
  this.ethCoin = await EthCoin.createAsync(
    this.client,
    this.accountMapping.ethereum
  )
}
5.2.2 Updating Balances
As you've seen in the previous section, the web page displays the user's balances on Rinkeby and Extdev, together with the PayableDemo contract's balance.
The following functions update these balances:
async _updateBalances () {
  const mainNetBalance = await this._getMainNetBalance()
  const loomBalance = await this._getLoomBalance()
  const payableDemoContractBalance = await this._getPayableDemoContractBalance()
  EventBus.$emit('updateBalance', { mainNetBalance: mainNetBalance, loomBalance: loomBalance, payableDemoContractBalance: payableDemoContractBalance })
}

async _getPayableDemoContractBalance () {
  const contractAddress = PayableDemoJSON.networks[this.extdevNetworkConfig['networkId']].address
  const wei = await this.ethCoin.getBalanceOfAsync(Address.fromString(`${this.client.chainId}:${contractAddress}`))
  return this.web3Ethereum.utils.fromWei(wei.toString(), 'ether')
}

async _getMainNetBalance () {
  const wei = await this.web3Ethereum.eth.getBalance(this.accountMapping.ethereum.local.toString())
  return this.web3Ethereum.utils.fromWei(wei.toString(), 'ether')
}

async _getLoomBalance () {
  const loomAddress = Address.fromString(this.accountMapping.loom.toString())
  const wei = await this.ethCoin.getBalanceOfAsync(loomAddress)
  return this.web3Loom.utils.fromWei(wei.toString(), 'ether')
}
5.2.3 Calling the Payable Function
When calling a payable function you must specify the amount of ETH you want to send. Apart from this, calling a payable function is not different from calling any other function. Here's the code that calls the buySomething function:
async pay (amount) {
  const ethAddress = this.accountMapping.ethereum.local.toString()
  try {
    await this.payableDemoContract
      .methods
      .buySomething()
      .send({ from: ethAddress, value: this.web3Loom.utils.toWei(amount) })
  } catch (error) {
    console.log('Failed to call the buySomething function.')
    throw error
  }
}
5.3 The Withdraw Funds Script
When the user sends ETH to the PayableDemo contracts, it gets stored in the contract's account, and it will be trapped there unless you provide a way to withdraw the ETH from the contract. This is why we've added the withdrawFunds function. As you've seen, we invoke it by executing a Node.JS script called withdraw-from-payable-demo-contract.js. The most relevant part of this script is listed below. If you want more context, you can find the full source code for this script in the at GitHub
(async () => {
  const { account, web3js, client } = loadExtdevAccount()
  const { payableDemoContract, ethCoin } = await getContracts(web3js, client, account)
  const payableDemoContractBalance = await ethCoin.getBalanceOfAsync(Address.fromString(`${client.chainId}:${payableDemoContractAddress}`))
  if (payableDemoContractBalance.toString() === '0') {
    console.log('The balance of the contract is 0. Nothing to withdraw.')
    client.disconnect()
    process.exit(0)
  }
  filterEvents(payableDemoContract, web3js)
  try {
    await payableDemoContract.methods.withdrawFunds().send({ from: account })
  } catch (error) {
    console.log(`Something went wrong: ${error.message}`)
  }
  const ownerBalanceInWei = await ethCoin.getBalanceOfAsync(Address.fromString(`${client.chainId}:${account}`))
  console.log(`Owner's balance: ${web3js.utils.fromWei(ownerBalanceInWei.toString(), 'ether')}`)
  client.disconnect()
})()
As you can see, the code checks that the balance of the contract is greater than zero. If yes, then it calls the withdrawFunds() function. Lastly, it reads the owner's balance and prints it to the console.
This concludes our tutorial on payable functions.
Please feel free to reach out to us on Telegram if you have any questions about this tutorial or just want to leave us feedback.